

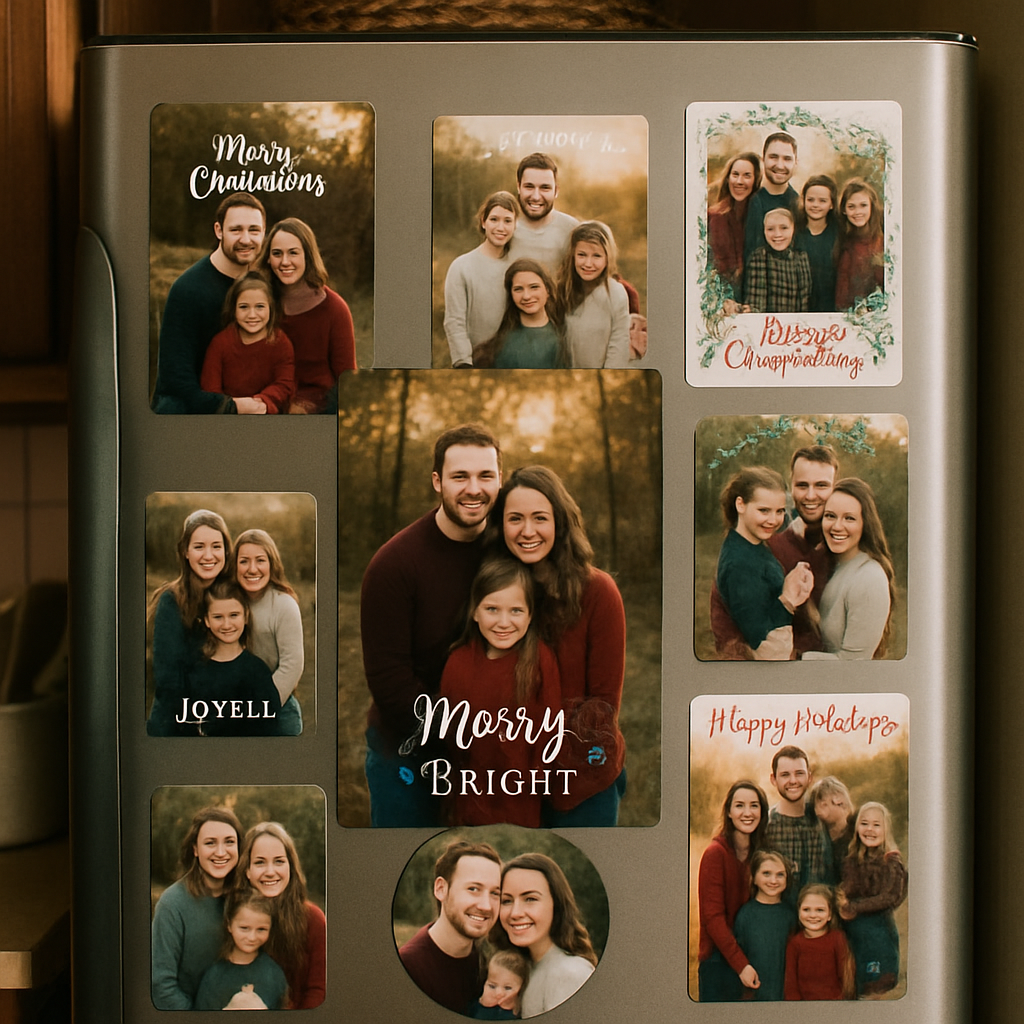
Picture this: you’re sipping hot cocoa, the snow is swirling outside, and the fridge is covered in little snapshots of the past year’s celebrations.
Does that mental image make you smile, or does it feel a bit chaotic, like too many memories fighting for space?
That’s where holiday photo magnets step in like a friendly organizer, turning those cherished moments into tidy, eye‑catching décor that lives right where you grab the milk.
Think about the last holiday dinner—grandma’s laugh, the tangled string of lights, the kids’ frosting‑covered faces. Imagine snapping a quick photo and, in a few minutes, having a durable magnet that sticks those feelings on your kitchen door.
We’ve all tried plastering paper notes on the fridge, only to watch them wilt or get lost behind the next grocery list. Holiday photo magnets solve that problem with a blend of nostalgia and practicality.
And because they’re custom, you can pick the exact moment you want to freeze: the twinkling tree, the first snowflake caught on a window.
But here’s the kicker: they’re not just sentimental junk. A well‑designed magnet can add a splash of color, act as a subtle reminder of gratitude, and even become a conversation starter for guests who walk by.
So, if you’ve ever wished your kitchen could feel more like a gallery of happy memories rather than a blank canvas, you’re in the right place.
In the next sections we’ll walk through choosing the perfect photos, picking the right magnet style, and even some DIY tricks to make your holiday photo magnets last season after season.
Let’s dive in and turn those fleeting holiday moments into lasting fridge art you’ll love to see every day.
And remember, the magic isn’t just in the picture itself—choose magnets with a sturdy finish, vibrant colors, and a size that fits your fridge without overcrowding, so each memory shines bright.
TL;DR
Holiday photo magnets turn fleeting festive moments into vibrant, everyday décor, letting you relive the joy each time you reach for a snack.
Choose durable, colorful designs and simple DIY tricks to keep your kitchen feeling like a cozy gallery all season long, that brighten every holiday memory for you.
1. Family Portrait Holiday Photo Magnets
When the last slice of pie disappears and the lights start to dim, you probably wish you could bottle that exact feeling. A family portrait holiday photo magnet does just that—turning a single, laugh‑filled instant into a tiny piece of art that lives right on your fridge.
1. Capture the candid moment, not the posed one
Think about the time Uncle Joe tried to balance a wreath on his head and the kids erupted in giggles. That spontaneous sparkle is what makes a magnet memorable. Instead of arranging everyone in a stiff line, let the camera roll while you’re all busy decorating or opening gifts. The resulting snap feels genuine, and every time you grab the butter you’ll remember the shared laugh.
2. Choose a festive layout that tells a story
Most magnet services offer templates with snowflakes, holly, or twinkling lights. Pick a layout that frames the photo rather than overwhelms it. For example, a simple white border with a subtle pine branch motif lets the family’s expressions stay front‑and‑center while still shouting “holiday.”
Does a template feel limiting? Not at all—many platforms let you upload your own background, so you could use a photo of last year’s decorated tree as the backdrop and place the portrait on top.
3. Size matters: balance visibility with fridge real‑estate
A 2×2‑inch magnet is cute, but it might get lost behind a grocery list. A 3×4‑inch size gives enough room for faces and a hint of décor, yet it still fits nicely among other magnets. Measure the space you have on the fridge door before you order, and aim for a size that feels like a natural puzzle piece.
4. Mix and match frames for visual rhythm
Don’t feel forced to use the same border on every magnet. Pair a glossy, full‑color magnet of the whole family with a matte, black‑and‑white close‑up of Grandma’s smile. The contrast adds depth and keeps the display from looking monotonous.
5. Embrace a seasonal colour palette
Red, evergreen, gold—these hues instantly say “holiday.” When you choose the background or overlay text, stick to two or three of these colors. Too many shades can make the fridge feel cluttered, but a coordinated palette turns the magnets into a mini‑gallery you actually want to stare at.
6. Involve the kids in the design process
Ask the little ones to pick their favorite photo or even draw a doodle to add as a corner accent. When they see their artwork glued next to Mom’s smile, they’ll feel proud and are less likely to pull the magnets off later. It’s a win‑win: you get a personal touch, and they get a sense of ownership.
7. Care and longevity tips
Even the best‑printed magnet can fade if it’s exposed to kitchen steam every day. Wipe the surface gently with a damp cloth and avoid harsh chemicals. If you notice a magnet losing its stick, a tiny dab of reusable adhesive on the back revives its grip without damaging the fridge.
Pro tip: rotate the magnets every season to keep the display fresh and prevent any one spot from wearing out.
So, what’s the next step? Pick a favorite family photo from this holiday, decide on a size that fits your fridge, and let the magnet‑making magic begin. In a few days you’ll have a collection that not only brightens your kitchen but also reminds you of the moments you’ll want to replay over and over.
2. Travel Snapshot Holiday Photo Magnets
Ever looked at a fridge and thought, “I wish I could travel without leaving the kitchen?” That feeling is exactly why travel‑snapshot holiday photo magnets work so well. They let you pin a postcard‑size memory of that sunrise over Santorini, the snow‑capped Alps, or the neon lights of Tokyo right where you grab the milk. Each magnet becomes a tiny window to a place you’ve been—or hope to go—so the fridge turns into a personal travel board.
Here’s how you can turn a wander‑lust photo into a magnet that not only looks great but also lasts through the holiday hustle.
If you’re visual, the quick tutorial below shows how to upload, add a border, and order a set of travel magnets in under five minutes.
Now that you’ve seen the steps, let’s dive into the specifics that make a travel magnet feel like a souvenir you can actually touch.
1. Capture the moment that tells a story
Instead of a textbook postcard, grab the candid shot where the family is laughing in front of the Eiffel Tower, or the picture of your kids building a sandcastle on a Bali beach. Those unscripted moments trigger the brain’s memory centers, so every time you open the fridge you relive the joy, not just the view.
2. Choose the right size for travel photos
Travel shots are often wide‑angle. A 3×5‑inch magnet gives enough room for the horizon without crowding the fridge real‑estate. If you have a portrait‑oriented cityscape—think Tokyo night skyline—a 2×3‑inch size fits nicely alongside a landscape magnet, creating a pleasing visual rhythm.
3. Pick travel‑themed borders and overlays
Most magnet services let you add a subtle map outline, a tiny compass, or even the GPS coordinates of the spot. A faint gold‑lined border with a small airplane icon keeps the focus on the photo while whispering “adventure.” It’s a small design cue that makes the magnet feel curated.
4. Use maps and coordinates for a personal touch
Write the latitude‑longitude pair on the back of the magnet in a handwritten font. When you or a guest spots it, you can say, “That’s the exact spot where we got lost and found the best coffee.” It turns a simple picture into a conversation starter.
5. Mix landscape and portrait for visual rhythm
Don’t dump all the same orientation in one corner. Alternate a sweeping desert panorama with a portrait of a bustling market street. The alternating shapes keep the display from feeling flat and give each memory its own breathing room.
6. Practical tips for durability on the fridge
Holiday kitchens can get steamy, so you want magnets that won’t fade. Look for “vibrant, fade‑resistant printing” to ensure colors stay bright season after season.Photosynthesisia’s custom photo magnets highlight this feature, and the strong, flexible magnet backing resists warping. Wipe each magnet with a damp cloth weekly, and avoid abrasive cleaners. If a magnet starts to lose its grip, a dab of reusable adhesive on the back restores its stick without leaving residue.
And when you’re ready to refresh the board, rotate the magnets every few months. Swapping a New York skyline for a Maldives beach keeps the display lively and protects any single spot from constant wear.
7. Make the set feel cohesive
Choose a consistent colour palette—perhaps teal and amber to echo holiday lights—across all borders and text. Even if the photos vary wildly, the shared palette ties them together, turning the fridge into a mini travel gallery that feels intentional rather than cluttered.
Finally, if you need a step‑by‑step design checklist, check out our guide on How to Choose and Create Personalized Photo Fridge Magnets That Stand Out. It walks you through selecting the perfect size, layout, and finish, so you can launch your travel‑snapshot collection with confidence.
3. Pet-Themed Holiday Photo Magnets
Ever notice how your dog’s goofy grin or the cat’s sleepy stare can instantly lift the mood on a chilly December morning? That little spark is exactly why pet‑themed holiday photo magnets feel like a warm hug every time you swing open the fridge.
We’ll walk through why pets make the perfect subject, how to turn a snap into a magnet that survives kitchen steam, and a handful of real‑world ideas you can copy tonight.
1. Choose the right moment – the one that tells a story
Instead of a posed studio shot, look for the candid moment: the pup mid‑sprint after a treat, the kitten tangled in tinsel, or the rabbit nose‑pressing against a snow‑flake cookie. Those spontaneous frames trigger the brain’s dopamine release, so the magnet becomes a tiny mood‑booster.
Pro tip: set your phone to burst mode during holiday playtime. You’ll end up with several frames to pick from, and you can crop to the exact expression you love.
2. Size and shape that fits your fridge real‑estate
A 2.5×2.5‑inch square works well for most pet faces, while a 3×4‑inch rectangle lets you capture a full‑body pose—like the dog wearing a reindeer antler headband. Measure the empty space on your fridge door first; you don’t want a magnet that blocks the grocery list.
If you have a long, sleek cat, a vertical 2×3‑inch portrait will keep the tail visible without crowding other magnets.
3. Add a festive border without drowning the pet
Think subtle: a thin gold line with a tiny pinecone icon, or a muted red‑green plaid corner. The border should whisper “holiday” while the animal steals the spotlight. Most custom magnet services let you upload a transparent PNG border, so you can keep the design consistent across a whole pet series.
4. Personalize the back with a fun fact
Write a short note on the back of the magnet—maybe “Max’s first snow” or “Bella’s favorite toy: the red ball.” When a guest pulls the magnet down, you’ve got an instant conversation starter.
Even better, add the pet’s name in a playful handwritten font; it feels like a little tag you’d see on a collar.
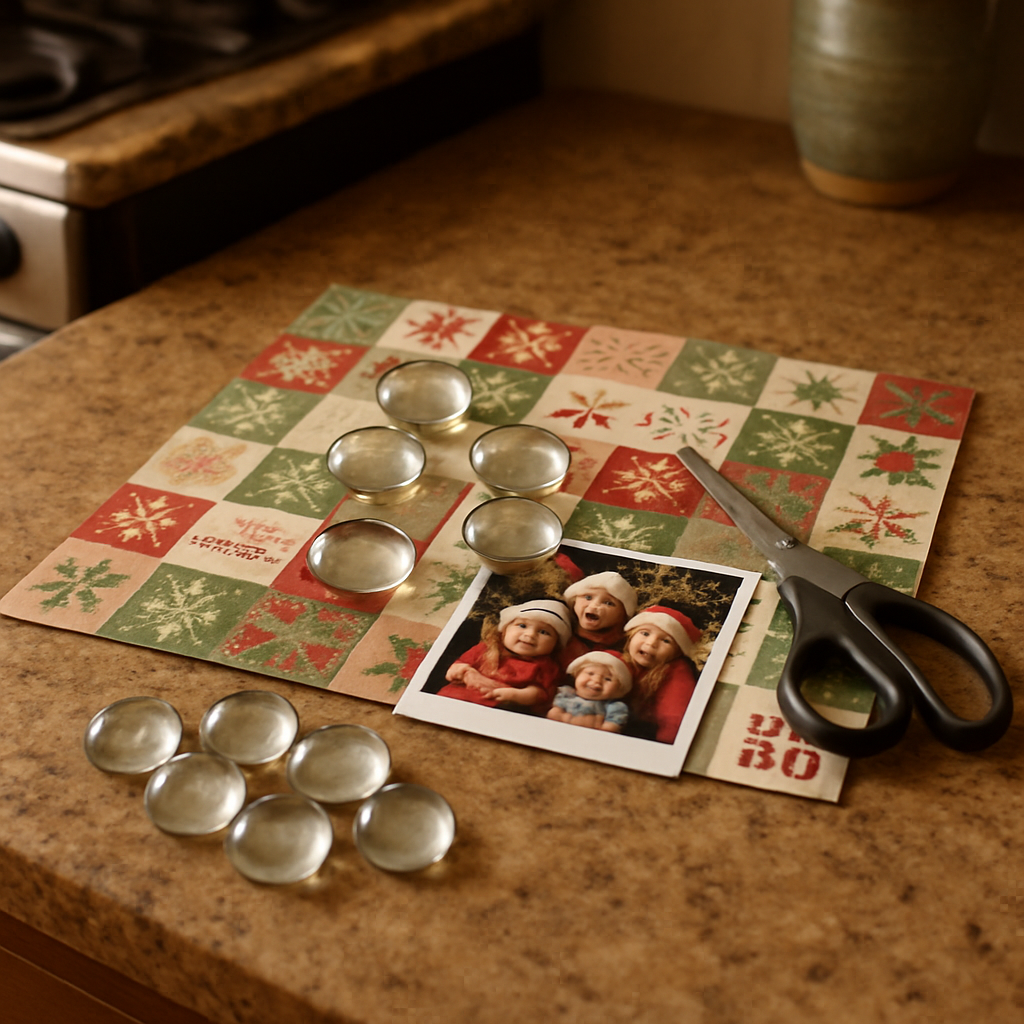
5. DIY upgrade: glass‑marble pet magnets
If you enjoy a hands‑on project, consider the glass‑marble style that Mod Podge Rocks walks through. A clear glass bead acts like a tiny window, and you can sandwich a 1‑inch circular print of your pet’s face inside. The result is a glossy, jewel‑like magnet that catches kitchen light beautifully.Mod Podge Rocks shows how simple the process is. All you need are flat‑back glass beads, a laser‑print of the photo, and a dab of Mod Podge—no fancy equipment required.
6. Protect the colors for a season‑long shine
Pet fur can be a tough color to keep vivid under steam. Look for “fade‑resistant printing” when you order—many services, including Walgreens Photo, advertise that their magnets retain color even after repeated exposure to kitchen humidityWalgreens Photo magnets. Once you receive them, give each magnet a quick wipe with a damp cloth every week; avoid abrasive cleaners that can dull the gloss.
7. Create a cohesive pet gallery
Gather all your furry family members into a mini‑gallery: place the dog’s antler magnet on the top left, the cat’s snow‑flake on the right, and a hamster in a tiny sweater at the bottom. Stick to two or three holiday colors in the borders (think evergreen, cranberry, gold) so the whole set feels intentional rather than random.
Mix finishes—glossy for the dog, matte for the cat—to add visual rhythm. The contrast keeps eyes moving and makes each magnet feel like a separate artwork.
8. Actionable checklist before you hit “order”
- Pick 3–5 candid pet photos that capture personality.
- Crop to the appropriate shape (square or portrait) and test on your phone screen.
- Choose a subtle holiday border that matches your fridge’s existing color scheme.
- Decide whether you want a standard printed magnet or a DIY glass‑marble version.
- Confirm the printer offers fade‑resistant ink.
- Order a sample size (2×2 in) to test grip and color before bulk ordering.
When the magnets arrive, place them on the fridge, step back, and notice how the room instantly feels cozier. That’s the power of pet‑themed holiday photo magnets: they turn everyday chores into a quick smile‑break.
Ready to start? Grab your phone, pull up a favorite pet moment, and let the magnet‑making adventure begin. Your fridge—and your heart—will thank you.
4. DIY Crafty Holiday Photo Magnets
1. Pick a holiday‑themed paper that sings to you
Grab a pack of festive scrapbook paper – think vintage reds, pine‑green plaids, or even a subtle gold foil. The paper sets the mood before you even stick a photo on it. If you love a coordinated look, choose a matching set so every magnet feels like part of a tiny gallery.
2. Choose the photos that make you smile
Skip the posed family portrait and go for the candid snap: the kid mid‑snow‑ball fight, the dog tangled in tinsel, or that one blurry but love‑filled moment of grandma humming by the tree. Those real‑life slices feel like a warm hug every time you open the fridge.
3. Cut, shape, and prep the base
Cut your paper into squares or rectangles a hair larger than the glass gem you’ll use. The extra margin gives you room to trim later and keeps the edges neat. If you’re working with a senior or a little helper, let them do the cutting – the larger pieces are easier to handle and it adds a sweet personal touch.
4. Glue a glass gem with Mod Podge for that jewel‑like shine
Spread a dab of Mod Podge (glitter for extra sparkle, matte if you prefer understated) onto the paper where the gem will sit. Place the gem, press gently, and let it dry overnight. The gem acts as a perfect template – you’ll cut around it later and get a flawless edge every time.the caregiver craft guide shows this simple Mod Podge trick
5. Trim around the gem and attach the magnetic backing
Once the Mod Podge is rock‑solid, use kid‑safe scissors to cut tightly around the gem. The paper will curve under the gem, giving you a forgiving, rounded edge. Then slap a thin magnetic sheet (or pre‑cut magnet stickers) onto the back with a dab of strong craft glue like Glue‑All. You now have a sturdy, holiday‑ready magnet.
6. Add a personal holiday note or glittery accent
Write a quick line on the back – "First snow for Max" or "Grandma’s secret cookie recipe" – using a fine‑point pen. You can also sprinkle a pinch of holiday glitter on the front before the Mod Podge dries for extra sparkle. These tiny details turn a plain magnet into a memory capsule.
7. Protect, display, and rotate
Give each magnet a gentle wipe with a damp cloth every week; avoid harsh cleaners that could dull the finish. When the fridge starts feeling crowded, swap out a few magnets for fresh holiday shots. Rotating keeps the display lively and prevents any single spot from wearing out.Live Snap Love suggests rotating photo displays for lasting appeal
So, what’s the next step? Gather your favorite festive paper, pull out that glitter‑filled Mod Podge, and start turning those holiday moments into shiny, handcrafted magnets. In a couple of afternoons you’ll have a personalized gallery that makes every snack break feel like a cozy holiday memory.
5. Commercially Printed Holiday Photo Magnets
When you want a polished look without spending a weekend in the craft room, commercially printed holiday photo magnets are the sweet spot. You upload a snap, choose a finish, and a professional printer does the heavy lifting. The result? A magnet that feels sturdy, looks vibrant, and sticks to the fridge like it was born there.
Why go commercial?
First, the print quality is usually a step up from home‑ink. Professional labs use UV‑protected inks that resist fading even when the kitchen steams up during a turkey roast. Second, you get consistency – every magnet in the batch has the exact same color balance and edge treatment. That matters when you’re building a cohesive holiday gallery.
Does that sound like a lot of extra hassle? Not really. Most services let you upload straight from your phone, pick a size, and have the magnets shipped in a few days. It’s almost as fast as ordering a pizza, but the taste lasts all season.
Choosing the right size and shape
Typical commercial options hover around 2×2 in, 3×4 in, and the quirky 2.5‑in circle. Think about fridge real‑estate: a 2×2 in square fits nicely between grocery lists, while a 3×4 in rectangle can showcase a family portrait with a festive border. If you love a more playful vibe, a round magnet turns a photo of a snow‑ball fight into a tiny snow globe.
Pro tip: measure the empty space on your fridge first. You don’t want a magnet that hides the milk bottle you rely on every morning.
Finishes that make a difference
Glossy finishes pop color – perfect for bright lights, shiny ornaments, and cheeky pet noses. Matte finishes soften glare, which is handy if your fridge is under a bright kitchen light. Some printers also offer a soft‑touch coating that feels like a velvet‑covered photo, adding a tactile surprise when you run your fingers over it.
And if you want a little extra sparkle, look for a “glitter‑top” option. It’s a thin layer of glitter that catches the light without getting messy.
Real‑world examples
Jane from Ohio ordered a set of 3×4 in glossy magnets for her Christmas dinner photo. She chose a subtle gold border that matched her table runner, and the magnets stayed vibrant after two weeks of holiday cooking. Meanwhile, Mark in Seattle went with matte 2×2 in circles for his kids’ snow‑day snapshots; the matte finish kept the images from reflecting the kitchen’s LED strip lights, making the faces easier to see.
Actionable checklist before you hit ‘order’
- Pick 4–6 favorite holiday photos that tell a story (tree lighting, goofy pet, first snow).
- Decide on a uniform shape (square, rectangle, or circle) for visual rhythm.
- Choose a finish that matches your kitchen lighting – glossy for bright spaces, matte for softer ambience.
- Upload high‑resolution files (at least 300 dpi) to avoid pixelation.
- Order a single sample if you’re unsure about color or feel.
Comparing popular commercial options
| Print Provider | Finish Options | Typical Cost per Magnet | Turnaround Time |
|---|---|---|---|
| Provider A | Gloss, Matte, Glitter‑Top | $1.20–$1.80 | 3‑5 business days |
| Provider B | Gloss, Soft‑Touch | $1.40–$2.00 | 4‑6 business days |
| Provider C | Matte, Metallic | $1.30–$1.90 | 2‑4 business days |
Take a look at the table, pick the combination that fits your budget and timeline, and place your order. In a handful of days you’ll have a set of professional‑grade holiday photo magnets that feel as festive as the moments they capture.
So, what’s the next step? Pull out those favorite holiday shots, decide on a shape and finish, and let a commercial printer do the rest. Before you know it, your fridge will be a mini‑gallery that greets you with a smile every time you reach for that last slice of pie.
6. Seasonal Design Holiday Photo Magnets
Ever notice how the vibe in your kitchen shifts the moment the first snowflake lands? That subtle change is exactly what seasonal‑themed photo magnets can capture. They let you ride the wave of each holiday—whether it’s Christmas, Hanukkah, Kwanzaa, or the New Year—without swapping out a whole décor scheme.
Pick a seasonal colour palette that feels like an instant mood‑boost
Start by asking yourself, “What color makes me think of this holiday?” For Christmas, you might gravitate toward deep evergreen and ruby red; for Hanukkah, a cool blue‑silver combo; for Kwanzaa, bright orange, black, and green; and for New Year’s, glittering gold and midnight navy.
Once you have a palette, stick to two or three hues across all your magnets. That visual restraint keeps the fridge from looking like a chaotic scrapbook and turns the collection into a mini‑gallery that feels intentional.
Match the photo style to the season’s storytelling tone
Think about the story you want each magnet to whisper. A snowy window‑pane shot works beautifully with a matte finish that softens glare, while a bright fireworks burst over the city skyline screams for a glossy, high‑contrast print.
Real‑world example: a family captured the moment the kids lit the menorah for the first time. They paired a soft‑touch matte magnet with a blue‑silver border, letting the candlelight glow without reflecting off the fridge’s LED strip.
Choose a shape that reinforces the holiday’s geometry
Round magnets echo the shape of ornaments and holiday lights, making them perfect for Christmas tree photos. Square or rectangular magnets feel more like traditional photo frames, which works well for New Year’s resolutions or Hanukkah family portraits.
Pro tip: mix shapes sparingly—maybe a circle for the tree, a square for a family selfie, and a rectangle for a holiday recipe snap. The alternating geometry creates rhythm without overwhelming the eye.
Add subtle seasonal motifs without drowning the image
Most custom printers let you layer a faint graphic behind the photo. A translucent pine‑branch pattern, a delicate dreidel silhouette, or a tiny Kwanzaa kinara can give the magnet a festive whisper.
In practice, one shopper added a barely‑visible snowflake overlay to a picture of their dog in a reindeer sweater. The result? The magnet still felt like a pure pet portrait, but the holiday hint made it feel curated.
Practical steps to create your seasonal set
1. Gather 4–6 high‑resolution photos (300 dpi or higher). Include a mix of candid moments and decorative shots.
2. Decide on a consistent palette and shape for each holiday. Write it down so you don’t accidentally blend Christmas red with Kwanzaa orange in the same week.
3. Choose a finish that matches the lighting in the room where the fridge lives. Gloss for bright kitchens, matte for softer ambience, and soft‑touch for a tactile surprise.
4. Upload your images to a reputable printer, preview the seasonal border options, and add a tiny motif that matches the holiday.
5. Order a single sample magnet before committing to a full batch. Test the stick, the colour fidelity, and the feel of the finish.
Keep the magnets fresh year after year
Seasonal magnets aren’t meant to be permanent fixtures. Every few months, rotate them out and store them in a flat, dry box. When the next holiday rolls around, pull the set out, wipe each magnet with a damp cloth, and let them shine again.
If you notice any fading after a busy cooking season, a quick swipe with a microfiber cloth usually restores the vibrancy—just avoid abrasive cleaners that could scratch the surface.
Quick checklist before you click ‘order’
- Pick a holiday‑specific colour scheme (2–3 colors).
- Select a shape that mirrors the holiday’s visual language.
- Choose a finish that complements your kitchen lighting.
- Upload 300 dpi images and add a subtle seasonal motif.
- Order a single sample to verify stick, colour, and texture.
So, what’s the next step? Pull out those festive photos, decide on a palette and shape, and let a trusted printer bring your seasonal story to life. In a handful of days you’ll have a fridge that not only stores your butter but also tells the tale of every holiday you cherish.
Conclusion
There you have it—holiday photo magnets that turn everyday fridge space into a living scrapbook.
Think about the last time you grabbed a snack and a smile popped up because of a goofy pet face or a snowy family selfie. That tiny moment is exactly why we love these magnets.
We've covered everything from picking the right size, choosing a festive palette, testing a sample, to caring for them season after season. If you follow those steps, you’ll end up with a display that feels both personal and polished.
So, what’s the next move? Pull out your favorite holiday shots, decide on a shape that fits your kitchen layout, and order a single test magnet from Loveonmagnets. A quick wipe with a damp cloth later, and you’re set for months of joyful reminders.
Remember, the magic isn’t just in the photo—it’s in the habit of pausing, smiling, and sharing that memory with anyone who opens the fridge.
Ready to give your kitchen its own holiday story? Let’s make those magnets and watch your fridge become the heart of the home.
Pro tip: store any magnets you’re not using in a flat, dry box and give them a gentle wipe before swapping them back in. That way the colors stay bright year after year.
FAQ
What size holiday photo magnets work best for a typical kitchen fridge?
Most people find a 3×4‑inch rectangle or a 2.5‑inch circle hits the sweet spot. The rectangle gives enough room for faces and a little festive border without swallowing a grocery list, while the circle feels playful and fits nicely between other magnets. Measure a blank spot on your door first – if you can slide a standard photo frame into the space, you’ve got the right size.
How do I make my holiday photo magnets last through kitchen steam and cleaning?
Choose a printer that advertises fade‑resistant inks and a laminated or coated finish. After they arrive, give each magnet a quick wipe with a damp cloth every week; avoid harsh chemicals that can wear down the coating. If a magnet starts to lose grip, a dab of reusable adhesive on the back revives the stick without harming the fridge surface.
Can I mix different holiday themes on the same fridge without it looking chaotic?
Absolutely – the trick is to keep a consistent colour palette and shape rhythm. Stick to two or three holiday colours (like evergreen, ruby red, and gold) across all magnets, and alternate rectangles with a few circles. The visual harmony lets a Christmas tree snap sit next to a Hanukkah candle photo without jarring the eye.
Is it okay to use my phone’s camera for holiday photo magnets, or do I need a DSLR?
You don’t need fancy gear. Modern smartphones capture 12‑megapixel images that are more than sufficient for a 3×4‑inch magnet. Just make sure the photo is well‑lit, focus is sharp, and the resolution is at least 300 dpi when you export it. A quick crop on your phone to remove background clutter will make the final magnet look polished.
How many magnets should I start with before I feel the fridge looks “full”?
A good rule of thumb is to begin with four to six magnets spaced evenly across the door. That gives you enough visual interest without overwhelming the space. After a week or two, step back and see if there are any gaps you’d like to fill – you can always add a seasonal accent or swap one out when a new memory pops up.
Do holiday photo magnets make good gifts for friends and family?
They’re perfect little presents because they’re personal, inexpensive, and instantly displayable. Pick a favorite photo of the recipient – maybe a pet in a sweater or a vacation snap – and choose a festive border that matches their kitchen décor. Pair the magnet with a handwritten note on the back, and you’ve got a thoughtful, usable gift that shows you really listened.
What’s the best way to store extra holiday photo magnets when the season ends?
Lay them flat in a dry, cardboard box or a shallow plastic drawer. Slip a soft sheet of tissue paper between each magnet to prevent scratches, and give the whole bundle a quick wipe before you seal it up. When the next holiday rolls around, a gentle wipe with a microfiber cloth brings the colours back to life, and the magnets are ready to redecorate your fridge in minutes.


