

Picture this: you just tossed your cap in the air, and the whole world feels a little brighter. You’ve got that proud, slightly overwhelmed feeling, and you want to share it with family without sending a boring email.
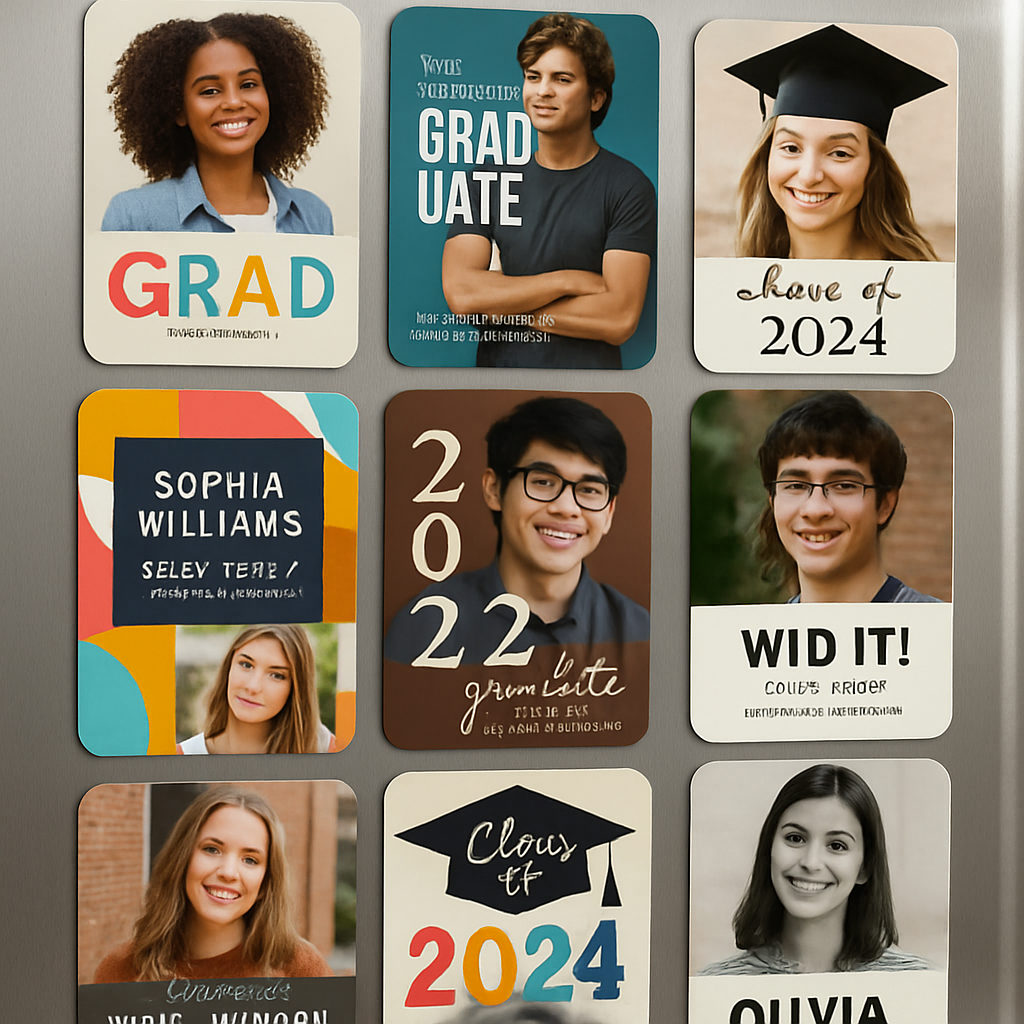
Enter graduation announcement magnets – the tiny, fridge‑friendly postcards that turn a kitchen door into a personal billboard. They’re cheap, lightweight, and instantly visible every time Mom grabs a snack.
Why do they work so well? First, they’re tactile. A magnet lets people actually hold your news in their hand, which creates a stronger memory than a digital post. Second, they sit on a surface you see multiple times a day, so the congratulations keep rolling in.
Think about Jenna, a recent high‑school grad. She ordered a set of 12 custom photo magnets, each featuring her smiling face in the school colors. She slipped them onto her grandparents’ fridge, and the next morning they called to tell her how proud they felt seeing her achievement while making breakfast.
Or consider Mark, a college senior who wanted something a bit more formal. He chose sleek, matte‑finish magnets with his diploma photo and a short thank‑you note. He mailed a small box to out‑of‑state relatives – the surprise of a physical magnet arriving in the mail made the moment feel extra special.
Getting started is easier than you think. Here’s a quick checklist:
- Pick a high‑resolution photo (at least 300 dpi).
- Decide on size – 2 × 3 in works great for most fridges.
- Choose a design that matches your school colors or personal brand.
- Order a sample to make sure the colors pop.
Most services let you add a short message, like “Class of 2025 – Thank you for your support!” and even include a QR code linking to a video of your ceremony. That little tech touch can turn a simple magnet into an interactive keepsake.
When you’re ready to bring your vision to life, explore our custom photo magnet options for a quality finish that sticks (literally) around for years.
And don’t forget the timing: send them out a week before the graduation party so guests have something to pin to their own fridges, turning your celebration into a ripple of shared pride.
So, whether you’re a parent wanting to brag a little, a graduate looking to thank mentors, or a friend hunting the perfect party favor, graduation announcement magnets give you a personal, memorable way to spread the good news.
TL;DR
Graduation announcement magnets turn your big day into a tactile keepsake that friends and family can see every time they open the fridge, spreading pride and personal thanks instantly.
With simple steps—choose a high‑resolution photo, pick a 2×3 in size, add a short note or QR code, and order a sample—you’ll have a memorable, affordable party favor that sticks around long after the caps are tossed.
Design Inspiration: 10 Creative Themes for Graduation Announcement Magnets
Now that you’ve got the basics down, it’s time to let your personality shine. Below are ten themes that turn a simple fridge magnet into a mini‑celebration you’ll actually look at every day.
1. Classic School Colors
Pull the palette straight from your alma mater—think navy, gold, or maroon. A clean background in those hues lets your photo pop and makes the magnet instantly recognizable as yours. Want a polished, on‑brand look? Check out design inspiration from experts who specialize in academic branding. You can even add a subtle graduation cap icon in the corner for extra flair.
2. Photo Collage
Combine a handful of candid shots—cap toss, group selfie, and that goofy “I can’t believe I did it” moment. The collage feels like a mini‑scrapbook that friends can flip through while grabbing a snack. Mix in a black‑and‑white version of your group shot for a timeless vibe.
3. Quote & Typography
Pick a favorite line from your valedictorian speech or a quote that kept you going. Pair it with a bold, hand‑lettered font and you’ve got a magnet that reads like a personal mantra. Try a script font that mimics a handwritten note for that personal touch.
4. Minimalist Monochrome
Sometimes less is more. A black‑and‑white portrait with a thin line of your graduation date looks sleek, modern, and works on any fridge décor. Pair it with a thin gold border to give it a hint of elegance.
5. Vintage Yearbook Feel
Give your magnet a retro vibe by adding a grainy texture and a “Class of 2025” banner that mimics old yearbook covers. It’s nostalgic without feeling dated. Add a faint sepia filter to make the whole piece feel like a cherished memory.
Seeing these ideas in action can spark even crazier combos. Feel free to mix a quote with a collage or sprinkle a splash of school color over a vintage texture.
6. Travel Map Highlight
If you studied abroad, trace a tiny world map and mark the campus where you earned your degree. It’s a subtle way to showcase the journey that led to this moment. Highlight the city skyline where you studied for an extra personal nod.
7. Sports Team Pride
Got a mascot you love? Incorporate the team logo or a stylized version of the mascot leaping over the graduation cap. It’s perfect for athletes who want to celebrate both the sport and the scholastic win. Include your jersey number underneath the logo for a true fan‑style shout‑out.
These themes can be mixed and matched to suit any personality.
8. Artistic Watercolor
Commission a soft watercolor background that blends your school colors. The dreamy effect adds a touch of artistry that feels like a tiny gallery piece. If you’re artistic, hand‑paint the watercolor yourself and scan it for a one‑of‑a‑kind design.
9. Pop Culture Mashup
Channel your favorite series or movie—maybe a “Stranger Things” upside‑down cap or a “Star Wars” lightsaber graduation scroll. It’s playful, memorable, and makes your magnet a conversation starter. Just make sure the reference feels authentic to you—nothing beats a genuine fan moment.
10. QR Code Celebration
Print a tiny QR code that links to a highlight reel of your ceremony. Guests can scan it right from the fridge and relive the moment in seconds. You can also embed a short thank‑you audio clip that plays when the QR code is scanned on mobile.
Pick the theme that feels most you, customize the layout, and order a sample. Once you see the magnet in your own kitchen, you’ll understand why these tiny keepsakes become cherished reminders of a big day.
Choosing the Right Magnet Material
When you pick a magnet for your graduation announcement, the material decides whether it’ll cling like a loyal friend or slide off after a quick swipe. Below are the most common choices, plus a quick sanity‑check so you know which one fits your design, budget, and fridge surface.
1. Neodymium (NdFeB) – the heavyweight champ
If you’re planning a full‑color photo or a QR‑code that needs to stay perfectly flat, neodymium is the go‑to. These rare‑earth magnets are the strongest you’ll find in a standard 2×3 in magnet, so they hold even heavier paper without wobbling.
Pros: unbeatable pull, works on stainless steel and even glass when you add a metal backing. Cons: a bit pricier and can scratch delicate surfaces if you don’t use a protective pad.
Tip: pair a thin silicone pad on the back of the magnet – it keeps the fridge looking pristine while still giving you that iron‑clad grip.
2. Ferrite (Ceramic) – budget‑friendly and reliable
Ferrite magnets are the workhorse of the fridge world. They’re not as strong as neodymium, but for a typical graduation announcement they’re more than enough. Their ceramic coating also makes them less likely to rust.
Pros: low cost, good for large batches, gentle on painted surfaces. Cons: may struggle with very glossy or glass doors unless you add a metal strip.
Quick test: place a ferrite magnet on your fridge for a minute. If it stays put, you’re good to go.
3. Alnico – the classic, temperature‑stable option
Alnico magnets have a softer magnetic pull but shine when temperature changes are a concern – like a kitchen that gets hot during Thanksgiving prep. They’re also naturally non‑corrosive.
Pros: stable performance from -40 °C to 200 °C, smooth finish that looks classy. Cons: weaker grip means you’ll want a larger size for the same hold as neodymium.
Use them if you love the vintage look of a brushed metal magnet and you don’t need to support heavy cardstock.
4. Rubber‑coated magnets – the safe bet for every fridge
These are essentially ferrite or neodymium cores wrapped in a soft rubber or silicone skin. The coating prevents scratches and gives a tactile, “grippy” feel that kids love.
Pros: scratch‑proof, easy to remove, often comes in fun colors that match school palettes. Cons: the coating adds a millimeter of thickness, which can be noticeable under a tight photo layout.
Best for: family‑friendly designs where you expect the magnets to be handled often.
5. DIY magnetic clips – add flexibility to your announcement
Sometimes you want the magnet to stay, but you also need the freedom to swap photos or notes later. Magnetic clips give you that modularity. A recent Amazon product line offers heavy‑duty clips with neodymium cores that grip firmly while letting you slide paper in and out.
Customers rave about their strength, noting they can hold whole packets of paper without slipping (see the review roundup).
Pair a couple of clips with a slim backing board, and you’ve turned a single magnet into a mini‑gallery that can evolve as you collect new memories.
How to choose the perfect material for your graduation announcement
- Ask yourself: will the magnet carry a full‑bleed photo, a QR‑code, or just text? Heavy visuals need stronger pull.
- Check your fridge surface – stainless steel tolerates neodymium, painted enamel prefers rubber‑coated or ferrite.
- Set a budget. Ferrite saves dollars; neodymium adds a premium but guarantees no sagging.
- Consider future use. If you plan to reuse the magnet for other events, rubber‑coated or clips give the most flexibility.
Bottom line: there’s no one‑size‑fits‑all magnet, but with these five options you can match the material to your design vibe, your fridge’s personality, and your wallet. Pick wisely, and your graduation announcement magnets will stick around—literally—for years to come.
Step‑by‑Step: How to Create Your Own Graduation Announcement Magnets
So you’ve picked the perfect design vibe and you’re ready to turn that vision into something you can actually stick on a fridge. Let’s walk through the process together, one easy step at a time, so you end up with magnets that feel as personal as the day you tossed your cap.
Step 1: Collect High‑Resolution Photos & QR Content
First, gather the images you want to showcase. Aim for at least 300 dpi; that’s the sweet spot for crisp prints that won’t look fuzzy when the magnet is held up close. A classic cap‑and‑gown shot works, but consider adding a candid moment – maybe the day you walked across campus or a goofy selfie with your study group. If you want a QR code, generate it now (a 0.5‑inch square is plenty) and test it on a phone before you lock it into the design.
Step 2: Choose the Right Magnet Material
Remember the material matrix we talked about earlier? Pick a magnet that matches your design weight. Heavy‑duty neodymium is perfect for full‑bleed photos, while rubber‑coated ferrite works great for lighter text‑only layouts. If you’re not sure, run a quick “stick test”: press a sample piece on your fridge for ten seconds. If it stays, you’ve got the right pull.
Step 3: Size It Right
Most fridges love a 2 × 3 in footprint – it’s big enough for detail but small enough to fit between grocery lists. If you have a lot of information (date, venue, a short thank‑you note), consider a 2.5 × 3.5 in canvas; just be sure the extra width doesn’t crowd the magnet’s edge.
Step 4: Lay Out Your Design
Open your favorite design tool – Canva, Photoshop, or even a free online editor. Start with a blank 2 × 3 in canvas, drop in your photo, then add a thin border that matches your school colors. Keep text under 12‑point size; anything larger can look cramped once printed. A quick tip: use a “safe zone” of 0.125 in from every edge so nothing gets trimmed.
Real‑world example: Jenna used a navy background with her school’s gold mascot subtly water‑marked behind her portrait. The result felt official without screaming “designer.”
Step 5: Add a Personal Touch
Now sprinkle in the details that make the magnet yours. A short line like “Thanks for cheering me on, Mom!” works better than a generic “Thank you.” If you’ve got a QR code, tuck it in a corner with a tiny call‑out “Watch my ceremony.” You can also attach a magnetic clip (the ones we highlighted earlier) if you want to swap photos later.
Step 6: Order a Sample
Before you press “order 200,” order a single proof. This lets you check color fidelity, magnet strength, and how the QR code scans in real life. Many vendors ship samples within a week, so you can still meet a tight deadline.
Step 7: Pack & Send
When the batch arrives, give each magnet a quick visual inspection. Slip a thin piece of cardstock behind it for extra rigidity if the magnet feels a tad floppy. Then bundle them in a small box with a thank‑you note – your recipients will love the extra personal flair.
Step 8: Place & Celebrate
Now the fun part: stick them on your loved ones’ fridges. Watch the smiles as grandparents see your cap photo every morning. If you’ve used magnetic clips, they’ll enjoy swapping in new pics from the ceremony night.
Quick recap: pick sharp photos, choose the right material, size it, design with a safe zone, add a heartfelt line or QR code, order a sample, and then ship. Follow these steps and your graduation announcement magnets will become the talk of the kitchen for months to come.
Top 5 Printable Templates for Graduation Announcement Magnets
Okay, you’ve got your photo, your QR code, and a magnet material in mind. The next step is picking a ready‑made layout that lets you drop those elements in without spending hours on Photoshop. Below are five printable templates that work like a charm for graduation announcement magnets.
1. Classic School‑Color Banner
This template splits the magnet into two horizontal bands. The top band is a solid fill of your school’s primary color, and the bottom band holds your portrait and a short thank‑you line. Because the design is mostly color blocks, you can print on any material—neodymium for a sturdy hold or rubber‑coated ferrite for a softer finish.
Tip: Pull the exact HEX code from your alma mater’s branding guide, then replace the placeholder text with “Class of 2025” and your name. You’ll end up with a clean, instantly recognizable look that feels official without looking stiff.
2. Photo Collage Timeline
Here’s a layout that lets you showcase three moments in a vertical stack—freshman day, a memorable project, and the graduation ceremony. Each slot has a thin border, so the images stay crisp even on a 2 × 3 in magnet. The middle space is perfect for a brief caption or QR code.
Real‑world tip: Keep each image at least one inch wide; otherwise the details get lost when the printer trims the edges. Swap the default icons for your own doodles if you want a personal flair.
3. QR‑Code Corner
This design reserves a small corner for a QR code while the rest of the space is dominated by a full‑bleed portrait. The code sits on a contrasting background so scanners can read it easily, even on glossy finishes.
Quick tip: Make the QR square at least 0.5 in on each side and test it with a phone before you send the file to print. If the code looks fuzzy, bump the resolution up to 600 dpi.
4. Vintage Yearbook Look
If you love a nostalgic vibe, choose the yearbook template. It uses sepia tones, a serif header, and a decorative border that mimics an old school page. The layout works well on matte‑finished magnets, giving the design a soft, paper‑like feel.
Pro tip: Add a subtle grain filter in your editor and use a ferrite or alnico magnet so the matte surface doesn’t glare under kitchen lights.
5. Minimalist Monogram
This ultra‑clean option features a single monogram in the center, surrounded by a thin line with your graduation date. It’s perfect for corporate‑track grads who want a sleek, professional keepsake.
Best practice: Pair the design with a neodymium core and ask the printer for a foil‑like gold or silver overlay. The metal finish catches the light and makes the monogram pop without any extra clutter.
Now that you’ve seen the five go‑to templates, pick the one that matches your vibe, download the printable, swap in your photos, and you’re ready to order a sample.
| Template | Ideal Magnet Material | Quick Tip |
|---|---|---|
| Classic School‑Color Banner | Neodymium or rubber‑coated ferrite | Use exact school HEX code for authentic colors |
| Photo Collage Timeline | Neodymium (for heavier image load) | Keep each photo ≥1 in wide |
| QR‑Code Corner | Any material (ensure flat surface) | QR ≥0.5 in square, test before printing |
| Vintage Yearbook Look | Ferrite or alnico for matte finish | Add grain filter for authentic feel |
| Minimalist Monogram | Neodymium with foil‑like overlay | Use gold/silver foil effect for extra shine |
When you upload your chosen template to a printing service, double‑check the bleed settings and confirm the magnet size matches the 2 × 3 in spec. A quick proof order saves you from costly re‑prints and guarantees the colors stay true to your school’s palette.
Printing & Finishing Tips: From Home to Professional
So you’ve nailed the design and picked the perfect magnet material—now the real magic happens in the printer. Whether you’re using a home inkjet or sending files to a commercial shop, a few savvy tweaks can mean the difference between a bland fridge souvenir and a show‑stopping keepsake.
File preparation basics
First, set your canvas to 300 dpi. That resolution keeps the portrait crisp even when a curious aunt leans in for a closer look. Export the file as a PDF or high‑quality PNG; both preserve color profiles better than a JPEG‑compressed JPEG.
Pro tip: add a 0.125‑in bleed on every side. It sounds tiny, but without bleed the printer’s trim can bite into your school logo or QR code, leaving a white fringe that looks cheap.
Color sanity check
Do you remember that time you printed a bright gold monogram only to see it look dull on the fridge? That’s a color‑space issue. Work in CMYK if you’re sending to a pro shop, because most commercial presses interpret colors that way. At home, stick with the printer’s sRGB profile but run a test strip first.
Here’s a quick experiment: print a single swatch of your school’s primary color on plain paper, stick it on the fridge, and compare it to the digital mockup on your screen. If it looks off, tweak the hue by a few points in your design app before sending the final file.
Finishing options that elevate
Glossy laminate is the go‑to for vibrant photos—think of it as a tiny protective shield that also makes colors pop under kitchen lights. If you want a more muted, sophisticated vibe, matte lamination eliminates glare and gives the magnet a paper‑like feel.
Foil stamping isn’t just for business cards. A thin gold or silver foil overlay on a monogram can turn a simple “Class of 2025” into a mini‑trophy. Most pro printers charge per square inch, so keep the foil area under 1 sq in for a budget‑friendly sparkle.
UV coating is another pro‑level trick. A clear, UV‑cured topcoat locks in the ink and makes the magnet resistant to kitchen spills. If you’re printing at home, a spray‑on clear acrylic seal works in a pinch, but test it on a scrap piece first to avoid foggy spots.
Home‑printer hacks
If you’re using a consumer inkjet, invest in magnet sheets designed for your printer model. They usually have a glossy front and a magnetic back that you can cut with a craft knife. Cut a tiny notch on each side of the magnet before printing; the notch prevents the sheet from curling as the ink dries.
Don’t forget to let the ink cure for at least 24 hours before peeling the sheet off the backing. Rushing this step can cause smudges that look unprofessional, especially on QR codes.
When to go pro
Imagine you’re ordering 150 magnets for a family reunion. The cost per piece drops dramatically when you batch‑print, and you get access to die‑cut shapes—like a graduation cap silhouette—that a home printer simply can’t handle.
One graduate I know, Maya, sent a batch of 200 caps‑shaped magnets to her out‑of‑state relatives. The pro shop used a 2‑mil UV coating and a custom die‑cut, and the magnets arrived with a perfectly crisp edge that didn’t chip after a week of fridge traffic.
If you’re unsure whether to DIY or outsource, run a cost‑benefit comparison: add up the price of magnet sheets, ink, and your time versus the quote from a print shop that includes finishing. Usually, once you cross the 50‑magnet threshold, the professional route wins on quality and consistency.
Checklist before you hit ‘order’
- File set to 300 dpi, with 0.125 in bleed.
- Colors converted to CMYK (or verified sRGB for home).
- Proof printed on plain paper first.
- Decide on gloss, matte, foil, or UV finish.
- Choose magnet core (neodymium for heavy photo load, rubber‑coated for gentle surfaces).
- Confirm trim lines and any custom die‑cut shapes.
Cross those boxes, and you’ll avoid the dreaded “oops, my QR code won’t scan” moment.
And remember, a little extra effort in the printing stage pays off every time Grandma pulls the magnet off the fridge to show her friends. That sparkle, that tactile feel—it’s the kind of detail that makes your graduation announcement magnets feel like a true celebration, not just another piece of paper.
Ready to turn your design into a polished magnet? Follow the steps above, test one sample, and then watch your friends light up when they see your achievement glued to their kitchen door.

Budget‑Friendly Options: DIY vs. Pre‑Made Graduation Announcement Magnets
Okay, you’ve already nailed the design vibe and you know which magnet material feels right. Now the big question: should you roll up your sleeves and print them yourself, or let a shop handle the heavy lifting? Both routes can stay gentle on the wallet, but they each come with their own set of trade‑offs.
DIY: Hands‑On, Pocket‑Friendly
Going DIY means you buy printable magnet sheets, feed them through your home inkjet or laser, then cut them out with a craft knife. The upfront cost is low—think a pack of 50‑sheet rolls for under $30—so it’s perfect if you’re only making a small batch for close family.
Pros? You control every detail: color saturation, paper weight, even a quirky die‑cut shape if you have a hobby‑cutter. You can also swap out a photo or QR code at the last minute without re‑ordering a whole lot.
But there’s a catch. Home printers aren’t built for thick magnet stock, so you might see ink smudges or uneven edges. And the time you spend trimming 100 tiny rectangles adds up—especially if you’re juggling a graduation party schedule.
Quick checklist for a smooth DIY run:
- Buy magnet sheets that match your printer type (inkjet vs. laser).
- Set your file to 300 dpi with a 0.125‑in bleed.
- Print a single test piece on regular paper first, then on a magnet sheet.
- Let the ink cure at least 24 hours before cutting.
When it works, the satisfaction of saying “I made these myself” feels like a mini‑victory. And if you’re on a shoestring budget, the per‑magnet cost can dip below $0.60.
Pre‑Made: Convenience Meets Consistency
Ordering pre‑made graduation announcement magnets from a vendor shifts the labor to the pros. You upload your design, choose the magnet core (neodymium, ferrite, etc.), pick a finish—gloss, matte, foil, UV—and they ship the finished batch.
The biggest upside is quality control. Professional presses lay down ink with precise registration, and the magnets get trimmed to exact dimensions every time. That means your QR code will scan, your colors stay true, and the edges won’t fray after a few weeks on the fridge.
Cost‑wise, pre‑made starts a bit higher—usually $1.20‑$1.80 per magnet for runs under 25. However, once you cross the 50‑piece threshold the unit price often drops below $1, and you gain access to premium options like foil‑stamped monograms or custom die‑cuts that are near impossible at home.
Another hidden benefit: most vendors include a free sample. You get a tangible proof before committing to the full order, which can save you from a pricey re‑print if the colors look off on the actual magnet surface.
Things to watch out for:
- Shipping time—plan at least two weeks ahead of your graduation party.
- Setup fees—some shops charge a small design‑setup cost if you need help finalizing the file.
- Minimum order—few providers let you order fewer than 10‑12 pieces.
Which Path Saves You More?
If you’re only sending magnets to parents, grandparents, and a handful of friends (say, 12‑20 pieces), DIY will almost always be cheaper, even after accounting for ink and cutter blades. You’ll also get the fun of a hands‑on project, which can be a nice post‑grad activity.
But if you’re planning to mail magnets to out‑of‑state relatives, hand them out at a graduation reception, or you simply want that flawless, glossy finish without the hassle of cutting, the pre‑made route wins. The price per magnet evens out quickly, and the professional look can feel more “official,” which some graduates prefer for corporate‑track announcements.
Bottom line: match the method to your batch size, timeline, and how much you value polish versus personal touch. Either way, you’ll end up with a keepsake that sticks—literally and emotionally—on the fridge for years to come.
Conclusion
So there you have it—graduation announcement magnets can be as simple or as fancy as you want, and they actually stick around long after the caps are tossed.
We’ve walked through picking a theme, choosing the right magnet material, laying out the design, and even weighing DIY versus a pre‑made service. Each step gives you a tiny decision point, but none of them feel overwhelming when you break them into bite‑size actions.
Remember the moment you imagined your family opening the fridge and spotting your smiling face alongside a quick thank‑you note. That feeling is the real payoff, and the magnets themselves become a tiny reminder of the hard work you just celebrated.
So, what’s the next move? Grab a template, swap in your favorite photo, add a short line of gratitude, and order a single sample. If the sample looks good, scale up to the batch you need for parents, grandparents, or the whole graduating class.
And if you ever feel stuck, think back to the material guide: a neodymium core for heavy photo loads, rubber‑coated ferrite for gentle fridge paint, or a simple clip if you want future swaps.
Bottom line: graduation announcement magnets are a low‑cost, high‑impact way to turn a milestone into a daily smile. Go ahead—design, print, and let those little magnets do the talking on every kitchen door.
FAQ
What exactly are graduation announcement magnets and why should I use them?
Think of them as tiny, printable postcards that cling to your fridge. They let you share a photo, your name, the ceremony date, and even a quick thank‑you note—all in a format that family members see every morning. Because they’re low‑cost and instantly visible, they become a lasting reminder of your achievement without the waste of paper invites.
How do I choose the right magnet material for my design?
The material decides how strong the hold is and how the surface looks. Neodymium gives a heavyweight grip, perfect for full‑bleed photos or QR codes, while rubber‑coated ferrite is gentler on painted fridge paint and works well for text‑only layouts. If you plan to swap images later, magnetic clips with a neodymium core add flexibility without sacrificing strength.
Can I add a QR code to my graduation announcement magnet?
Absolutely—just treat the code like any other graphic element. Make sure it’s at least 0.5 in square and keep a contrasty background so phones can read it easily. Test the code on a printed paper sheet before you send the final file; a quick scan will reveal any blurry edges that could frustrate your guests.
What size should I use so the magnet looks good on a fridge?
The sweet spot is a 2 × 3 in rectangle. It’s large enough for a clear portrait and a line of text, yet small enough to fit between grocery lists and magnets already on the door. If you have a lot of information—like venue details and a QR code—bump it up to 2.5 × 3.5 in, but keep a 0.125 in safety margin to avoid trimming off important bits.
How many magnets do I need for different occasions?
For a close‑knit family gathering, 12–15 pieces usually cover parents, grandparents, and a few friends. If you’re sending them to an entire graduating class, aim for 1 magnet per recipient plus a handful of extras for teachers or staff—so roughly 120–150 for a class of 100. Ordering in bulk often drops the per‑piece cost dramatically, especially when you hit the 50‑magnet threshold.
What are some budget‑friendly ways to personalize my magnets?
Start with a simple photo and a short thank‑you line—no frills needed to make it feel special. Use free design tools like Canva to add school colors or a subtle mascot watermark. If you want a splash of flair, consider a matte finish instead of glossy; it looks sophisticated and usually costs less. And remember, ordering a single sample first lets you catch any color or layout tweaks before you commit to a larger run.
How long do graduation announcement magnets last on the fridge?
Most magnets stay strong for years as long as the fridge surface stays clean and dry. Neodymium cores can hold up to a decade without losing pull, while rubber‑coated ferrite may lose a little grip after 3–4 years if the coating wears down. To extend life, wipe the magnet and the fridge with a soft cloth every few months and avoid exposing it to harsh heat or steam.


