

Picture this: the day you walk down the aisle, sunlight spilling through the windows, your best friend wiping a tear from her cheek, and everyone’s eyes locked on the tiny details that make the moment unforgettable.
But what happens to those fleeting snapshots once the wedding day fades into memory? You scroll through your phone, print a few favorites, maybe frame one… and then the rest? They end up hidden in a drawer, right?
Enter wedding photo magnets – tiny, sturdy keepsakes that cling to your fridge, office locker, or even the metal side of a garden shed, turning everyday surfaces into a rotating gallery of your love story.
They’re not just cute décor; they’re practical. Every time you grab a snack or open a cabinet, you get a quick, heart‑warming flashback. No need to dig out a photo album or scroll endlessly on a screen.
Honestly, I’ve seen couples who start their marriage by pinning a single magnet of their first dance, then add a new one each anniversary – a visual timeline that grows right in their kitchen.
So, why settle for a generic frame when you can create something you’ll actually see daily?
In the next few minutes we’ll walk through everything you need to know: how to choose the perfect photo, what sizes work best for a fridge door, the little design tricks that make a magnet pop, and where to order high‑quality custom pieces without breaking the bank.
Grab a cup of coffee, get your favorite wedding snap ready, and let’s dive into the world of wedding photo magnets together.
Imagine opening the fridge at midnight, craving a snack, and instead of the usual glow you’re greeted by the smiling face of your bride, the twinkle of your vows, or that goofy candid where you both lost a shoe – a tiny reminder that love lives in the everyday.
TL;DR
Wedding photo magnets turn your favorite wedding snap into a daily reminder, letting love linger on every fridge door, locker, or metal surface. Choose the perfect image, size it right, and order custom magnets from Loveonmagnets for a durable, heartfelt décor that brightens meals, midnight cravings, and every moment together.
Idea 1: Custom Guest‑Book Magnet Wall
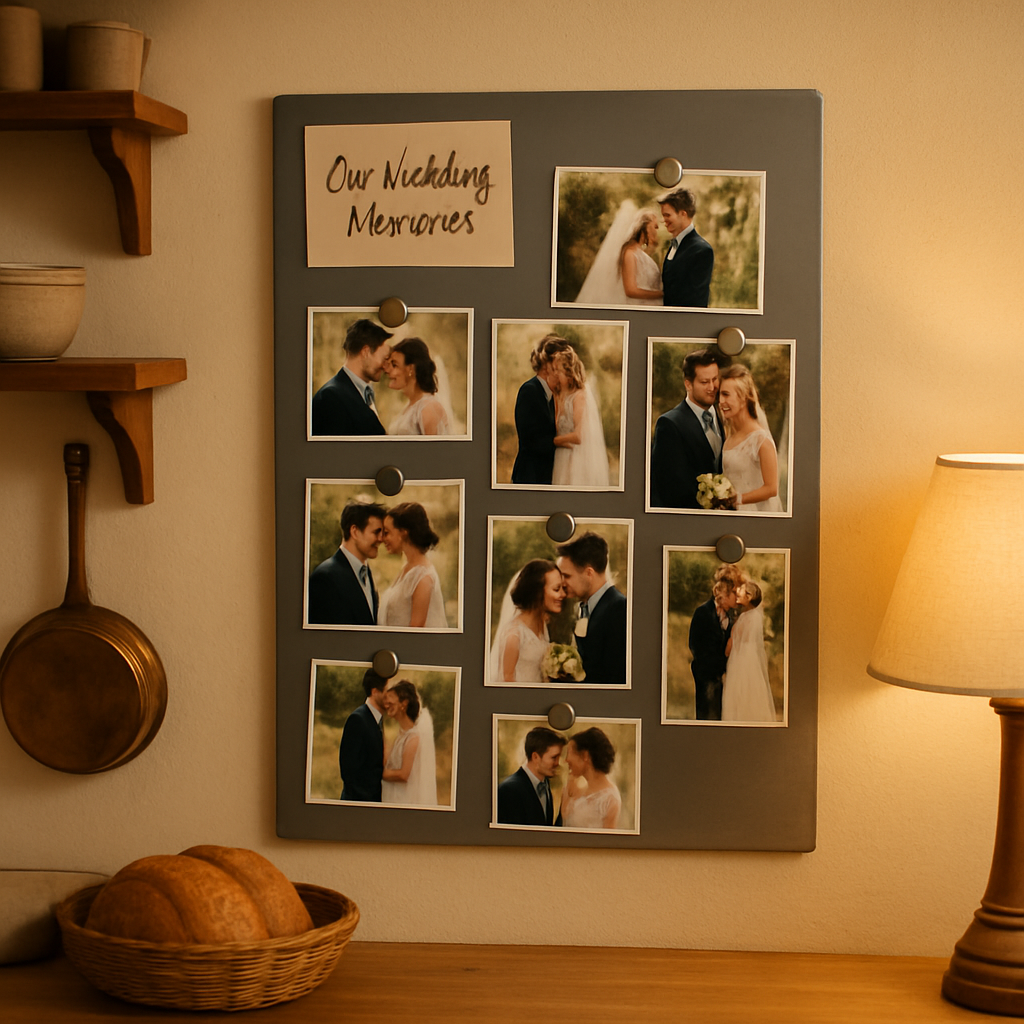
Imagine walking into your kitchen and the first thing you see isn’t a boring white board, but a vibrant collage of your wedding day captured in magnet form. That’s the magic of a custom guest‑book magnet wall – every guest leaves a tiny, personal snapshot that sticks right where you’ll see it most.
Why does this work so well? Because people love tangible keepsakes. When you hand someone a magnet, they instantly picture it on their fridge at home, and the thought of that future display makes them more likely to write a heartfelt note.
How to set it up in three easy steps
1. Pick the perfect photo layout. Choose a mix of candid laughs, the first kiss, and that goofy group shot with the bridesmaids. Keep each image under 2 inches so they’re easy to handle and look great side‑by‑side.
2. Order high‑quality custom magnets. You want a durable finish that won’t fade after a few washes. Loveonmagnets offers a UV‑coated option that stays bright for years. Check out this guide on personalized photo fridge magnets for design tips and material choices.
3. Create the wall. Paint a strip of metal sheet or attach a magnetic board to an empty hallway, living‑room nook, or even the back of a pantry door. Leave a little space between each magnet so guests can write their name, a short note, or a date.
Once the board is up, hand each guest a magnet as they sign the traditional guest book. They’ll love the novelty of sticking their memory right where you’ll see it daily.
So, what if you’re short on wall space? No problem. You can use multiple smaller magnetic panels and arrange them like a puzzle. The key is to keep the overall look cohesive – stick to a single colour palette for the borders or use a uniform matte finish.
Watch the short video above for a visual walk‑through of setting up the board, from measuring the metal strip to arranging the magnets in a way that feels like a living scrapbook.
Here’s a quick checklist to keep you on track:
- Choose 30‑40 photos that capture different moments.
- Order magnets in a uniform 2 × 2 in size.
- Buy a magnetic board or metal sheet at a home‑improvement store.
- Provide permanent‑marker pens for guests to add notes.
- Label the top of the wall with a simple “Our Wedding Memories” sign.
And don’t forget the little details that turn a wall into a conversation starter – a tiny vase of fresh flowers, a string of fairy lights, or a rustic wooden frame around the board.
One common worry is magnets pulling off paint or leaving marks. The good news? Modern magnetic boards are designed to be paint‑friendly, and the magnets themselves have a soft rubber backing that won’t damage surfaces.
Finally, think about longevity. Store a digital copy of all the photos you used, just in case you ever want to re‑print the magnets for a new home or a future anniversary celebration.
If you’re dealing with invasive plants on your property and need a reliable service, you might want to check out the expertise of Japanese Knotweed specialists – they handle tough situations so you can focus on enjoying your beautiful magnet wall.
Idea 2: Magnetized Place Card Sets
Remember that moment when you walked into the reception and the place cards were just glossy paper, easily knocked over by an enthusiastic toast? Imagine swapping that flimsy card for a magnet that sticks to the fridge, the bar, or even a metal wedding cake stand, and stays perfectly in place for years.
Magnetized place card sets turn a one‑time seating cue into a lasting keepsake. Every guest’s name becomes a tiny piece of décor you can reuse at anniversary parties, family reunions, or just to add a personal touch to your kitchen fridge.
Here’s how you can create a set that feels both functional and sentimental, without turning your whole wedding planning into a DIY nightmare.
1. Choose a photo‑rich layout
Start with the same high‑resolution wedding photo you used for your magnets. A wide‑angle shot of the ceremony venue or a candid of you two laughing works great because it gives a subtle backdrop for the names. Keep the background muted enough that the text remains legible.
If you want a professional finish, services like Walgreens offers printable wedding place cards that let you upload your image and add names in a sleek template. You can then order the sheets, cut them to size, and affix a small magnetic strip on the back.
2. Pick the right magnet strength
Not all magnets are created equal. For place cards you’ll want a medium‑strength magnet—strong enough to cling to a fridge door, but weak enough to lift off without bending the card. A 0.5‑inch flexible magnet sheet works perfectly; you can cut it to match each card’s dimensions.
Test a strip on your kitchen fridge before you commit to the full batch. If it slides too easily, add a second layer. If it’s stubborn, shave a millimeter off the back.
3. Personalize each card
Use a simple design tool (Canva, Photoshop, or the editor on your chosen printing site) to overlay each guest’s name onto the photo backdrop. Play with fonts that match your wedding theme—script for elegance, sans‑serif for modern vibes.
For an extra touch, add a tiny icon next to the name: a fork for foodies, a music note for the DJ, or a little heart for your parents. Those micro‑details become conversation starters every time someone spots the magnet.
4. Add a “magnet pen” for on‑the‑spot edits
Even the best‑planned seating can go sideways when a plus‑one shows up late. Keep a dry‑erase marker handy and let guests write “+1” directly on the magnet. Because the surface is magnetic, the note stays put, and you can erase it later without a trace.
This little hack turns a static card into a dynamic RSVP tool, especially useful for destination weddings where you might need to shuffle tables on the fly.
So, how does this all look in practice?
In the video, you’ll see a step‑by‑step walkthrough of printing, magnetizing, and displaying the place cards. Notice how the presenter uses a kitchen fridge as the demo board—just the kind of everyday surface that keeps your wedding memories in sight.
5. Create a “memory board” display
Once the ceremony is over, don’t toss the place cards. Arrange them on a magnetic board in your entryway or on the back of a pantry door. Over the years, the board becomes a visual guest list, a reminder of who celebrated your big day.
Swap out old cards for new ones on birthdays, anniversaries, or when you host a family game night. The board evolves with your life, turning a simple place‑card idea into a living scrapbook.
6. Pack them for travel
If you’re moving to a new home, these magnets travel like postage stamps. Slip them into a small zip‑lock bag, and they’ll stick to any metal surface in your new kitchen—instantly making the space feel like yours.
And because they’re magnetic, you won’t have to worry about broken frames or lost photos during a move.
Ready to give your guests a keepsake they can actually use? Grab your favorite wedding snap, design the name layout, add a magnetic strip, and let the magnets do the rest. You’ll end up with a functional piece of décor that brings a smile every time you open the fridge, and a sweet reminder that love really does stick around.
Idea 3: DIY Photo Magnet Favors (Video Tutorial)
Picture this: you’re sipping coffee after the reception, the last song is fading, and you think, “How do we give guests a little piece of today they can actually use?” That’s where DIY photo magnet favors swoop in – cheap, personal, and instantly fridge‑ready.
We’ve pulled together a step‑by‑step video (see below) that walks you through the whole process, but let’s break down the why, the what, and the how before you hit play.
Why DIY beats buying pre‑made
First off, handmade magnets let you match the exact color palette of your wedding décor. You can crop a candid, a detail shot of your rings, or even a goofy selfie from the cocktail hour – whatever feels most “you.”
Second, the cost per magnet drops dramatically when you bulk‑order the raw supplies. A 1‑lb bag of flat‑back glass beads from the dollar store costs under $2, and a roll of magnetic sheet is a one‑time $5 expense. That’s a fraction of the $3‑$5 price tag you’d see on a commercial vendor.
And finally, the act of making them together can become a mini‑workshop at the rehearsal dinner or a crafty afternoon with your bridal party. The memory of “we glued those together” adds another layer of sentiment.
What you’ll need (the minimalist list)
- Flat‑back glass beads or clear acrylic “marbles” – the kind you find in the floral aisle of a craft store.
- Laser‑jet prints of your chosen photos (size about 1‑inch square). Laser prints avoid bleed and stick well to Mod Podge.
- Mod Podge Gloss (or Matte if you prefer a non‑shiny finish).
- Small hot‑glue gun with a fine tip.
- Flexible magnetic sheet (0.5 inch thick works great).
- Scissors, a round paper punch (1‑inch), and a clean workspace.
Step‑by‑step: from photo to fridge in under an hour
- Print and cut. Scan your favorite wedding snap, crop it into a perfect circle using any free tool (Canva, PicMonkey). Print on laser‑jet paper, then use the round punch to cut out each image.
- Prep the glass beads. Lay a bead flat‑side up. If the back isn’t perfectly smooth, give it a quick wipe with a dry cloth – dust will ruin the adhesion.
- Mod Podge the photo. Spread a thin layer of Mod Podge on the flat side, place the cut‑out photo face‑down, and smooth with your fingertip. Let it dry 15‑20 minutes.
- Seal it. Once the first coat is set, apply a second thin layer of Mod Podge over the paper side. This creates a water‑resistant barrier for kitchen spills.
- Attach the magnet. Cut a piece of magnetic sheet to match the bead’s diameter. Hot‑glue the magnet to the back of the bead, holding until the glue firms (about 30 seconds).
- Quality check. Gently tug on the magnet; it should hold firmly but still lift off without cracking the glass. If it feels too loose, add a second magnet layer.
- Package for guests. Slip each finished magnet into a small cellophane bag with a handwritten thank‑you tag. Tie with twine for that rustic touch.
Does this sound doable? Absolutely. The whole batch of 30 magnets can be assembled in roughly 45 minutes once you have the prints ready.
Real‑world examples that stole the show
Emily and Raj turned their “first dance” photo into a set of 25 glass‑marble magnets. They placed a tiny heart‑shaped magnet on each one, spelling out “LOVE” across the fridge. Guests loved hunting for the hidden letters during the cocktail hour.
Another couple, Zoe and Carlos, used a black‑and‑white portrait of the ceremony venue. They printed the same image on each magnet but added a different guest’s name in a handwritten script on the back. The result was a cohesive look that still let every guest feel personally recognized.
According to a DIY craft blog, these glass‑marble magnets are “so simple that even a kid can make them,” and the author notes that the supplies are cheap and the project can be completed quickly (Mod Podge Rocks explains the process).
Pro tips you won’t find in a generic tutorial
- Use a clear acrylic sealer. A quick spray of a clear acrylic sealant after the Mod Podge dries adds extra protection against kitchen humidity.
- Batch‑glue with a glue gun. If you’re making more than 20 magnets, set the glue gun to low and keep a spare roll of glue sticks handy – it saves a lot of time.
- Personalize the back. Write a short thank‑you note on the magnetic side with a permanent marker before the glue sets. It’s a tiny surprise that only the recipient sees.
- Consider color‑tinted beads. Lightly frosted beads give a vintage look and make the photo pop without extra framing.
So, what’s the next move? Grab your favorite wedding snap, fire up the video tutorial, and start cutting. By the time the last guest leaves, you’ll have a stack of handmade wedding photo magnets that double as heartfelt favors and functional fridge art.
And remember, the best part isn’t just the magnet—it’s the memory you create while making it. Happy crafting!
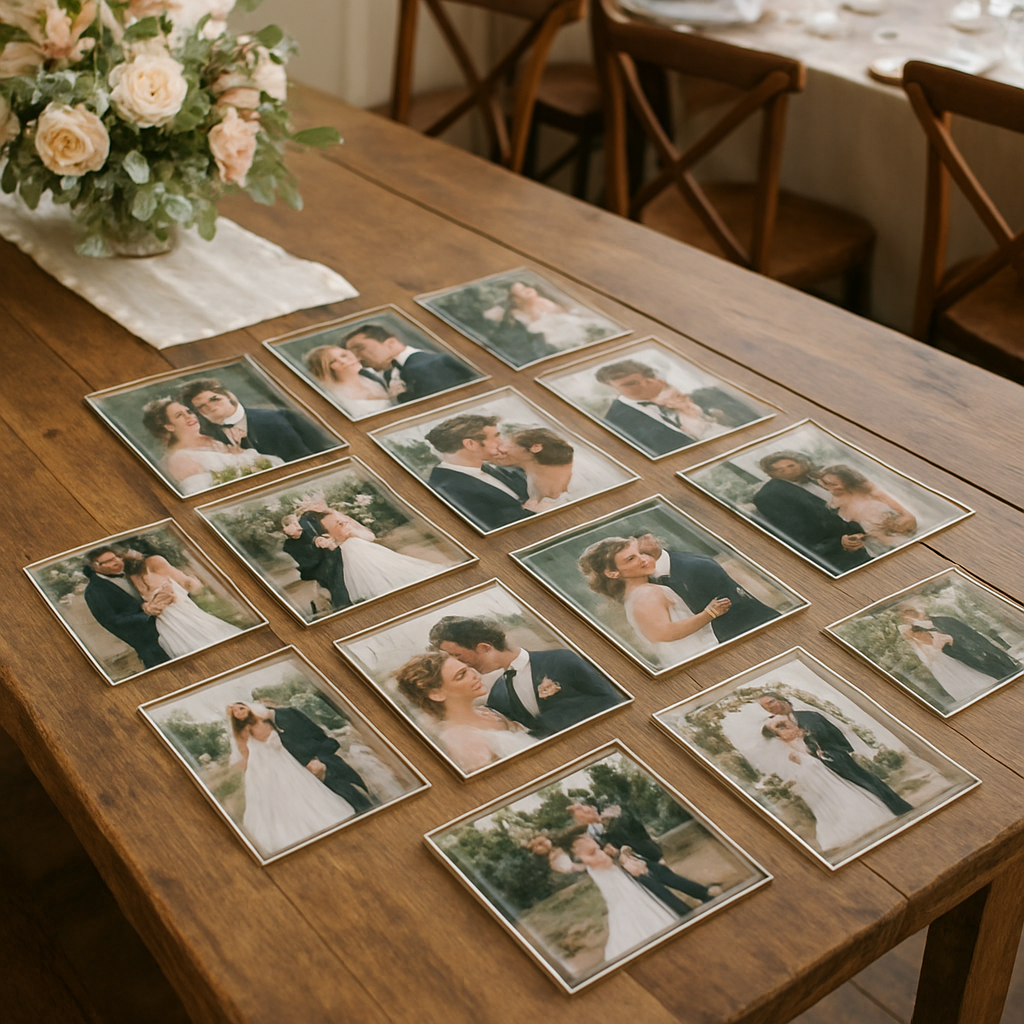
Idea 4: Magnetized Table Decor with Photo Collages
Ever walked into a reception and thought, "The tables look great, but they could use a personal touch that actually sticks?" Yeah, me too. That’s where magnetized table décor steps in – it’s a tiny splash of your wedding day that you can rearrange, swap out, and even take home without breaking a nail.
What makes a magnetized collage work?
First, you need a sturdy magnetic base. A thin sheet of flexible magnet works perfectly under a clear acrylic cover or a simple glass coaster. The base holds the photos in place, but you can pull a piece out whenever you want to change the vibe.
Second, pick photos that tell a story in bite‑size frames. Think candid laughter, a close‑up of the rings, or that goofy moment when the best man tripped over the aisle runner. Because the pieces are small, each image feels like a secret you’re sharing with anyone who leans over the table.
Third, consider the finish. A glossy Mod Podge seal keeps kitchen spills at bay, while a matte acrylic spray gives a softer, vintage feel. It’s a tiny decision that changes the whole mood of the spread.
So, how do you turn those ideas into a real‑world table centerpiece?
Step‑by‑step cheat sheet
- Print the photos same‑day. If you need them fast, CVS can crank out glossy magnet‑ready prints in under an hour, perfect for a last‑minute table update (CVS offers same‑day printed magnets).
- Trim to uniform squares. A paper cutter or a simple ruler and craft knife will give you 2×2‑inch pieces that line up neatly.
- Apply a protective coat. One thin layer of Mod Podge, let it dry, then a second coat for water resistance.
- Attach to the magnetic sheet. Peel the backing off the magnet, stick the photo, and press firmly.
- Seal the whole collage. Place a clear acrylic coaster on top or slide a cut‑to‑size acrylic sheet over the arrangement for extra durability.
That’s it. You’ve got a table décor that’s as dynamic as your dance floor playlist – you can swap a photo out for a new one when the night shifts from dinner to dessert.
Real‑world examples that spark ideas
Emma and Tyler used a collage of their first‑look photos on the cocktail table. Guests loved pulling out a magnet to read the caption Emma wrote on the back, like a tiny love note.
Another couple, Maya and Carlos, turned their reception tables into mini‑galleries. Every table had a different theme – “How We Met,” “First Dance,” “Family Fun” – and they rotated the magnets after each course, keeping the conversation flowing.
What’s cool is that the magnets become keepsakes. After the night, each guest can take home a piece of the collage, and the couple ends up with a set of memories they can re‑use for future anniversaries.
Quick comparison of the most common materials
| Material | Magnet Strength | Finish & Durability |
|---|---|---|
| Flexible magnetic sheet (0.5 in) | Medium – easy to lift | Works with Mod Podge; good for indoor use |
| Neodymium thin tiles | Strong – almost permanent | Needs a protective acrylic cover; best for low‑traffic tables |
| Magnetic photo paper (pre‑printed) | Light – suitable for quick swaps | Glossy finish, ready‑to‑use; limited to same‑day print services |
Pick the material that matches how often you plan to change the collage. If you want a “set it and forget it” vibe, neodymium is your friend. If you love swapping photos like playlists, go with the flexible sheet.
And here’s a little insider tip: keep a small stash of extra printed photos in a decorative envelope on the side. When a guest asks for a specific memory, you can pull it out on the spot. It feels like you’ve got a secret photo stash ready to share.
Ready to give your tables some magnetic personality? Grab a few of your favorite wedding snaps, order same‑day prints if you’re short on time, and let the collage become the conversation starter you never knew you needed.
Idea 5: Keepsake Magnet Photo Albums
Imagine flipping through a tiny, magnetic album that clings to your fridge and lets you pull out a single memory whenever the mood strikes. No dust‑covered photo boxes, no heavy coffee‑table albums – just a handful of bite‑size pages that snap onto metal, ready for a quick smile.
Why a magnetic album works better than a traditional one
First off, the magnetic backing means the whole thing is instantly portable. You can slide it onto a locker, a kitchen cabinet, or even a metal bookshelf without hunting for a spare surface. That little bit of friction is actually a memory trigger – every time you open the fridge you get a micro‑dose of nostalgia.
Second, the format encourages you to keep the collection lean. Instead of stuffing 200 photos into a binder, you choose the 12 or 24 moments that truly matter. It feels less like a chore and more like a curated playlist.
And because the pages are magnetic, you can rearrange them on the fly. Want the first dance at the front for anniversary night? Just pull it out, flip the order, and you’re good to go.
How to build your own keepsake magnet album
1. Select your favorite shots. Pick images that tell a story – the ceremony entrance, the cake cutting, that goofy aunt dancing. Aim for a mix of wide‑angle and close‑ups so each page feels fresh.
2. Design tiny “pages.” Most services let you create a 2×2‑inch layout that fits inside a magnetic sleeve. If you love a more book‑like feel, check out tiny magnet photo books from Social Print Studio. They hand‑assemble 12‑page mini books with a strong magnet embedded in the back, perfect for fridge display.
3. Print on archival‑quality matte paper. Matte finishes reduce glare on kitchen lighting, and archival paper keeps colors from fading after a few washes.
4. Add a protective coating. A light gloss of Mod Podge or a spray acrylic sealant will guard against spills – a must if the album lives next to the snack zone.
5. Attach the magnet. Cut a thin magnetic sheet to the size of each page, peel off the backing, and press firmly. For a sturdier feel, sandwich the magnet between two layers of paper before sealing.
6. Bind the pages. You can simply stack them in a magnetic frame, or slide them into a slim acrylic sleeve that slides onto the fridge like a picture rail. The sleeve acts like a protective spine and makes swapping pages a breeze.
Real‑world inspiration
One couple turned their “first‑look” photos into a 12‑page magnet album that now lives on their pantry door. Each month they pull out a different page to reminisce during dinner prep. Another set of newlyweds used Walgreens Photo’s custom photo books to design a mini‑book, then cut the pages down to 2×2 inches and added magnets – a clever hack that saved them a few bucks while still getting a professional layout.
What I love about these mini albums is the ritual factor. You’ll find yourself opening the fridge just to see which memory is on top, and that tiny pause can turn a busy weekday into a moment of gratitude.
Tips to make your magnetic album last
- Store extra magnets in a small envelope so you can replace a page if it gets damaged.
- Use a permanent‑marker pen on the back of each page to write the date or a short note – it’s a sweet detail only you’ll see.
- Rotate themes seasonally: spring blossoms, holiday lights, summer beach snaps. The album stays fresh without buying new magnets.
So, ready to give your wedding photos a home that’s as dynamic as your love story? Grab a handful of your favorite shots, print them on matte paper, slap on a thin magnetic sheet, and start building a keepsake that sticks around – literally.
Conclusion
So there you have it—your kitchen can become a living scrapbook thanks to wedding photo magnets.
Think about those tiny moments you’ve just read about: a mini‑album that pops up while you prep dinner, a guest‑book wall that doubles as fridge art, or a set of place‑card magnets you still use on anniversaries. All of them share one thing: they turn ordinary metal surfaces into daily love notes.
What’s the biggest win? You get a reminder of your big day every time you grab a snack, and you never have to dig through a dusty album again. It’s cheap, it’s personal, and it’s ridiculously easy to set up with just a few prints and a magnetic sheet.
Ready to try it? Grab your favorite wedding snap, cut it to a bite‑size size, slap on a thin magnet, and let the habit of opening the fridge become a mini‑celebration.
And if you’re looking for more ideas—maybe a save‑the‑date magnet or a seasonal swap—keep experimenting. The only limit is how many memories you want to see on your fridge door.
Happy magnet‑making, and may every glance at your wedding photo magnets bring a smile.
So go ahead, stick those moments everywhere, and watch your love story stay front‑and‑center daily.
FAQ
How do I choose the best photo for wedding photo magnets?
Start with a shot that makes you smile the instant you see it – think the first kiss, a goofy dance move, or the moment you both burst out laughing. Pick a high‑resolution image; you want the details crisp when the magnet is only a few inches wide. If you have a photo that’s a little dark, boost the brightness in a free editor, then preview it at the size you plan to print.
What size should my wedding photo magnets be for a fridge?
Most couples find 3 × 3 inches perfect for a quick glance without crowding the door. If you love a collage feel, mix in a few 2 × 2 inches for guest‑name tags or tiny details. For larger fridge doors, 4 × 6 inches works well as a centerpiece. The trick is to leave a little breathing room so the magnets don’t feel cramped.
How can I make my wedding photo magnets durable and long‑lasting?
Use a UV‑coated finish or a thin layer of clear Mod Podge to guard against kitchen spills and sunlight. Choose a magnetic sheet with a medium‑strength adhesive – strong enough to stay put, but gentle enough to lift without bending the photo. After they’re printed, let the coating cure for at least 24 hours before sticking them on the fridge; that extra patience pays off in durability.
Can I personalize wedding photo magnets with text or dates?
Absolutely. Most design tools let you overlay a short line of text – a wedding date, a favorite lyric, or a tiny “We said yes!” Keep the font legible at small sizes; sans‑serif or a clean script works best. If you’re feeling crafty, add a tiny handwritten note on the back with a permanent marker. It becomes a secret love note that only the holder sees.
Are wedding photo magnets safe for all fridge surfaces?
Yes, they’re safe for stainless steel, enamel, and even the metal side of a pantry door. Just make sure the surface is clean and dry before you apply the magnet; a quick wipe with a damp cloth removes crumbs and fingerprints. Avoid placing them on painted wood or glass – the magnet won’t stick, and you could scratch the finish.
Where can I order high‑quality custom wedding photo magnets?
Look for a service that offers a magnetic sheet, UV coating, and a quick turnaround – that way you can test a few samples before committing to a full batch. Many vendors let you upload your design directly, preview the final look, and even order a single proof magnet. Once you’re happy with the proof, you can scale up to the quantity you need for your kitchen, office, or gifting.


