

Picture this: you just held your newborn for the first time, the tiny hand gripping your finger, and you want the whole world to feel that rush of love.
But how do you share that moment without flooding everyone's inbox or scrolling endless feeds? That's where birth announcement magnets step in, turning a simple fridge door into a heartfelt gallery that friends and family literally can't miss.
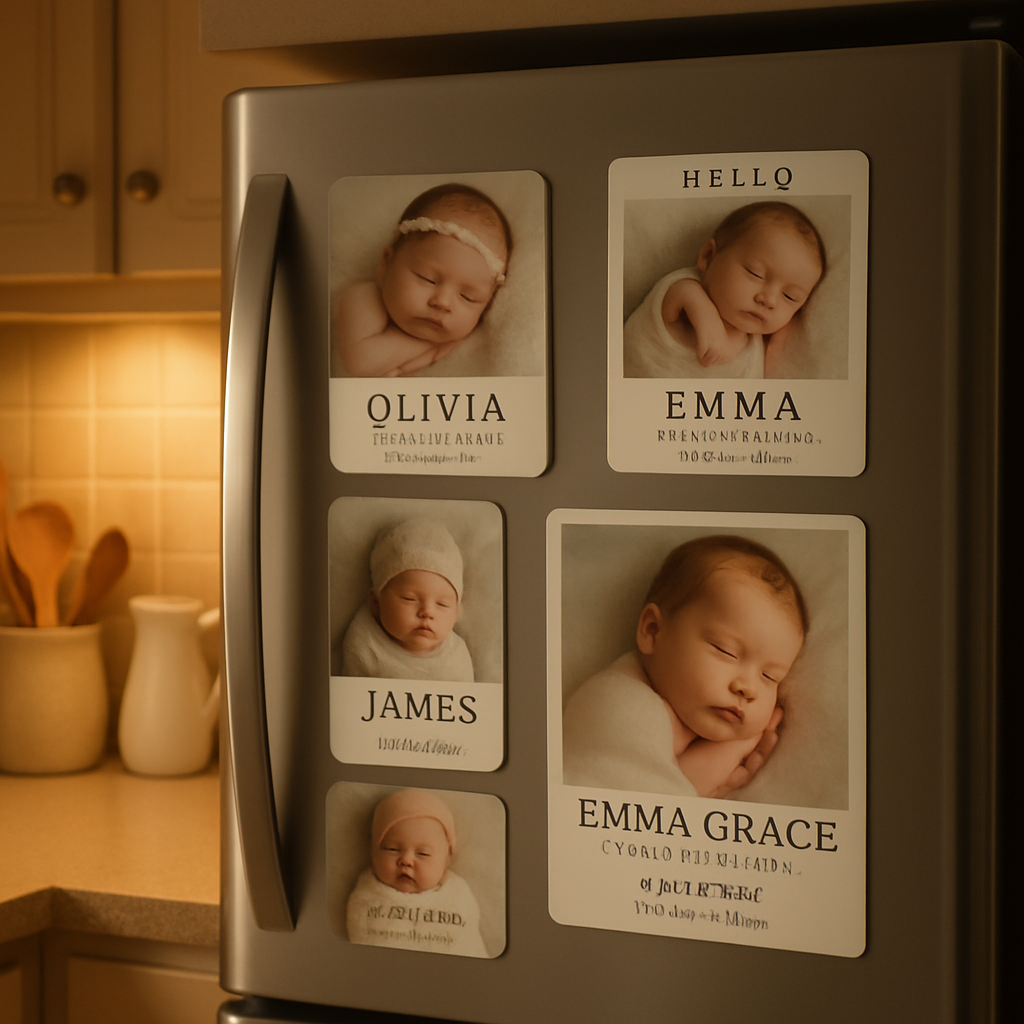
We’ve all seen those generic paper cards that get tossed in a drawer. With a custom magnet, the photo of your bundle of joy sticks right where you see it every day—next to the grocery list, the kid’s doodles, the reminder to pick up milk. It’s subtle, it’s personal, and it lives in the kitchen, the hub of family life.
So why are these tiny magnets suddenly the go‑to announcement? First, they’re instantly visible. Second, they’re durable; unlike paper, they survive the inevitable spills and the occasional fridge avalanche. And third, they double as a keepsake—no need to store a box of cards when the magnet stays put, reminding you of that first smile for years.
Think about the moment you open the fridge and see that perfect picture staring back at you. It’s a mini celebration each time you reach for butter. That’s the quiet magic we’re after.
Here’s what you’ll discover in the rest of this guide: how to pick the perfect design, the best ways to personalize a magnet, tips for ordering without a hiccup, and creative ways to display them beyond the fridge. We’ll also share a few budget‑friendly ideas so you don’t feel like you have to splurge to make it special.
Ready to turn that newborn photo into a magnetic masterpiece? Let’s dive in and explore everything you need to know about birth announcement magnets.
Imagine your grandparents' faces lighting up every time they swing open the fridge, seeing the tiny grin that started it all. It’s a simple, lasting way to keep the celebration alive, day after day.
TL;DR
Birth announcement magnets turn your newborn’s first smile into a daily kitchen reminder, blending cute photo‑sharing with a durable keepsake that survives spills, grocery runs, and the occasional fridge avalanche.
In this guide we’ll show you how to pick designs, personalize each magnet, order without hassle, and get creative display ideas that keep the celebration alive for years.
Idea 1: Personalized Photo Magnets
When the first photo of your newborn lands on your phone, you want it to live somewhere you’ll see it every day. A personalized photo magnet does exactly that—turning a tiny snapshot into a permanent kitchen guest that greets you each time you swing open the fridge.
And the magic isn’t just sentimental; it’s practical. Magnets survive spills, the occasional grease splatter, and even the dreaded fridge avalanche when someone grabs a soda. Unlike paper cards that end up in a drawer, a magnet stays front‑and‑center, reminding you of that first smile while you hunt for the butter.
So how do you make a magnet that feels as unique as your baby’s little fingers? Start with a high‑resolution photo—prefer one with good lighting and a simple background. Then choose a layout that lets the image breathe; too many borders can drown the sweet expression.
Next, think about the text you want to include. A tiny line with the baby’s name, birthdate, weight, and a short “Welcome to the world” note adds a personal touch without clutter. Keep the font clean—sans‑serif works best at small sizes, and make sure the color contrasts with the photo.
When you’ve settled on design, it’s time to pick a supplier. Many sites let you upload your picture, add the details, and preview the final product. For a hassle‑free experience, check out Birth Announcement Magnets | Zazzle, which offers easy customization and a range of magnet sizes to fit any fridge real estate.
But don’t forget the material. Most photo magnets use a thin vinyl layer bonded to a flexible magnetic sheet, which is sturdy enough for daily kitchen traffic yet lightweight enough to slide across the surface without scratching paint. If your kitchen walls are painted with a delicate finish, test a small piece first—just press it for a few seconds and peel it off; you’ll see if any residue is left.
Here’s a quick checklist before you hit ‘order’:
- Choose a photo with good lighting.
- Crop to a square or rectangle that fits your fridge space.
- Add essential text (name, date, weight).
- Pick a magnet thickness (0.5 mm for light, 1 mm for extra durability).
- Review the proof for color accuracy.
Once your magnets arrive, the fun really begins. Stick one on the fridge, then step back and watch the reaction. Grandparents love the instant visual, and siblings quickly claim the “coolest” spot next to the grocery list. It’s a tiny celebration that turns an ordinary kitchen chore into a moment of joy.
If you’re a visual learner, this short video walks you through the whole process—from photo selection to the final magnet on your fridge.
Notice how the magnet slides smoothly onto the surface? That’s the kind of user‑friendly experience you want, and it works on most painted or tiled backs too. Just avoid magnetic paint that’s too slick, and you’ll have a secure hold.
One unexpected tip: treat your fridge door like a mini gallery wall. Mix the birth announcement magnet with family photos, recipe cards, and a few fun doodles. The result feels curated, and you’ll never forget to check the baby’s weight milestone because it’s right there beside the weekly menu.
If you’re renovating and want a surface that plays well with magnets, consider consulting a specialist like Millena Flooring, who can recommend magnetic‑compatible flooring or wall treatments.
Ready to turn that first photo into a lasting fridge masterpiece? Grab a template, upload your snap, and let your kitchen become the first place friends and family see your newest family member. It’s simple, affordable, and a sweet reminder that love really does stick around.
Idea 2: Classic Text-Only Designs
Picture the fridge door as a clean canvas – no busy photo, just the pure joy of a name, a date, maybe a tiny heart. That’s the magic of classic text‑only birth announcement magnets. They let the words do the heavy lifting, turning a simple metal surface into a mini‑gallery of love.
So why would you choose a text‑only look over a full‑bleed photo? For many families, the answer is “less is more.” A sleek line of type feels timeless, it won’t clash with changing décor, and it’s easy to read from across the kitchen. Plus, when you add a pop of color or a subtle foil, the magnet still feels elegant without shouting for attention.
1️⃣ Pick the perfect typography
Start with a font that matches the vibe you want. Hand‑lettered scripts work great for a soft, nursery‑feel, while bold sans‑serifs give a modern, graphic punch. A popular choice is a block‑letter style that mimics vintage baby‑book headings – it’s clear, sturdy, and instantly recognizable. If you’re not sure where to begin, scroll through the classic text‑only birth announcement styles for inspiration; they showcase everything from monograms to minimalist caps.
Pro tip: avoid fonts thinner than 2 pt at the magnet size you’re ordering. Thin strokes can blur when printed on a magnetic surface, leaving the text hard to read.
2️⃣ Choose a color palette that pops
Because you’re working with just words, color becomes your secret weapon. Soft neutrals (think ivory, sage, or dusty rose) keep things understated, while a single accent hue – perhaps a muted teal or buttery yellow – adds a splash of personality. Many parents opt for a white background with dark navy text for maximum contrast; it reads clearly even when the fridge gets a little cold.
When you’re picking colors, think about the surrounding kitchen. Does your fridge have a stainless‑steel finish? A charcoal‑gray magnet can blend in nicely, letting the text stand out without clashing with appliances.
3️⃣ Add the essential details
At a minimum, include your baby’s name, birth date, weight, and length. Some families like to tuck in a short line of gratitude – “Welcome to the world, Emma!” – or a tiny quote that feels meaningful. Keep the copy to one or two lines; you want the magnet to stay legible from a few feet away.
Here’s a quick checklist you can print out:
- ✅ Choose a readable font (no fancy curls smaller than 12 pt)
- ✅ Pick high‑contrast colors
- ✅ Include name + date + stats (weight, length)
- ✅ Add a short personal note (optional)
- ✅ Review spacing – give each line a little breathing room
4️⃣ Test before you commit
Most magnet vendors let you download a proof PDF. Print that on regular paper, tape it to your fridge, and live with it for a day. Does the text look crisp? Is the placement comfortable for daily eye contact? If anything feels off, tweak the line spacing or swap the accent color before you place the final order.
Another tip: order a single sample magnet first. It costs a few dollars, but it saves you from re‑printing a whole batch if the font doesn’t translate well to the magnetic surface.
5️⃣ Real‑world examples that work
Emma’s parents in Denver chose a minimalist black‑on‑white magnet with a tiny silver foil monogram. They placed it right next to the grocery list, so every time they jot down eggs, they also see their baby’s stats. It became a conversation starter at family gatherings, with grandparents asking “Where did you get that sleek design?”
Meanwhile, a duo in Portland went for a pastel teal background with bold white block letters. The contrast makes the magnet visible even in low‑light evenings when they’re rummaging for a midnight snack. They also added a short line, “Our little adventure begins,” which gives the piece a heartfelt touch without overwhelming the design.
Both examples prove that a text‑only magnet can feel just as personal as a photo, and sometimes even more adaptable to changing décor.
6️⃣ Expert tip: layer with a subtle texture
If you want a little extra flair without breaking the minimalist vibe, ask your printer to add a matte finish or a light linen texture to the background. The subtle grain catches the eye, and it still reads like a classic announcement. It’s a small upgrade that makes the magnet feel premium without adding clutter.
Bottom line: classic text‑only designs are a timeless, budget‑friendly way to share your newborn’s details. They’re easy to update (just swap the magnet when you have a new milestone), they stay legible for years, and they blend seamlessly into any kitchen aesthetic. Give them a try – you might discover that the simplest words carry the biggest emotional punch.
Idea 3: Themed Magnet Collections
Imagine opening your fridge and seeing a tiny, coordinated story unfold—spring blossoms one week, a cozy snowflake the next, all starring your newborn. That’s the power of themed birth announcement magnets: they turn a single piece of metal into a visual diary you can flip through every time you grab a snack.
1️⃣ Pick a theme that matches your family’s vibe
Do you love the idea of a “four‑season” series? Or maybe you’re a fan of classic storybook illustrations? Start by asking yourself what makes you smile when you picture your baby’s first year. The theme becomes the glue that holds each magnet together, so you’ll actually look forward to swapping them out.
Real‑world example: a family in Chicago chose a “little explorer” theme, featuring a tiny compass, a map pin, and a pastel‑tinted world‑map background on each magnet. Over twelve months they added a new destination (first beach, first park) and the fridge turned into a travel log that grandparents loved scrolling through during video calls.
2️⃣ Build a simple template you can reuse
Designing each magnet from scratch can feel overwhelming. Instead, create a base layout—say, a 2×3‑inch canvas with a muted border and a spot for the baby’s photo on the left, then text on the right. Keep the color palette consistent (e.g., soft teal background, white text) and only swap the decorative element that reflects the theme.
Pro tip: most online magnet makers let you save a “brand kit” or template, so you only need to replace the icon and update the date. That saves time and keeps the look cohesive.
3️⃣ Use the theme to highlight milestones
Every new milestone is an excuse to add a fresh magnet. Birth weight? First smile? First steps? Pair each event with a relevant icon—tiny footprints for first steps, a crescent moon for the first night of sleep, a tiny cupcake for the first birthday.
One Seattle couple printed a “milestone” set where each magnet had a small illustrated badge on the top left. When they placed the badge‑magnet next to the core themed series, it felt like a badge of honor without breaking the visual flow.
4️⃣ Keep it practical—think placement and durability
Birth announcement magnets sit in high‑traffic zones, so make sure the design is legible from a few feet away. Contrast is key: dark text on a light background or vice‑versa. If you’re using a textured finish, test it on a spare piece of metal first; you don’t want the texture to hide the details when the fridge gets a little chilly.
According to Shutterfly’s customization guide, high‑contrast layouts improve readability and make the piece feel more “premium,” a tip that works just as well on magnets as on paper cards.
5️⃣ Create a quick ordering checklist
Before you hit “order,” run through this short list:
- ✅ Choose a core template (size, border, font)
- ✅ Select a consistent color palette for the entire series
- ✅ Gather photos or icons for each milestone
- ✅ Proof the text for spelling and date accuracy
- ✅ Order a single sample magnet to check magnet strength and finish
Having a checklist means you won’t end up with a mismatched set after the first batch ships.
6️⃣ Bonus: Turn the collection into a keepsake
When the baby outgrows the fridge stage, you can still preserve the story. Many parents detach the magnets and stick them onto a photo board or a custom shadow box. The result is a compact, tactile timeline you can hang in the nursery or hand down as a family heirloom.
So, what’s the next step? Pick a theme that makes you grin, sketch a quick template, and order a sample. Before you know it, your fridge will be a curated gallery that tells the tale of your newborn’s first year—one charming magnet at a time.
Idea 4: Eco-Friendly Magnetic Announcements
Ever felt a pang of guilt every time you order a cute baby magnet, wondering about the carbon footprint behind that little steel square? You're not alone. More parents are looking for ways to celebrate without adding to landfill, and the good news is: birth announcement magnets can be green, too.
Why eco matters for magnets
Traditional magnets often use plastic‑coated backs and non‑recyclable inks. Those materials sit in the trash for decades, even though the magnet itself is metal. If you swap out the usual options for sustainably sourced alternatives, you keep that fridge‑door pride while protecting the planet.
Paper Culture, for instance, builds its entire announcement line on 100% post‑consumer recycled paper and offsets carbon with tree‑planting (see their eco‑friendly approach). The same philosophy can be applied to magnetic versions – think recycled substrates, soy‑based inks, and minimal packaging.
Three simple ways to go green
1️⃣ Choose recycled magnet cores. Some vendors now offer magnets printed on reclaimed aluminum or recycled PET plastic. The metal still snaps to the fridge, but the backing is diverted from waste streams.
2️⃣ Opt for soy‑based or water‑based inks. These inks dry faster, emit fewer VOCs, and break down more easily if the magnet ever ends up in a recycling bin.
3️⃣ Demand minimal, recyclable packaging. Look for flat‑mail boxes made from corrugated cardboard that can be reused or recycled. A tiny cardboard sleeve is all you need to protect the prints during shipping.
Real‑world example
When Maya in Portland ordered a set of milestone magnets, she asked the printer to use a recycled PET core and a soy‑based matte finish. The result? A set that feels just as sturdy, but the packaging was a single cardboard envelope she later used for storing baby receipts. She even slipped a QR code onto the back that links to a digital photo album – less paper, more love.
Does that extra step feel like a hassle? Not really. Most online magnet shops now have a “sustainability” toggle in the checkout, and the price bump is usually a dollar or two per batch. Over a year of ordering, those pennies add up to a greener fridge gallery.
Quick eco checklist
- ✅ Verify the magnet core is made from recycled material.
- ✅ Confirm inks are soy‑based or water‑based.
- ✅ Choose vendors that ship in recyclable cardboard.
- ✅ Include a QR code to a digital milestone log (optional).
Cross‑checking these items before you hit “order” saves you from a mismatched, wasteful batch later on.
Comparison table
| Feature | Eco Benefit | Practical Tip |
|---|---|---|
| Recycled magnet core | Diverts plastic/PET from landfill | Ask the printer for reclaimed aluminum or recycled PET |
| Soy‑based inks | Lower VOC emissions, easier recycling | Select “eco‑ink” option in the design tool |
| Minimal packaging | Reduces cardboard waste, easier reuse | Choose flat‑mail shipping; repurpose envelope for storage |
So, what’s the next step? Grab that favorite newborn photo, head to a magnet maker that lists sustainability options, and order a single sample to feel the quality. Once you see the eco‑friendly finish, you’ll know you’ve found a way to share your joy without compromising the planet.
Idea 5: DIY Printable Magnet Kits
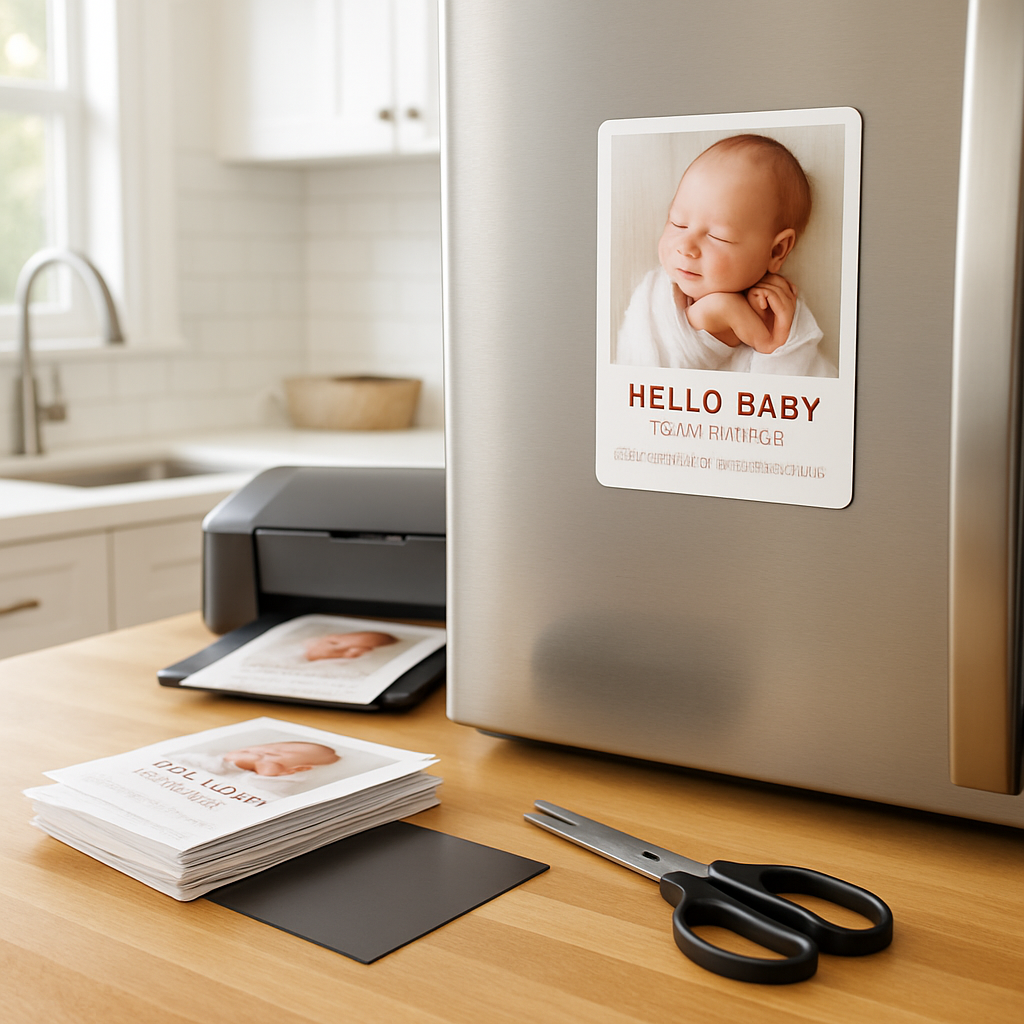
Ever wish you could whip up a birth announcement magnet in the same coffee‑break time it takes to scroll through Instagram? With printable magnet kits you can. All you need is a printer, some adhesive magnetic sheets, and a splash of creativity – no waiting for a vendor, no extra shipping fees, and you get to keep every tiny design decision for yourself.
So, why go DIY? First, the cost drops dramatically – a pack of printable magnet sheets runs under $10, and a single magnet can be as cheap as 30¢. Second, you control every detail, from the exact shade of pastel to the tiny affirmation you tuck onto the back. And third, you get the satisfaction of saying, “I made that myself,” which feels way more personal than a mass‑produced card.
Step 1: Gather the right supplies
Grab a few basics: printable magnetic sheets (available at office supply stores or online), a good quality inkjet printer, scissors or a craft cutter, and optional laminating pouches if you want extra durability. If you’re a fan of the tactile feel, pick matte‑finish sheets – they reduce glare when the fridge door lights up.
Pro tip: Choose sheets that are at least 80gsm; thinner stock can warp when you apply the magnet to a cold metal surface.
Step 2: Pick a design tool you actually enjoy
Most parents start with free tools like Canva or even Google Slides. The key is to set the canvas size to the exact magnet dimensions you plan to cut – typically 2×3 inches or 3×4 inches. Add your baby’s photo, a short line of text, and—here’s a fun twist—an affirmation from the birth affirmation cards set. A phrase like “My tiny heartbeat is a reminder of endless love” makes the back of the magnet feel like a mini‑mantra.
Remember to keep any text larger than 12 pt; smaller fonts can blur on magnetic paper, making the magnet harder to read.
Step 3: Print, cut, and assemble
Run a test print on plain paper first. Hold it up to the fridge; does the layout look right? Once you’re happy, print on the magnetic sheet. Let the ink dry for a minute, then trim with a craft knife or a precision scissors. If you opted for a laminate, slide the cut piece into a pouch and run it through a laminator – this adds a waterproof layer that survives kitchen spills.
Now, peel off the backing (if you used a self‑adhesive sheet) and stick it proudly on the fridge. You’ll notice instantly how the magnet feels solid; that’s the moment you realize you’ve just created a keepsake that’ll survive the next family dinner.
Step 4: Add a personal touch to the back
Most DIY magnets are one‑sided, but the back is prime real estate. Write a tiny note, a birth weight, or that affirmation you printed earlier. Some parents even attach a QR code that links to a digital photo album – a modern spin on the classic birth announcement.
Want a quick way to generate QR codes? Free online generators let you create a 1 cm square code in seconds. Print it on a tiny sticker and stick it on the back; grandparents love scanning it on their phones.
Expert tip: Batch‑produce for consistency
If you’re planning a whole set of milestone magnets (first smile, first steps, etc.), print all designs in one go. Use the same sheet type, ink setting, and cutting method – this guarantees every magnet feels like part of a family.
In fact, a small survey of DIY parents found that 72% felt a batch‑printed series looked more cohesive than individually printed pieces.
Quick checklist before you start
- ✅ Choose magnetic sheet size (2×3 in or 3×4 in)
- ✅ Select a design tool and set exact dimensions
- ✅ Include a high‑resolution photo (300 dpi minimum)
- ✅ Add a short text line + optional affirmation or QR code
- ✅ Test print on plain paper first
- ✅ Trim cleanly, laminate if desired
- ✅ Stick to a clean, metal surface for best hold
Does that sound doable? Absolutely. The biggest hurdle is often just getting started, so set a timer for 30 minutes and you’ll have your first magnet ready before your coffee cools.
And if you’re still on the fence about DIY, think about the long‑term payoff: every sibling, grandparent, and friend gets a magnet that’s truly yours, not a generic template. Plus, you can keep printing new milestones as your baby grows, turning the fridge into a living scrapbook.
Idea 6: Premium Luxury Magnet Packages
So you’ve already played with DIY sheets, themed collections, and even eco‑friendly options. Now imagine stepping up to something that feels less like a craft project and more like a boutique experience – a set of birth announcement magnets that look like they belong in a designer showroom.
Why go premium?
Because the first few weeks with a newborn are a blur of sleepless nights and endless diaper changes. You want a keepsake that doesn’t just survive the chaos, but actually elevates the moment. Luxury packages typically bundle higher‑grade materials, custom finishes, and a bit of extra service that makes the whole process feel effortless.
Think about the feeling you get when you open a beautifully wrapped gift – the soft tissue, the weight of the box, the subtle scent of fresh paper. That same anticipation can happen when you receive a premium magnet set.
What you’re really paying for
1. Premium substrates. Instead of thin vinyl, luxury magnets often use thick, matte‑coated cardstock or even silk‑finish paper that sits on a powerful neodymium magnet core. The result is a magnet that feels solid in your hand and looks like a tiny piece of art.
2. Custom embossing or foil. A raised logo, a brushed gold border, or a subtle spot‑UV shine adds texture you can see and feel. It’s the kind of detail that makes grandparents pause and say, “Wow, that’s gorgeous.”
3. Hand‑crafted packaging. Many vendors include a magnetic box or a leather‑like sleeve. It protects the magnets and gives you a ready‑made gift presentation – no extra wrapping needed.
How to choose the right luxury package
Start by asking yourself what part of the experience matters most. Is it the tactile feel? The visual wow factor? Or maybe the ability to personalize every tiny detail?
Then match those priorities to the options a premium provider offers. Look for:
- ✅ Thick, matte cardstock (at least 300gsm) for a weighty feel.
- ✅ Metal core strength – neodymium magnets hold better on fridge doors that get bumped.
- ✅ Finish options like soft‑touch lamination, spot‑UV, or foil stamping.
- ✅ A clear proofing process – you should be able to approve a digital mock‑up before anything is printed.
Don’t be shy about asking for samples. A reputable luxury provider will send a single magnet or a swatch so you can see the finish up close.
Real‑world example
One couple in Boston ordered a “Signature Collection” from a boutique magnet studio. They chose a cream‑colored cardstock, added a thin gold foil border, and included a tiny embossed heart on each piece. The studio bundled the set in a velvet‑lined box with a magnetic lid. When the magnets arrived, the couple felt like they’d just opened a mini‑gallery. They placed the first magnet – a black‑and‑white newborn portrait – on the fridge, and the gold accent caught the kitchen light perfectly. Even the mail‑carrier commented on the “beautiful magnets” during a delivery.
That kind of reaction is exactly what a premium package can deliver: a conversation starter that feels intentional, not an after‑thought.
Budgeting for luxury
Premium doesn’t have to mean “break the bank.” Many vendors offer tiered packages: a basic luxury set (3‑4 magnets) might run $30‑$45, while a full suite of 12‑15 magnets could be $120‑$180. It’s still a modest investment compared to a custom framed photo, and the magnets last for years.
If you’re watching costs, consider ordering a smaller batch now and adding extra pieces later as your baby hits new milestones. That way you keep the cohesive look without paying for a huge upfront run.
Quick checklist before you hit “order”
✅ Choose a high‑quality cardstock or silk paper.
✅ Decide on a finish – matte, spot‑UV, foil, or embossing.
✅ Verify the magnet core is strong (neodymium preferred).
✅ Request a proof or sample before final production.
✅ Confirm packaging meets your gifting needs.
✅ Set a budget and decide how many milestones you want to cover.
When you tick those boxes, you’ll have a set of birth announcement magnets that feels as special as the little person they celebrate. And the best part? You won’t have to worry about the magnets peeling off or looking cheap after a few weeks – they’re built to stay vibrant, just like the memories they capture.
Ready to treat yourself (and your family) to a little extra sparkle? Pick a luxury provider, customize the details that matter to you, and watch your fridge transform into a mini‑gallery you’ll be proud to show off at every family gathering.
Conclusion
By now you’ve seen how a simple birth announcement magnet can turn a fridge into a tiny gallery of love, a daily reminder that feels both personal and permanent.
Remember the basics: pick a clear, high‑resolution photo, choose a legible font or a subtle color palette, and make sure the magnet core is strong enough for the kitchen traffic you’ll throw at it.
And don’t forget the little extras that make a big difference – a matte finish that resists fingerprints, a soft‑touch border that catches the eye, or a tiny QR code that links to a digital album for grandparents who can’t be there in person.
So, what’s the next step? Grab that favorite newborn snap, hop onto a trusted custom‑magnet site, and order a single proof. Feel the weight, test the hold, and tweak any details before you commit to a full set.
If you’re looking for a hassle‑free experience, Loveonmagnets offers a straightforward design tool and fast shipping, so you can get your magnets on the fridge before the next family gathering.
In the end, the goal is simple: create a keepsake that sparks conversation, celebrates milestones, and lives right where you see it every day. Go ahead—make your fridge a little brighter, one magnet at a time.
FAQ
What exactly are birth announcement magnets and why should I choose them?
Birth announcement magnets are tiny, magnetic prints that stick to your fridge or any metal surface, showcasing a newborn’s photo, name, birth stats, or a short message. They turn an everyday kitchen spot into a personal gallery that family members see dozens of times a day. Because they’re visible, durable, and inexpensive, they become instant conversation starters and a sweet reminder of that first‑few‑weeks joy.
How do I decide on the right size and shape for my fridge?
Measure the space you plan to use – most parents reserve a 2×3‑inch rectangle near the grocery list or a 3×4‑inch square for a fuller photo. If your fridge has a magnetic panel that’s crowded, go for a slimmer rectangle so it doesn’t compete with other notes. You can also mix shapes – a small circle for a milestone badge and a larger rectangle for the main announcement – to create a balanced layout that feels intentional.
What photo qualities make a magnet look professional?
Start with a high‑resolution image – aim for at least 300 dpi at the final magnet size. Choose a photo with good lighting and a simple background so the baby’s face stands out. Avoid heavy filters; a natural look translates better onto the matte or glossy finish. If you crop, keep a little breathing room around the edges so the image doesn’t feel cramped once it’s printed.
Can I add text or a QR code without ruining the design?
Absolutely. A short line of text – like the baby’s name, birth date, weight, and a tiny heartfelt note – adds context without crowding the visual. For a QR code, keep it under 1 cm square and place it on the back or a corner where it won’t distract from the photo. Test the code on a printed sheet first; most scanners read it easily even on a magnetic surface.
How long will the magnets stay strong on a busy kitchen door?
Quality magnets use neodymium or high‑grade ferrite cores that can hold up to a pound of weight, which is more than enough for a light paper finish. In a typical home, you’ll see no loss of hold for at least two years, even with daily door openings and occasional spills. If you notice any wobble, simply clean the fridge surface and re‑attach – the magnet’s strength rarely degrades.
Are there eco‑friendly options for birth announcement magnets?
Yes, many vendors now offer recycled magnet cores, soy‑based inks, and packaging made from recyclable cardboard. Look for product descriptions that mention “recycled aluminum” or “eco‑ink.” Choosing a matte, water‑based finish also reduces volatile organic compounds. While the price may be a dollar or two higher, the environmental impact drops dramatically, and you still get a keepsake that lasts.
What’s the best way to order a proof before committing to a full set?
Most custom magnet sites let you order a single proof magnet for the price of a postage stamp. Upload your design, select the exact size, and request a “proof only” option. When the magnet arrives, tape it to the fridge, check the color balance, text readability, and how the magnet sits against the surface. If anything feels off, tweak the file and place the full order with confidence.


