

Ever walked into your kitchen and felt something was missing, even though the fridge was already covered in notes and grocery lists?
That's the moment we all know: the door is functional, but it could also be a tiny gallery that tells your story. Imagine turning that bland surface into a curated showcase of memories, humor, and style.
We're talking fridge magnet display ideas that go beyond the usual 'buy a magnet and stick it on.' Think of it as a mini‑museum where each piece has purpose—whether it's a favorite travel photo, a witty quote, or a seasonal splash of color.
So, what does a good magnet display look like? First, start with a theme. Maybe it's 'family moments,' 'kitchen hacks,' or 'seasonal vibes.' A theme gives you a quick decision filter: does this magnet fit, or does it clash?
Next, play with layout. Some folks love a grid—neat rows that feel organized. Others prefer a collage, letting magnets overlap like a scrapbook. Try both on a spare sheet of paper first; you'll see instantly which vibe matches your kitchen personality.
Don't forget the power of negative space. A crowded door can feel overwhelming, but a few well‑placed pieces let each magnet breathe and catch the eye. A single, oversized photo magnet can become the focal point, while smaller funny magnets orbit around it.
And here's a little secret: mix in functional magnets—like a magnetic spice rack or a magnetic notepad. They blend utility with style, making your display both beautiful and practical.
Feeling inspired? Grab a few of your favorite snapshots, maybe print them as custom photo fridge magnets, and start arranging. Move them around, step back, and notice how the mood of your kitchen shifts.
Ready to turn that fridge into a conversation starter? Let's dive into the next sections where we break down specific styles, seasonal swaps, and DIY tricks that make your fridge magnet display ideas truly shine.
TL;DR
Fridge magnet display ideas turn an ordinary kitchen door into a personal gallery, mixing photos, fun quotes, and functional magnets for style and convenience.
Pick a theme, play with layout, and use negative space to create a curated, ever‑changing focal point that sparks conversation and keeps your meals daily organized.
Idea 1: The Photo Collage Magnet Board
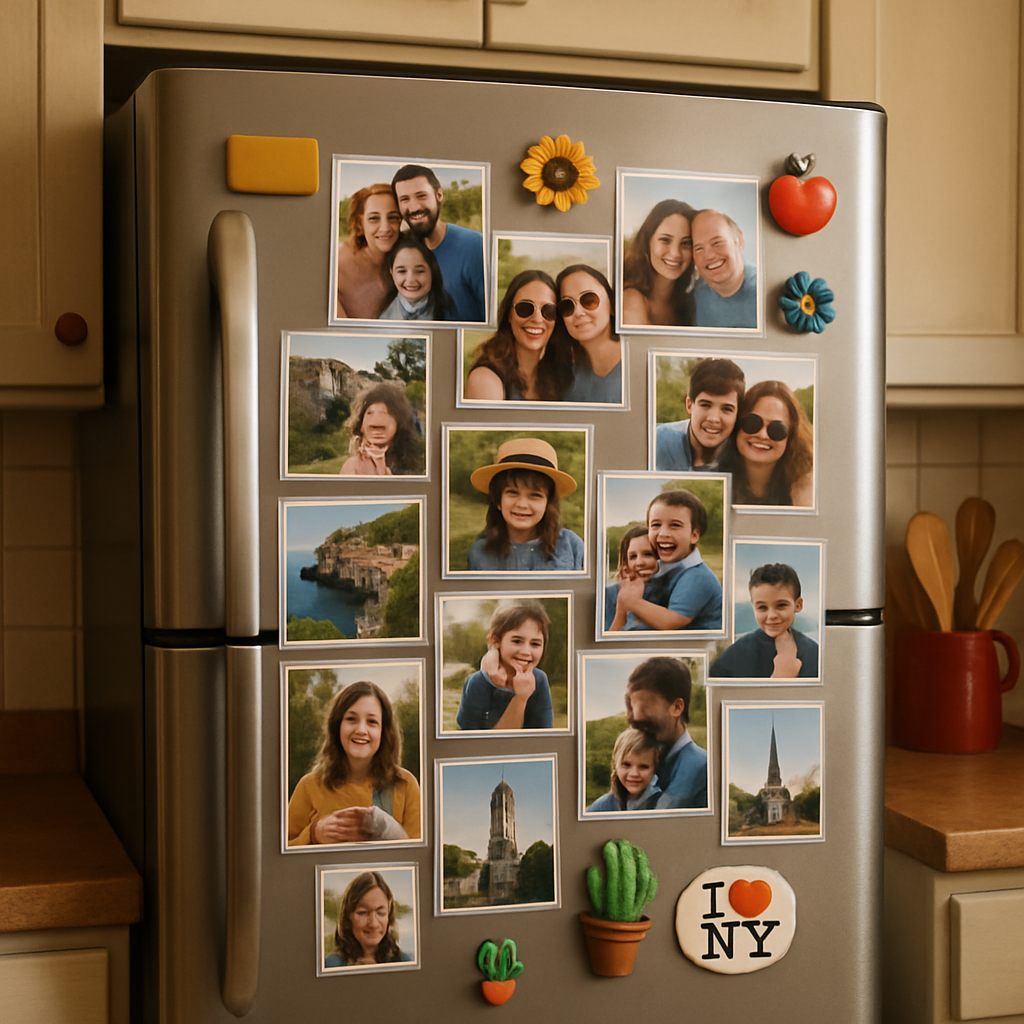
Ever walked past your fridge and thought, “I could totally turn this into a memory wall”? That feeling is the spark for the photo collage magnet board, a playful way to showcase snapshots while keeping the door functional.
Here’s the vibe: you gather a handful of your favorite pictures—maybe a beach sunset, a goofy pet moment, and that candid family dinner photo. Print them as custom photo magnets (they’re surprisingly easy to order from Loveonmagnets). Then you start arranging them directly on the fridge, letting them overlap like a scrapbook spread.
Step‑by‑step layout tips
First, lay all the magnets on a flat surface. This gives you a chance to play with composition without committing. Try a loose “cloud” shape for a dreamy feel, or line them up in a loose grid if you like order.
Next, pick a focal point. A larger portrait or a bright travel shot works great as the centerpiece. Let the smaller magnets orbit around it—think of them as supporting characters in a story.
Do you ever notice how a single bold piece can make the whole arrangement feel intentional? Use that principle. A 4×6 photo magnet can become the anchor, while 2×2 mini‑photos add texture.
Mix in functional flair
Don’t let the board become all pretty‑pictures and no purpose. Slip a magnetic grocery list, a spice rack, or a tiny whiteboard into the mix. The functional pieces act like punctuation, giving the collage breathing room.
Pro tip: alternate between vertical and horizontal photos. That tiny visual rhythm keeps eyes moving and prevents the board from looking like a single long strip.
And because you’re using custom photo magnets, you can swap them out seasonally. A summer beach scene fades into autumn leaves, then into holiday lights—your fridge evolves with your life.
Materials that matter
Choose magnets with a strong pull but a slim profile, so they sit flush and don’t bulge the door. If you love a matte finish, go for that; glossy can make colors pop. The key is consistency—mixing wildly different magnet styles can look chaotic.
Want a quick guide on picking the right photo magnets? Check out How to Choose and Create Personalized Photo Fridge Magnets That Stand Out for insider tips on durability, sizing, and coating options.
Now, step back and look. Does the collage feel like a conversation starter? If a guest walks in and asks, “Where did you get that picture?” you’ve succeeded.
Here’s a little secret: the negative space between photos is just as important as the images themselves. A gap the size of a thumb can give each memory room to breathe, making the whole board feel curated, not cluttered.
Finally, keep a small “magnet stash” drawer nearby. Whenever you bring home a new print, you can instantly test it in the collage without scrambling for a spare magnet.
Ready to give your fridge a personality boost? Grab a few prints, order your custom photo magnets, and let the collage grow with your moments. You’ll find that a simple magnet board can turn everyday kitchen traffic into a stroll down memory lane.
Idea 2: Magnetic Chalkboard Gallery
Ever wish your fridge could double as a doodle board and a memory wall?
That’s exactly what a magnetic chalkboard gallery does – it gives you a smooth, writable surface that you can also cover with custom photo magnets.
Think of it as a living scrapbook you can erase, rewrite, and refresh whenever the vibe changes.
Why a chalkboard surface works
Because chalk is instantly editable. One minute you’ve written a grocery list, the next you’ve scribbled a funny quote from a kid.
And the magnet side stays strong enough to hold your favorite snapshots, recipe cards, or even a tiny magnetic spice rack.
So, does this sound like the perfect blend of function and nostalgia?
Step‑by‑step setup
1. Pick a magnetic chalkboard sheet that matches your fridge size. You can find peel‑and‑stick versions that cling without damaging the door.
2. Peel the backing and smooth it onto the fridge, making sure there are no air bubbles.
3. Grab a handful of custom photo magnets – maybe a beach sunset, a pet portrait, or a tiny magnetic recipe card.
4. Arrange them in a loose grid or a whimsical collage. Leave a few empty squares for daily notes.
5. Grab a piece of chalk and start labeling! Write the date, a short story behind each photo, or a quick reminder.
6. When the month rolls over, wipe the board clean, swap out a few magnets, and let the new arrangement tell a fresh chapter.
Design tips that keep it from feeling chaotic
Start with a single anchor magnet – a larger image that draws the eye.
Then sprinkle smaller magnets around it, like supporting actors.
Leave a “breathing room” of about a thumb’s width between groups; it makes each piece feel purposeful.
Use different chalk colors for categories: green for groceries, purple for birthdays, orange for quick jokes.
And don’t forget to add a tiny magnetic clip or two – they’re perfect for holding receipts or a small to‑do list.
Real‑world example
Imagine a busy family kitchen. Mom sticks a photo of the kids’ first bike ride in the top left, while Dad pins a magnetic recipe card for Sunday roast in the center.
Every morning, a quick glance at the board tells you: “Buy apples, call Grandma, and don’t forget the new art class schedule.”
When the kids bring home a new drawing, you just snap a magnetic backing onto it, pop it onto the chalkboard, and write the date underneath. It becomes a mini‑gallery that grows with the family.
Maintenance hacks
Keep a small chalk‑eraser drawer on the counter – it’s cheaper than a fancy cleaning kit.
If chalk dust gets stubborn, a damp cloth followed by a dry wipe does the trick.
And because the magnets sit flush, you won’t have to worry about them pulling off the board when you clean.
Quick checklist
- Magnetic chalkboard sheet (size fits your fridge)
- Custom photo magnets (at least 3–5 for starter)
- Chalk in a few colors
- Mini eraser and cloth
- Optional magnetic clips for notes
Ready to turn your fridge into a magnetic chalkboard gallery? Grab the supplies, print a few favorite photos, and start doodling. You’ll soon notice how the simple act of writing and swapping magnets adds a playful rhythm to your daily routine.
And the best part? Because everything is magnetic, you can completely redesign the look whenever inspiration hits – no drilling, no paint, just pure, removable creativity.
Idea 3: Seasonal Theme Rotations
Ever notice how the kitchen feels different when the leaves turn orange or when the snow starts to sparkle? That subtle shift is a cue we can harness on our fridge.
Seasonal theme rotations turn your fridge into a living mood board that mirrors the calendar, and the best part is you only need a handful of magnets to make it happen.
Why rotate your magnets?
Because change keeps the space fresh. When you swap a single magnet each month, you get a tiny dopamine hit – it’s like a mini‑redecoration without the hassle.
Plus, seasonal magnets give you an excuse to showcase the moments that matter right now: a pumpkin‑spice photo in October, a beach snap in July, or a cozy family portrait for the holidays.
How to plan your rotation
Start with a simple calendar. Grab a sticky note and write the four main seasons, then break each season into two‑to‑three “mini‑themes” (think "Back‑to‑School", "Thanksgiving", "New Year's Eve").
Next, pick 3–5 magnet styles that can be reused across themes – a neutral frame, a blank‑canvas magnet for DIY doodles, and a couple of colorful shapes. These become your base.
Finally, design a small “magnet kit” for each mini‑theme. A kit might include one custom photo magnet, one funny quote magnet, and one decorative element (like a leaf‑shaped magnet for autumn).
Quick seasonal magnet ideas
- Spring: pastel flower prints, a photo of the first garden bloom, a tiny rain‑cloud magnet.
- Summer: bright beach photos, a flamingo‑shaped magnet, a mini‑calendar for vacation days.
- Fall: pumpkin or leaf magnets, a warm‑toned family portrait, a “sweater weather” quote.
- Winter: snowflake shapes, a holiday lights photo, a magnet with a simple "2025" countdown.
Notice how each idea uses the same core magnets and just swaps the seasonal accents? That keeps costs low and the process painless.
Tips for smooth swaps
Keep a shallow drawer or a magnetic tray on the side of the fridge. Store each season’s kit in a labeled envelope so you can grab it the day before the change.
Use a soft cloth to dust the board before you add new pieces – a clean surface makes the magnets sit flatter and looks more polished.
And if you’re feeling extra creative, write a short caption on the chalkboard side (if you have one) that explains the theme. It turns the fridge into a story‑telling hub.
Decision‑making table
| Season | Core Magnet Types | Suggested Accent |
|---|---|---|
| Spring | Neutral frame, blank‑canvas, pastel shape | Floral photo + rain‑cloud magnet |
| Summer | Neutral frame, blank‑canvas, bright shape | Beach snap + flamingo magnet |
| Fall | Neutral frame, blank‑canvas, warm shape | Pumpkin photo + leaf magnet |
| Winter | Neutral frame, blank‑canvas, icy shape | Snowflake photo + holiday lights magnet |
Now that you have a roadmap, go ahead and pick the first kit. Stick the new magnets on, step back, and let the seasonal vibe do its quiet magic. You’ll notice that even a tiny visual cue can lift the whole kitchen’s energy.
Ready to make your fridge a seasonal showcase? Grab a few custom photo magnets, add a couple of themed accents, and start rotating. It’s a low‑effort way to keep your home feeling fresh all year long.
Idea 4: Minimalist Grid Layout
If you love a clean look but still want a little personality on your fridge, the minimalist grid layout might be your new best friend.
Think of a newspaper crossword: each square has its own space, yet together they form a tidy picture. The same principle works for magnets.
So, how do you keep the grid from feeling sterile?
Why a grid works
A grid gives you negative space without the chaos of a free‑form collage. Each magnet gets breathing room, which makes even a simple black‑and‑white photo look intentional.
Because the eye loves order, you’ll notice yourself pausing a second longer to read a caption or admire a tiny souvenir.
Does that sound like the vibe you’re after?
How to create the perfect grid
Start by measuring the fridge door. A quick glance at the width and height lets you decide how many columns and rows feel balanced.
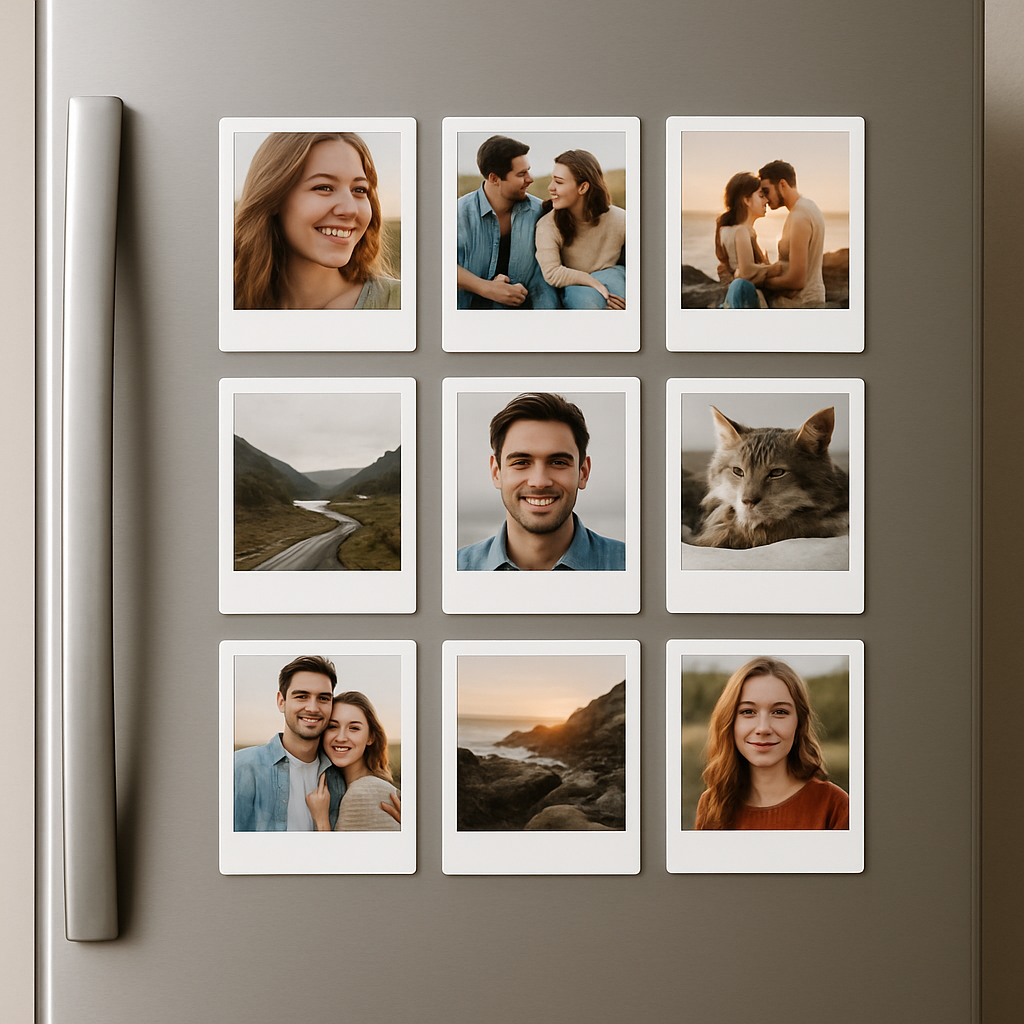
For most kitchens, a three‑by‑four grid (three columns, four rows) hits the sweet spot; it’s big enough for variety and small enough to stay tidy.
Next, lay your chosen magnets on a sheet of paper cut to the same size as your fridge. Move them around until the spacing feels even and aim for about the width of a thumb between each piece.
What if you only have a handful of magnets?
That’s fine and just fill the empty squares with neutral “placeholder” pieces. A plain white square or a simple shape keeps the grid intact without stealing the spotlight.
Choosing the right magnets
Custom photo magnets are perfect here because you can size them to fit any cell in the grid. Pick a matte finish if you love a subtle look, or go glossy for a pop of shine.
Mix in a few functional pieces and a magnetic grocery list or a tiny spice rack so the display stays useful as well as pretty.
Can you picture a single row of family portraits, each spaced like a gallery exhibit?
That visual rhythm makes the fridge feel like an intentional part of your décor, not an afterthought.
Maintenance tips
Because the grid is predictable, cleaning is a breeze. Grab a short microfiber cloth and wipe each square in turn and you’ll see dust disappear without moving any magnets.
If a magnet starts to lose its pull, swap it out for a fresh one from your stash. Keeping a small “magnet kit” near the fridge means you never have to hunt for a replacement.
Ready to give your kitchen a sleek, organized vibe with minimal effort?
Try the grid for a week, then step back and see if the fridge feels more like a calm canvas than a cluttered bulletin board.
Pro tip: use a thin ruler or the edge of a credit card to line up each magnet as you place it. The tiny extra effort guarantees perfectly straight rows, and you’ll feel a little sense of pride every time you glance at the fridge.
Idea 5: Interactive Magnet Puzzle Wall
Imagine turning a slice of your fridge into a magnetic puzzle that kids (and adults) can remix whenever the mood strikes. It’s like having a mini‑board game baked right into your kitchen, and it doubles as one of the most eye‑catching fridge magnet display ideas you’ll ever try.
How it works
Instead of flat photo magnets, you use interlocking puzzle pieces that each have a magnet on the back. When you snap them together, they form a picture, a map, or even a secret message. Pull a piece off, shuffle it around, and watch the design morph in seconds.
Because the pieces are magnetic, they stay put until you decide to move them. No adhesives, no holes, just pure, reusable fun that lives on your fridge door.
Choosing the right puzzle pieces
Start with a set of custom photo puzzle magnets from Loveonmagnets – you can upload a family portrait, a favorite travel shot, or even a whimsical illustration. The key is to pick a moderate difficulty: 9‑to‑12 pieces works well for most kitchens; big enough to be interesting, small enough to fit on a standard fridge door.
Look for magnets with a strong pull but a slim profile; you don’t want the puzzle to bulge the door or make it hard to close. A matte finish helps the colors stay true and reduces glare from kitchen lights.
Playful benefits
Every time you or your kids rearrange the puzzle, you’re creating a tiny moment of collaboration. It’s a low‑key way to practice problem‑solving, spatial reasoning, and even storytelling—what if that beach photo turned into a treasure map?
And because the puzzle is visible all day, it becomes a conversation starter for guests. “Hey, where did you get that cool magnet puzzle?” is a natural ice‑breaker that leads to sharing your custom magnet story.
Step‑by‑step setup
1. Measure a clear area on the fridge—about 12‑inch wide works for most families. 2. Order a custom puzzle set sized to that space; many providers let you choose piece count and shape.
3. When the magnets arrive, lay them flat on the counter and assemble the picture once, just to make sure everything fits. 4. Snap the completed puzzle onto the fridge, aligning it with the center of the chosen area.
5. Now pull a few pieces apart and re‑arrange them into a new pattern. Maybe you’ll swap the sky for a sunrise, or replace a pet’s face with a funny doodle using a separate decorative magnet.
Tips for a seamless look
Use a thin ruler or the edge of a credit card to press each piece firmly into place; you’ll feel a satisfying click that tells you the magnet is locked.
Keep a small “puzzle tray” on the countertop to store loose pieces when you want a break. It prevents them from rolling off the kitchen island and makes the next rearrangement effortless.
Keeping it fresh
Just like you rotate seasonal magnets, you can swap out an entire puzzle every few months. Send a new photo to the same custom‑magnet service, and they’ll ship a fresh set that slides right into the existing frame.
This keeps the fridge feeling new without any extra hardware. Plus, you get an excuse to dig out old photos, reminisce, and maybe even involve the whole family in picking the next image.
So, what’s the next move? Grab a favorite picture, turn it into a magnetic puzzle, and watch your fridge transform from a plain door into a dynamic, ever‑changing piece of art that invites play every time you open it.
FAQ
How can I keep my fridge magnet display ideas from getting messy?
Start by designating a small “magnet tray” or a shallow drawer on the counter. Every time you add a new piece, pop the extra ones into the tray – that way they don’t roll off the door when you open it. Use a thin ruler or the edge of a credit card to press each magnet firmly so it sits flush. A quick dust‑off with a microfiber cloth every week also prevents buildup and keeps the layout looking intentional.
What types of magnets work best for a kitchen fridge?
Look for magnets with a strong pull but a slim profile – you want them to stay put without bulging the door. Matte‑finished photo magnets blend nicely with kitchen lighting, while clear acrylic or metal shapes add a modern touch. Functional pieces like magnetic spice racks, grocery‑list pads, or a tiny whiteboard are great because they serve a purpose and still feel decorative.
How often should I rotate or update my fridge magnet display?
Most people find a monthly swap feels fresh without being a chore. Mark a calendar reminder on the first of each month, then pull out a “seasonal kit” you’ve pre‑packed with a few new magnets. If a special event pops up – a birthday, a new baby photo, or a holiday – feel free to add a surprise piece right away. The key is a small, consistent rhythm rather than a massive overhaul.
Can I use custom photo magnets for themed holidays?
Absolutely. Custom photo magnets let you match any holiday vibe: a snowy family portrait for winter, a pumpkin‑spice kitchen scene for fall, or a beach‑day snap for summer. Print them on a matte surface so they don’t glare under fluorescent light, and keep a tiny envelope of holiday‑specific magnets near the fridge. When the season changes, swap the old set for the new one and instantly give the kitchen a festive boost.
What's the best way to combine functional and decorative magnets?
Think of the fridge as a mini‑gallery with a few “punctuation” pieces. Start with a visual anchor – a larger photo or a bold graphic – then sprinkle functional items like a magnetic grocery list, a spice rack, or a tiny recipe card around it. The functional pieces act like commas, giving the eye a pause while still keeping the space useful. Keep the decorative magnets slightly larger than the functional ones so the display feels balanced.
How do I protect magnets and the fridge surface from damage?
Most fridge finishes handle magnets just fine, but it helps to clean the area with a gentle dish soap and a soft cloth before you stick anything on. Avoid using magnets with rough edges; a smooth coating prevents scratches. If you notice a magnet losing its pull, replace it rather than forcing it – a weak magnet can tug at the paint over time. A quick wipe with a dry microfiber cloth after each swap keeps everything looking sharp.
Conclusion
We've walked through a bunch of fridge magnet display ideas, from photo collages to seasonal swaps, and you can already picture your kitchen feeling a little more alive.
So, what's the next step? Grab a couple of your favorite snapshots, order custom photo magnets from Loveonmagnets, and start experimenting. You don't need a perfect layout right away – just place an anchor piece and let the smaller functional magnets fall into place like punctuation.
Remember, the magic lives in the tiny moments: a quick swap when the seasons change, a new recipe card that reminds you to try something daring, or a funny quote that makes you smile while you reach for the milk.
To keep the vibe fresh, set a reminder on your phone for a monthly refresh, or keep a small “magnet stash” drawer nearby so you can add or replace pieces on a whim.
And hey, if you enjoyed these ideas, why not share a photo of your revamped fridge on social media? Tag us so we can see how you turned a plain door into a personal gallery.
In short, fridge magnet display ideas are a low‑effort way to inject personality, organization, and a dash of fun into your daily routine. Give it a try – you’ll wonder how you ever lived without it.


