

Ever walked into a kitchen and caught yourself smiling at a tiny snapshot stuck to the fridge, wondering who made that little piece of nostalgia?
If you’ve ever thought “I need photo magnets near me” while scrolling through endless options, you’re not alone. We all love turning everyday surfaces into memory galleries, but the hunt for a local, reliable source can feel like chasing a moving target.
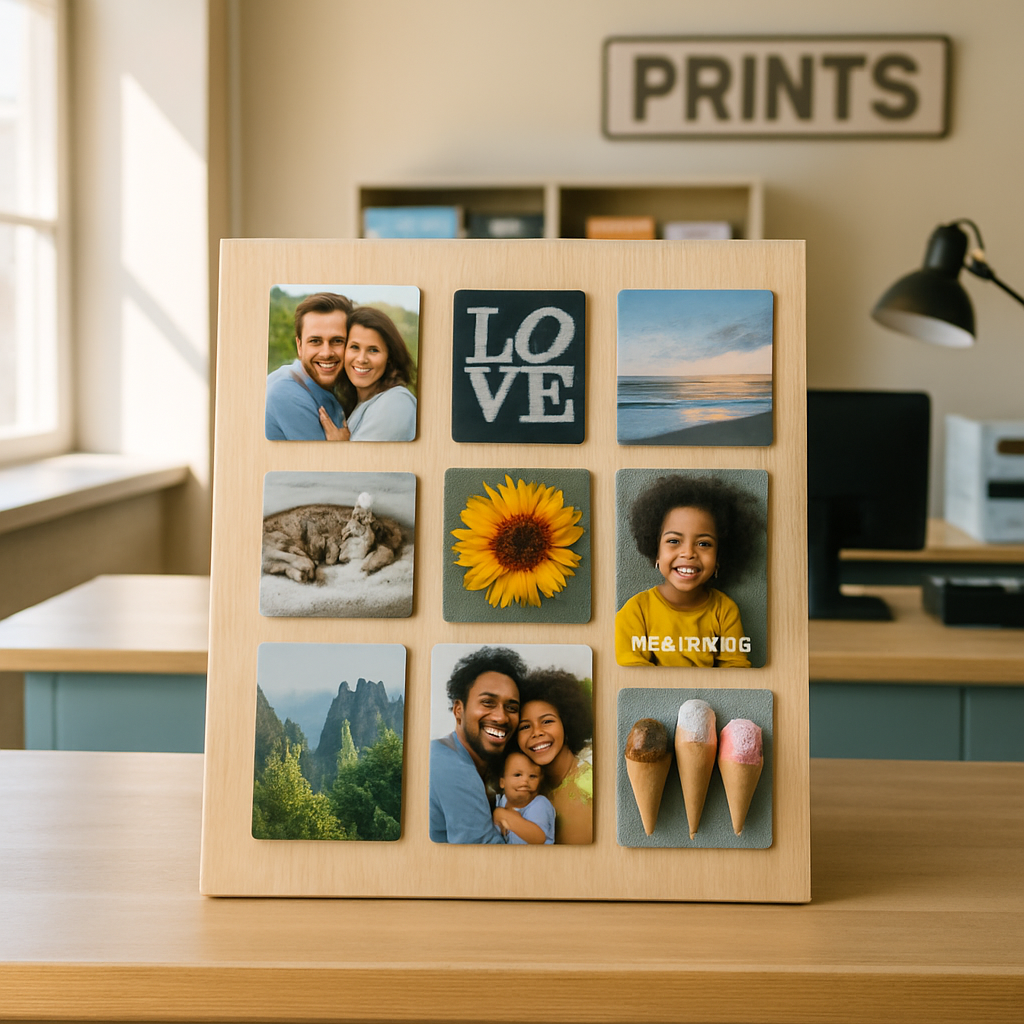
Here’s the thing: a good photo magnet isn’t just a printed picture on a strip of metal. It’s a personal keepsake you can touch, move, and rearrange whenever the mood strikes. Imagine the joy of pulling out a magnet of your last vacation, sliding it next to a recipe card, and instantly reliving that sunset while you prep dinner.
But why settle for generic, mass‑produced magnets from big retailers when a small, friendly shop can customize each piece exactly how you want? You get to choose the size, the finish, even the quirky border that matches your kitchen décor.
So, what’s the first step? Start by Googling “photo magnets near me” and notice which local studios pop up. Look for businesses that showcase real customer photos, offer quick turnaround, and talk about the materials they use. That way you avoid cheap plastic that flakes off after a week.
Think about the moment you open the package: the magnet feels solid, the image is vibrant, and you can already picture it on your fridge, locker, or office board. That instant connection is what makes a custom photo magnet worth the extra effort.
And if you’re still on the fence, ask yourself: how many times have you wished you could display a favorite photo without cluttering walls or buying frames? A magnet solves that problem with style and simplicity.
Let’s dive in and explore how to find the perfect local maker, what to look for in quality, and a few quick tips to make your photo magnets truly shine in your space.
TL;DR
Looking for photo magnets near me? Choose a local studio that lets you customize size, finish, and quirky borders so your fridge becomes a personal gallery without clutter.
We’ll show you how to spot quality makers, compare materials, and order fast and affordable—so you can start displaying cherished memories today.
Step 1: Locate Local Photo Magnet Providers
Ever typed “photo magnets near me” into Google and felt a wave of overwhelm as a dozen results popped up? I’ve been there, scrolling past chain stores, clicking on vague “custom prints” pages, and wondering if any of them actually care about the little details that make a magnet feel personal.
First thing to do is narrow the field to businesses that live right in your neighborhood. A quick search for “photo magnets near me” will usually surface three types of providers: large retail chains, print‑shop franchises, and independent studios. The difference isn’t just size; it’s the level of customization, turnaround time, and how much they’ll listen to your quirky ideas.
Step‑by‑step checklist to spot a quality local provider
- Check the Google map pin – does the shop sit on a main street you pass every day? Proximity means you can swing by with a USB drive or a phone file and see samples in person.
- Look for a portfolio on their website or social media. Real customer photos (not stock images) show they actually produce magnets that stay vibrant after weeks in the fridge.
- Read reviews that mention material quality – “strong magnet,” “no peeling,” “color didn’t fade.” Those phrases matter more than a five‑star rating alone.
- Call or email and ask about file formats. Most local shops accept PDFs or high‑resolution JPEGs; some even help you tweak the layout on the spot.
- Ask about turnaround. Many independent shops can finish a batch in 24‑48 hours, while franchise locations might need a week.
So, what does that look like in practice? Let’s walk through a couple of real‑world scenarios.
Example 1: The neighborhood print shop
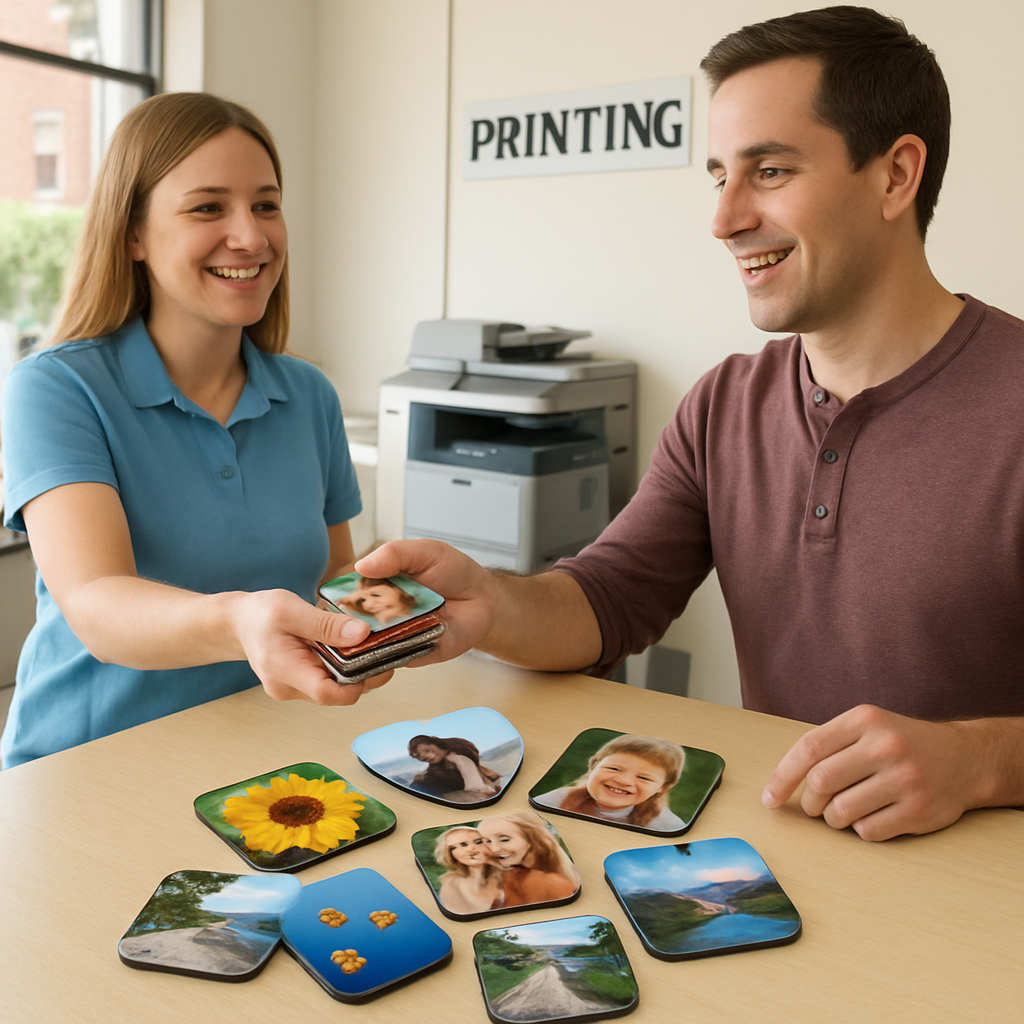
Imagine you live in a suburban strip mall and spot “Print‑It‑Now” on the corner. You pop inside, and the owner shows you a wall of magnet samples – everything from glossy‑finish beach shots to matte‑black “family tree” designs. You hand over a USB with a recent vacation photo, and they suggest adding a thin white border to make the colors pop on a stainless‑steel fridge. Within two days you’re back with a sturdy magnet that feels like a mini‑art piece, not a cheap souvenir.
Example 2: A small boutique studio
Or you might discover “Creative Keepsakes,” a tiny studio tucked behind a coffee shop. They specialize in hand‑cut shapes and custom die‑cut edges. You chat over espresso, decide on a set of three magnets – one square, one heart, one circle – each with a different finish (gloss, satin, and a textured “canvas” look). Because they’re a boutique, they can tweak the design on the fly, and you walk out with a personalized collection in under 48 hours.
Notice the common thread? Both places let you see and touch the product before you commit, and both offer quick, local turnaround. That’s the sweet spot you’re after when you search “photo magnets near me.”
Now, let’s talk about a quick trick to verify print quality without ordering a full batch. Ask the shop for a single “proof magnet” – a low‑cost sample that uses the exact paper, ink, and magnet backing you’ll get in the final order. If the colors look vibrant and the magnet holds firmly, you’ve got a winner.
And don’t forget to compare pricing structures. Some shops charge per magnet, others offer bundles (e.g., “5 magnets for $15”). Write down the unit cost, any setup fees, and shipping if you plan to pick up later. A simple spreadsheet can reveal whether a $30 bundle is really a deal or just a marketing gimmick.
Finally, trust your gut. If the staff greets you with a genuine smile and seems excited about your project, that enthusiasm usually translates into a better finished product. If they sound rushed or push a “one‑size‑fits‑all” template, keep looking.
To sum it up, locating a reliable “photo magnets near me” provider is all about proximity, portfolio proof, material reviews, and a quick proof magnet test. Follow the checklist, try the two real‑world examples as a mental model, and you’ll walk away with magnets that feel personal, durable, and exactly the way you imagined.
Step 2: Compare Quality, Pricing, and Turnaround
Now that you’ve scoped out a few local shops, it’s time to dig into the three things that really matter: how good the magnet looks, what you pay, and how fast you get it.
1. Quality checkpoints you can test today
Grab a proof magnet or ask for a single sample. Look for three clues: color fidelity (does the hue match your screen?), edge crispness (no fuzzy borders), and magnet strength (does it stay put on a metal surface without wobbling?).
Pro tip: bring a cheap grocery‑store magnet and compare the pull. If the sample feels noticeably sturdier, you’re likely dealing with a thicker magnetic foil – usually 0.7 mm or more, which lasts longer on fridge doors.
Real‑world example
Jane in Portland ordered a single proof from “Print‑It‑Now.” The sample arrived with a matte‑laminated finish and a magnetic backing that didn’t bend. She compared it to a generic Walmart magnet and noticed the colors stayed vivid after a week in the kitchen heat. That tiny test saved her a $15 bundle that would have looked washed‑out.
2. Break down the pricing structure
Don’t just glance at the headline price. Write down every component: base price per magnet, setup or file‑prep fees, any bulk‑discount thresholds, and shipping or pick‑up costs.
Use a simple spreadsheet: column A = quantity, B = unit cost, C = total before tax, D = shipping. You’ll often see a “5 for $15” deal look better than “$3 each” once you factor in a $5 pickup fee.
Another tip: ask if they offer a “no‑minimum” option. Some studios require a $20 minimum order, which can inflate the per‑magnet cost if you only need a handful.
Real‑world example
Mike in Austin got a quote from a boutique that charged $2.50 per magnet with a $4 setup fee. The competitor’s $3‑magnet bundle seemed cheaper, but after adding $6 shipping, Mike’s total was $14.90 versus $12.50 from the boutique – a clear win for the local shop.
3. Turnaround time – how fast can you get it?
Turnaround varies wildly: independent print shops often promise 24‑48 hours for a small batch, while larger chains may need a week because they batch orders.
Ask three questions up front: (1) Do they need a file‑prep step? (2) Is there a rush fee? (3) What’s the cutoff time for same‑day pickup?
If you need magnets for a last‑minute gift, a shop that can print while you wait with a coffee is gold.
Real‑world example
Sara in Seattle needed wedding favors two days before the ceremony. She called “Creative Keepsakes,” who said they could finish three dozen magnets in 36 hours for a $10 rush surcharge. The alternative online service quoted 5‑day shipping, which would have missed the deadline.
Quick comparison table
| Factor | Local Print Shop | Online Chain | What to watch |
|---|---|---|---|
| Print quality | Matte or glossy, thick foil (0.7 mm) | Often thinner foil, variable finish | Ask for a proof magnet |
| Pricing | $2‑$3 per magnet + low setup | $1.50‑$2.50 per magnet, higher shipping | Calculate total cost, not just unit price |
| Turnaround | 24‑48 hrs (in‑store) | 3‑7 days (shipping) | Confirm rush options early |
Now that you have a framework, let’s tie it back to the bigger picture of creating magnets that actually make you smile every time you open the fridge.
One handy resource is How to Choose and Create Personalized Photo Fridge Magnets That Stand Out, which walks you through design tips that complement the quality and price checks you’re doing right now.
Take a moment after the video to write down the three numbers that matter most for your next order: the magnet’s thickness, the unit cost after fees, and the promised delivery window. If any of those feel fuzzy, go back to the shop and ask for clarification – a transparent provider will gladly break it down.
Bottom line: comparing quality, pricing, and turnaround isn’t a math class; it’s a quick sanity check that keeps you from overpaying or ending up with a magnet that peels off after a week. Follow the checklist, run the table, and you’ll walk away with fridge art that actually lasts.
Step 3: Choose the Right Customization Options
Alright, you’ve found a shop that actually cares about your fridge art. Now it’s time to decide how those magnets will look, feel, and stick around for years.
Pick a shape that matches the story
Do you want a classic square that frames a beach sunrise, or maybe a heart that says “home sweet home”? Most local printers let you choose between square, rectangle, circle, or even custom die‑cut shapes. A die‑cut shape can turn a simple selfie into a quirky silhouette that pops on stainless steel.
And if you’re not sure, order one proof of each shape. Holding a round magnet in one hand and a square in the other lets you feel the weight and see which one grabs attention on your fridge.
Select the finish that fits your vibe
Gloss, matte, or textured “canvas” – each finish changes how the photo reads under kitchen light. Gloss makes colors pop like a fresh coat of paint, but it can show fingerprints. Matte softens glare, perfect for a coffee‑stained countertop. Textured finishes add a tactile element that feels almost like a tiny canvas.
But here’s a trick: ask the shop for a sample strip of each finish. Stick it on a magnet backing and see how it looks after a day in the fridge. The one that stays vibrant without looking oily is your winner.
Decide on a border or “frame”
Think about whether you want the photo to bleed to the edge or have a white or colored border. A thin white border can make a busy photo feel cleaner, while a bold color can echo the hues in your kitchen décor.
And if you’re feeling creative, combine a thin border with a subtle drop shadow. It adds depth without turning the magnet into a mini‑poster.
Choose the magnet strength
Not all magnets are created equal. A 0.7 mm magnetic foil holds a photo firmly on a fridge door, while a thinner 0.4 mm foil might slide around when you open the door.
Ask the printer: “What thickness do you use for a magnet that stays put on a stainless‑steel surface?” Most local shops will recommend the thicker option for anything you want to keep long‑term.
Think about the size and quantity
Measure the space you have on your fridge. A 2‑inch square looks great next to a grocery list, but a 4‑inch rectangle works better for a panoramic landscape.
When you’re ordering, start with a small batch – maybe three different designs – to see how they fit together. Then, if you’re happy, scale up. Many shops give a discount after a certain quantity, but the key is not to over‑order before you know the look works.
Personalize with text or icons
Do you want a date, a quote, or a tiny doodle stitched onto the magnet? Adding a line of text can turn a photo into a keepsake that tells a story every time you grab the butter.
Just keep the font readable at magnet size. Sans‑serif fonts at 8‑10 pt work best. And if you’re not a design whiz, ask the shop to mock up a few options before they print.
Final quick checklist
- Shape: square, circle, rectangle, custom die‑cut?
- Finish: gloss, matte, textured?
- Border: none, thin white, bold color?
- Magnet thickness: 0.7 mm or more for strong hold.
- Size: fits your fridge real estate.
- Text or icons: keep it legible.
- Order a proof batch before scaling.
Once you’ve ticked those boxes, you’ll have a set of photo magnets that not only look great but also survive the daily kitchen hustle. And the best part? You’ve turned a simple “photo magnets near me” search into a personalized gallery that greets you every time you open the fridge.
Step 4: Order and Pick Up or Ship Your Photo Magnets
Now that you’ve nailed the design, it’s time to actually get those little memory‑makers into your hands. The biggest question most people ask at this stage is: "Do I drive to the shop or have them shipped?" The answer depends on a few simple factors – urgency, budget, and how much you enjoy a quick coffee‑break stop‑by.
1. Decide whether you need it today or can wait
If you’ve got a birthday cake to pick up tomorrow, a last‑minute gift, or just love the thrill of holding a fresh magnet the moment it prints, look for a same‑day pickup option. Many local print shops keep a small batch of magnetic foil on hand, so a proof order can be printed while you wait for a latte.
On the other hand, if you’re planning a larger batch – say a set of twelve magnets for a family reunion – shipping usually saves you a trip and can be cheaper because the shop can bundle the order.
2. Gather your files and double‑check specs
Before you hit “order,” pull the exact JPEG or PDF you want to use. Make sure the resolution is at least 300 dpi; otherwise the colors will look fuzzy on a glossy or matte finish. Keep the file name simple (no spaces, no special characters) – you’ll thank yourself when the shop’s upload screen asks for it.
Pro tip: add a tiny bleed margin (about 1‑2 mm) around the edge if you want a border‑less look. That tiny extra space prevents an accidental white edge when the magnet is cut.
3. Choose pickup vs. shipping
Pickup checklist
- Confirm the shop’s pickup window – many places have a 2‑hour slot for same‑day orders.
- Ask if there’s a small “ready‑for‑pickup” fee; it’s usually under $5.
- Bring a form of ID and the order confirmation email.
Shipping checklist
- Ask about the carrier (USPS, UPS) and tracking options.
- Check if the shop offers free shipping over a certain order value – some waive the fee after $60.
- Make sure the magnets will be packed flat, not rolled, to avoid creasing.
When you’re weighing the two, think about the total cost: a $4 pickup fee + gas might equal a $5‑$6 shipping charge, but the convenience factor can tip the scales.
4. Place the order – step by step
1. Log onto the shop’s online portal or hand over a USB drive in person.
2. Select size (2×2", 2.75×2.75", heart, etc.) and finish (gloss or matte). Remember the thicker magnetic foil (0.7 mm) holds better on stainless steel.
3. Upload your file, double‑check the preview, and request a proof if you’re ordering more than five.
4. Choose “pickup” or “ship” and enter the appropriate address.
5. Review the total – watch for hidden setup fees or minimum order requirements.
6. Confirm payment and note the estimated ready‑date or delivery window.
5. Real‑world examples to illustrate the choices
Emily in Denver needed three custom magnets for her newborn’s first‑week photo album. She called a nearby boutique, asked for same‑day pickup, and walked out with the magnets in under an hour – perfect for a surprise family dinner.
Meanwhile, Carlos in Miami ordered a set of twenty‑four magnets featuring his vacation shots. He opted for shipping because the shop offered free delivery on orders over $60, and the magnets arrived a week later, neatly stacked in a protective sleeve.
6. Quick post‑order checklist
After you place the order, keep an eye on these three things:
- Confirmation email: It should list the exact quantity, size, finish, and pickup or shipping details.
- Production timeline: If the shop promises 24‑48 hours, set a reminder to call if you haven’t heard back.
- Final inspection: When you receive the magnets, compare them to the proof – check color fidelity, border alignment, and magnet strength.
If anything looks off, most shops will gladly reprint a replacement – just reach out within their guarantee window.
And remember, the whole point of searching "photo magnets near me" was to find a local, reliable partner that can turn your digital memories into tangible fridge art without the hassle of a big retailer.
So whether you’re grabbing a coffee and picking up a proof, or you’re waiting for a package to land on your doorstep, these steps keep the process smooth, affordable, and totally worth the smile you’ll get when you stick that first magnet on the fridge.
Step 5: Care, Display, and Repurposing Tips
Got your fresh photo magnets in hand and wondering how to keep them looking sharp for years? You’re not alone – we all want those little memory‑makers to stay vivid, even after a dozen trips to the kitchen door.
1. Gentle cleaning, not a power wash
First thing: wipe the surface with a soft, lint‑free cloth. A dab of mild dish soap diluted in water is enough to lift fingerprints. Avoid abrasive sponges; they can scratch the glossy or matte finish you chose.
And if you’re dealing with a glossy magnet that shows smudges, a quick swipe with a microfiber towel does the trick. Remember, the magnet backing itself is usually a sturdy 0.7 mm foil, so a gentle touch won’t affect the hold.
2. Placement tricks for maximum impact
Think about where you spend the most time. The fridge door is obvious, but a metal pantry door, a locker surface, or even the side of a filing cabinet works just as well. Try grouping magnets by theme – travel snaps together, family portraits in another cluster – this creates a mini‑gallery that’s easy to scan.
Does the magnet slide when the door closes? That’s a sign you need a stronger foil or a slightly larger magnet. Most local shops (the ones you find when you search “photo magnets near me”) can swap the backing without re‑printing the image.
3. Protecting against kitchen heat and humidity
Kitchen air can get steamy, especially around the stove. To guard against moisture, let the magnets air‑dry for a few minutes after cleaning, then press them firmly onto the metal surface. The magnetic pull will keep them snug even when the humidity spikes.
For extra peace of mind, you can slip a thin clear sleeve (the kind that came with your order) over the magnet when you’re not displaying it. That way the ink stays protected, and you can rotate the magnet later without worrying about wear.
Colorland notes that their photo magnets are tested for everyday kitchen and children’s‑room use, making them fault‑tolerant.
4. Creative display ideas for every room
Beyond the fridge, think about metal surfaces you already have. A stainless‑steel backsplash in the bathroom makes a surprising photo‑magnet gallery that brightens morning routines. In a home office, a magnetic whiteboard can double as a task board and a place for favorite family shots.
If you have a metal locker at work, a single magnet with a motivational quote can become your personal morale boost. The key is to treat each surface as a canvas and let the magnets tell a story.
5. Seasonal swaps and rotating collections
One trick I love is a quarterly “magnet refresh.” Pull out the magnets that match the current season – think pumpkin‑spice autumn photos or beach‑day summer snaps – and give the rest a temporary home in a small metal tray. When the next season rolls around, you simply swap the trays. It keeps the display feeling fresh without buying new magnets.
Because each magnet can be different, you can even create a “timeline” where the newest photo leads the eye to the oldest, like a visual diary that evolves over time.
6. Repurposing ideas when the gallery feels full
Ever reach the point where the fridge looks like a scrapbook and you need space for new memories? Here are a few low‑effort ways to give old magnets a second life:
- Mini‑photo board: Glue a metal sheet to a corkboard and arrange magnets there. It’s easy to swap pieces out without digging into the fridge.
- Gift tags: Pop a magnet onto a blank card, write a note on the back, and you have a personalized gift tag for birthdays or thank‑you notes.
- Travel collage: Stick a handful of magnets onto a metal suitcase or backpack flap – instant wander‑lust showcase.
7. Longevity checklist – before you hang the next batch
Before you place a fresh set, run through this quick mental checklist:
- Is the image resolution at least 300 dpi? Low‑res files can look fuzzy after a few weeks.
- Did you choose a finish that matches the lighting in the display area? Gloss for bright kitchens, matte for low‑light hallways.
- Is the magnet thickness at least 0.7 mm? That’s the sweet spot for staying put on stainless steel.
- Did you test a single sample on the intended surface? A quick “stick‑test” saves you from a batch that slides.
If you answered “yes” to all, you’re set. If not, head back to your local printer and tweak the specs – it’s easier than re‑ordering later.
8. Quick care routine you can stick to
Every month, give each magnet a quick wipe and a gentle press. It only takes a minute, and you’ll notice the colors staying vibrant, just like when you first unwrapped them.
And here’s a little secret: a dab of white vinegar diluted 1:4 with water can remove stubborn kitchen grease without dulling the print. Just wipe clean and dry immediately.
9. When to replace
If a magnet starts to lose its pull or the image begins to peel, it’s time for a replacement. Most shops that you find via “photo magnets near me” will honor a quick reprint if you’re within their guarantee window.
Bottom line: a little TLC, smart placement, and a few repurposing hacks keep your photo magnets fresh, functional, and fun for years to come.
Deep Dive: Local SEO Strategies for Photo Magnet Shops
Ever typed “photo magnets near me” and wondered why some shops pop up first while others stay hidden? It’s not magic – it’s local SEO doing its thing.
First, claim your Google Business Profile. Make sure the name, address, and phone number match exactly what’s on your website. Add a dozen bright photos of your best‑selling magnets, and don’t forget a short, friendly description that mentions “photo magnets near me.” Google loves fresh visuals and a clear, keyword‑rich intro.
Next, collect reviews like you’re gathering postcards from happy customers. A quick “Hey, did you love your fridge art? Could you leave a 5‑star note?” email can boost your rating. When new visitors see a steady stream of five‑star comments that mention “photo magnets near me,” they’re more likely to click.
So, what about on‑page tweaks? Sprinkle the phrase “photo magnets near me” naturally in your title tag, meta description, and the first 100 words of your homepage. Then, create a dedicated “Find Us” page that includes a map, directions, and a short paragraph about why your local shop beats the big chains.
Local backlinks are gold. Partner with nearby cafés, wedding venues, or community centers and ask for a link back to your site. In exchange, you can supply them with a few custom magnets for free – a win‑win that tells Google you’re part of the neighborhood ecosystem.
Don’t forget structured data. Adding LocalBusiness schema (address, opening hours, phone) helps search engines pull the right info straight from your code. It’s a tiny step that can mean the difference between a plain snippet and a rich, clickable result.
Finally, track your rankings. Use a free tool like Google Search Console to see which queries drive traffic. If “photo magnets near me” isn’t showing up, double‑check your GMB categories – “Print Shop” and “Photo Studio” are usually spot‑on.
Bottom line: do those five things, and you’ll watch your shop climb to the top of the “photo magnets near me” results, bringing more foot traffic and online orders.
FAQ
What exactly are “photo magnets near me” and how do they differ from regular fridge magnets?
When you type “photo magnets near me” you’re looking for custom‑printed magnets that showcase your own pictures, not the generic souvenir style you get at a big retailer. A local shop will print your high‑resolution image onto a magnetic backing, often letting you pick the shape, finish, and even a thin border. The result feels personal – it’s your memory glued to the fridge, not a mass‑produced novelty.
How fast can I expect my custom photo magnets to be ready?
Most independent printers can turn around a small batch (under ten pieces) in 24‑48 hours if you drop off the file in person. If you order online and need shipping, add another day or two for packaging and delivery. Ask the shop about a “same‑day pickup” option – many will print while you wait for a coffee, which is perfect for last‑minute gifts or a surprise fridge makeover.
What file format and resolution should I use for the best results?
Stick to a high‑resolution JPEG or PDF at 300 dpi or higher. Anything lower will look fuzzy once it’s printed on a glossy or matte finish. Name the file without spaces (e.g., beach_vacation.jpg) so the shop’s upload system doesn’t trip up. If you’re unsure, ask the printer to run a quick “proof test” – it costs almost nothing and guarantees crisp colors.
How do I know the magnet will stay put on my stainless‑steel fridge?
Look for a magnetic foil that’s at least 0.7 mm thick. Thinner foils (0.4 mm) can slide around when the door closes hard. When you pick up a sample, give it a gentle pull; it should feel solid, not floppy. If you’re ordering a larger size, ask the shop to double‑check the pull‑force – most local providers are happy to swap the backing if it isn’t strong enough.
Why do some “photo magnets near me” cost more than others?
Price differences usually come from three things: material quality, magnet thickness, and any extra customization like die‑cut shapes or textured finishes. A basic 2×2‑inch gloss magnet on thin foil might be $1.50 each, while a 3‑inch matte piece with a custom border and 0.7 mm foil can run $2.50‑$3.00. Always ask for a breakdown – base price, setup fee, and any shipping or pickup charge – so you can compare apples‑to‑apples.
Can I order a bulk set of photo magnets for an event or business?
Absolutely. Most local shops love bulk projects because they can batch‑print and offer a volume discount. Bring a single high‑quality file and let the printer duplicate it, or supply a spreadsheet with different images and quantities. Ask about a “no‑minimum” option if you only need a handful, and confirm the lead time – larger runs might need 3‑5 days, but the result will still feel handcrafted.
How should I care for my photo magnets to keep them looking fresh?
Wipe them with a soft, lint‑free cloth and a dab of mild dish soap diluted in water. Avoid abrasive sponges; they can scratch gloss or matte finishes. For stubborn kitchen grease, a quick swipe with a microfiber towel does the trick. And if you notice any fading after a few weeks, most shops will reprint a replacement within their guarantee window, so keep the original file handy.
Conclusion
So you've walked through everything from checking proof magnets to picking the perfect finish, and you probably feel a mix of excitement and a tiny bit of overwhelm.
That's normal – we all start a new fridge‑gallery project wondering if the colors will stay vivid or if the magnet will slip off the door.
The good news? You already have a simple checklist: proof a single magnet, confirm a 0.7 mm magnetic foil, compare the unit cost after fees, and set a clear pickup or shipping window.
If any of those steps feel fuzzy, go back to the printer, ask for a quick “stick‑test,” or request a revised quote – a transparent shop will happily walk you through it.
Remember, the whole point of searching “photo magnets near me” is to turn your favorite snapshots into everyday reminders that actually stick, both literally and emotionally.
So, what’s the next move? Grab your favorite photo, drop it off at Loveonmagnets or your local print shop, and schedule that same‑day pickup before your coffee gets cold.
When the magnets arrive, give them a quick wipe, stick them where you see them most, and enjoy the little burst of joy every time you open the fridge – that’s the real payoff.


