

Ever opened your fridge and felt that rush of nostalgia as a collage of smiling faces, beach sunsets, and goofy selfies greets you?
If you’ve ever wondered how to turn those random snapshots into a single, eye‑catching piece of décor, you’re not alone.
We’ve all scattered photos across the kitchen counter, trying to make sense of which ones deserve a spot on the magnetic door.
But what if you could stitch them together into a photo collage magnet that tells a story every time you grab a snack?
Picture this: a vibrant mosaic of your favorite family vacation, the kids’ first soccer goal, and that latte art you mastered last week, all glued to one sleek magnet.
It’s more than just a memory holder; it becomes a conversation starter, a daily reminder of the moments you love.
The beauty of photo collage magnets is they’re custom‑made, so you control the layout, colors, and even the shape of each piece.
You don’t need a design degree—just a handful of photos, a dash of creativity, and a simple ordering process.
And because they’re made of sturdy magnetic material, they stick securely without damaging your fridge paint.
So, how do you get from a folder of pictures to a polished collage that looks like it belongs on a gallery wall?
First, gather the images that spark the strongest emotions—those that make you smile, sigh, or laugh out loud.
Next, think about the story you want to tell: a timeline of a year, a theme like ‘summer adventures,’ or a mix of candid moments.
Then, arrange them on a digital canvas, playing with overlap and spacing until the composition feels balanced.
Finally, send the file to a trusted custom‑magnet maker like Loveonmagnets, and they’ll print and cut your collage into a magnet that’s ready to stick.
You’ll receive a high‑resolution, UV‑coated magnet that resists fading, so the colors stay vivid for years.
Ready to see your memories magnetized? Let’s dive in and explore the step‑by‑step process that turns a digital collage into a kitchen masterpiece.
TL;DR
Photo collage magnets let you turn favorite snapshots into a vibrant, magnetic gallery that brightens your kitchen and keeps memories within arm’s reach. Simply gather your best photos, arrange them on a digital canvas, and order a custom‑printed, UV‑coated magnet from Loveonmagnets for a lasting, hassle‑free display right now today.
Step 1: Choose Your Photos and Layout
First thing’s first: you need the right pictures. Not every snap in your camera roll belongs on a fridge, but the ones that make you grin, sigh, or say “remember that?” are gold.
Grab a handful of images that tell a story. For a family vacation, pick the beach sunrise, the kids building a sandcastle, and that goofy group selfie at sunset. For a milestone like a graduation, choose the diploma, the celebratory hug, and the confetti‑covered crowd.
Sort, Cull, and Prioritize
Open a new folder on your computer or phone called “Collage Magnet.” Drag the candidates in, then start a quick cull: delete blurry shots, keep the ones with good lighting, and flag the ones that evoke the strongest emotion.
Pro tip: aim for 8‑12 photos for a medium‑sized magnet. Anything less can look sparse, anything more can feel crowded.
Decide on a Layout Shape
Do you want a clean grid, a free‑form mosaic, or a themed shape like a heart or star? The layout you pick will set the visual rhythm. A grid works well for uniform portraits, while a freestyle collage lets you overlap and play with negative space.
Apps like Collageable give you 300+ templates to preview instantly. You can even rotate, scale, and layer each picture until it feels balanced. According to the app’s own description, users can “combine from 2 to 25 pics into one creative image” and see live updates as they add or remove photos.
Play with Color and Balance
Look at the overall color palette. If most of your shots are warm (sunsets, golden hour), consider a neutral background to let them pop. If you have a mix of blues and reds, a subtle gray or white canvas can tie everything together.
One quick test: hide the background for a moment and view the collage in black‑and‑white. If the composition still feels harmonious, you’ve achieved good balance.
Check Resolution and Aspect Ratio
Most custom‑magnet services, including Loveonmagnets, recommend a minimum of 300 dpi for crisp prints. Make sure each photo is at least 1200 × 1200 px for a 4 × 4 in magnet. If you’re pulling from a phone, use the “Export at maximum quality” setting.
Don’t forget to crop to the same aspect ratio (usually 1:1 or 4:3) before you stitch them together. This avoids odd borders after printing.
Preview on a Digital Canvas
Now that you have your photos, open your favorite collage maker—whether it’s a free online tool or the Collageable app. Drag the images onto the canvas, experiment with spacing, and use the “snap to grid” feature if you like tidy edges.
When you’re happy, export the file as a high‑resolution PDF or PNG. This is the file you’ll send to Loveonmagnets for printing.
Need a quick turnaround? same‑day photo magnet services at CVS can print and cut magnets in under an hour, perfect for last‑minute gifts.
Final Checklist Before You Upload
Once the checklist is green, you’re ready to move on to the ordering stage. If you’re unsure about the layout, How to Choose and Create Personalized Photo Fridge Magnets That Stand Out offers a deeper dive into style choices.
Now hit upload, sit back, and picture the grin that will appear when you open the fridge tomorrow – your memory gallery ready to greet you.

Step 2: Prepare and Print Your Collage
Alright, you’ve got the perfect lineup of photos and a layout that feels just right. The next move is turning that digital canvas into a physical magnet that won’t peel off your fridge after a week.
Double‑check resolution and color fidelity
Before you hit “export,” make sure every image sits at 300 dpi or higher. If a picture looks a little soft on your screen, it’ll look even softer once it’s printed and UV‑coated.
Pro tip: open the file in a free viewer like IrfanView and zoom to 100 % – that’s the size your printer will see. If any edge looks pixelated, swap it for a higher‑resolution version.
Choose the right file format
Most custom‑magnet services love a lossless PNG or a high‑resolution PDF. PNG keeps the colors crisp, while PDF preserves vector‑based elements like text overlays.
Save a copy in both formats just in case the printer’s upload portal prefers one over the other.
Set up bleed and safe zones
Think of bleed as the extra margin that gets trimmed off. Add about 0.125 in (3 mm) of background color around the edge of your collage; that way no white sliver sneaks into the final magnet.
Keep important faces or text at least 0.25 in (6 mm) inside the outer edge – that’s the safe zone. It’s the same rule you’d follow for a business card, just smaller.
Run a quick print‑preview test
Print a 4 × 4 in version on regular paper. Hold it up next to a real magnet and see if the colors still pop. If the preview looks dull, crank up the contrast in your editor.
That cheap test can save you a $10 re‑print later.
Pick a printing partner
If you’re already set on Loveonmagnets, you’re in good hands – they use UV‑coated magnetic sheets that resist fading for years. But if you need a same‑day turnaround, a local pharmacy’s photo lab can crank out a magnet in under an hour.
Just remember: fast service often means fewer material options, so decide whether you want matte, glossy, or a textured finish before you upload.
Upload with confidence
Most platforms ask you to confirm dimensions, DPI, and file type. Tick the box that says you’ve double‑checked bleed and safe zones – it’s a habit that pays off.
After uploading, most services give you a digital proof. Zoom in, click around, and make sure nothing shifted during the file conversion.
Real‑world example: family beach day
Emily wanted a magnet that captured her kids’ first sandcastle. She chose three photos: a sunrise, the castle, and a goofy splash shot. She set the canvas to 5 × 5 in, added a 0.125 in bleed of light blue, and kept the kids’ faces at least 0.3 in from the edge. After a quick paper test, she uploaded the PNG to Loveonmagnets. Two days later, the magnet arrived, glossy and bright, and the kids immediately claimed the fridge as “the best part of breakfast.”
Real‑world example: milestone graduation
Mark wanted a sleek, black‑bordered magnet for his office. He used a single 8 MP portrait, added a thin white margin for a modern look, and exported a PDF at 600 dpi. Because he chose a matte finish, the magnet looked like a tiny framed photo, perfect for his desk without any glare.
Final checklist before you order
- All images ≥ 300 dpi.
- File saved as PNG or PDF.
- Bleed added (0.125 in) and safe zones respected.
- Printed a paper mock‑up to verify colors.
- Chosen finish (glossy, matte, textured) matches your décor.
Once you’ve ticked those boxes, hit “order.” In a few days, you’ll have a custom‑made photo collage magnet that sticks, looks sharp, and reminds you of the moments you love every time you reach for a snack.
Step 3: Select Magnet Materials and Sizes
Now that your collage is pixel‑perfect, it’s time to decide what the magnet itself will feel like in your hand and on your fridge. The material you choose determines durability, glare, and even how easy it is to swap out photos later.
Material choices – glossy, matte, or textured?
Most services, including Loveonmagnets, coat a thin sheet of flexible magnetic foil with premium photo paper. You can go glossy for that punchy shine, matte if you hate fingerprints, or a subtle texture for a vintage vibe. premium photo paper with glossy or matte finishes sits on the magnetic base and protects colors for years.
Pro tip: if your collage has a lot of bright whites, matte can tone down glare under kitchen lighting. If you love the “pop” of a beach sunrise, glossy will make those blues explode.
Does the finish really matter? Absolutely – I once ordered a glossy magnet for a kid’s art collage, and after a month of refrigerator door bangs, the surface was covered in smudges. Switching to matte would have saved a lot of cleaning.
Size and shape decisions
Think about where the magnet will live. A 2 × 2 in square is perfect for a single portrait, while a 5 × 5 in rectangle gives you room to showcase a mini‑story. Squared.one lists common shapes: square (2.75 × 2.75 in), round (2.75 in diameter), rectangle (2.75 × 2 in), Polaroid style (2 × 2.75 in), and heart (2.75 in).
Ask yourself: do you want a magnet that hugs the corner of the fridge or one that commands the centre? Larger sizes make a bold statement but can dominate a small kitchen surface. Smaller, rounded magnets are great for creating a “constellation” of memories across the door.
When you’re not sure, print a cheap paper mock‑up at the intended size and tape it temporarily. Walk around the kitchen and see if it feels balanced. If it looks cramped, scale down a notch.
Choosing the right magnetic strength
All photo collage magnets use a flexible magnetic foil, but thickness can vary. Thicker foil (around 0.3 mm) holds better on stainless steel appliances, while a thinner foil is fine for a painted fridge. Most online labs default to a standard strength that works for most homes, so you rarely need to tweak this unless you have a particularly heavy fridge door.
One quick test: stick a regular fridge magnet to the spot where you plan to place your collage. If it slides off easily, you’ll want the stronger option.
Actionable steps to lock in your choice
1. Review the shape list above and sketch how your collage would fit each.
2. Measure the fridge area you intend to use (width × height) and note any obstacles like shelves or handles.
3. Decide on finish (glossy vs matte) based on lighting and cleaning preferences.
4. Pick a size that respects your measured space and leaves a 0.25 in margin for breathing room.
5. Add a note in the order form about magnetic strength if you have a metal-heavy door.
6. Upload a low‑resolution preview to double‑check that the chosen shape doesn’t crop out any crucial faces.
Quick comparison table
| Feature | Option | Best for |
|---|---|---|
| Finish | Glossy, Matte, Textured | Bright rooms (glossy) or high‑traffic kitchens (matte) |
| Shape | Square, Round, Rectangle, Polaroid, Heart | Grid layouts (square), playful themes (heart/round) |
| Size | 2×2 in, 2.75×2.75 in, 5×5 in, custom | Single photo (2×2 in) or story collage (5×5 in) |
Remember, the magnet is the bridge between your digital collage and the physical world. Picking the right material and size turns a nice picture into a daily conversation starter that won’t fade or peel.
So, grab a ruler, glance at your fridge real estate, and lock in the combo that feels right for your home. Once you hit “order,” you’ll have a custom‑made photo collage magnet that sticks, looks sharp, and reminds you of the moments you love every time you reach for a snack.
Step 4: Assemble and Seal the Collage Magnet
Alright, the printed sheet has arrived – glossy, matte, whatever you chose – and it’s sitting on your kitchen counter, fresh out of the box. Now the fun part begins: turning that flat piece of art into a sturdy magnet that will survive daily fridge traffic.
Gather your tools (you probably already have them)
Grab a clean microfiber cloth, a ruler, a soft‑rubber roller, and a small bottle of clear‑drying sealant (spray or brush‑on). If your magnet came with a protective film, keep it handy; you’ll peel it off at the very end.
Position the collage on the magnetic backing
Most services ship the photo layer already adhered to a thin magnetic foil. Lay it face‑up on a flat surface, then carefully align the printed collage on top. A quick test: slide the collage a little; if it moves without resistance, the adhesive layer is still tacky and you’re good to go.
Use the ruler to check that the edges line up with the foil’s border. A tiny mis‑alignment is okay – you can trim later – but try to keep the visual balance centered.
Press out air bubbles
Start in the middle and work your way outwards with the rubber roller. You’ll feel the pressure smooth out any trapped air, just like you’d press a sticker onto a laptop. If a bubble refuses to disappear, poke a tiny hole with a pin and roll over it again.
Does it feel too sticky? A light dusting of talc can reduce excess tack without compromising the bond.
Seal the surface for durability
Now, protect those colors from kitchen splatters, sunlight, and the occasional fridge‑door slam. A thin coat of clear UV‑resistant sealant does the trick. Spray in a well‑ventilated area, holding the can 12‑18 inches away, and apply a light, even mist. If you prefer a brush, use a soft‑bristle brush and spread a thin film.
Let the seal dry for at least 15‑20 minutes – you’ll see the finish go from glossy wet to a subtle sheen. This step mirrors what professional wall‑art kits recommend for long‑lasting displays according to Mpix’s collage wall guidelines, except we’re doing it on a magnet instead of a wall.
Trim excess foil (optional)
If your collage is slightly larger than the magnetic sheet, now’s the moment to trim. Use a sharp craft knife and a straight edge; cut slowly to avoid nicking the printed side. Many people love a tiny “border” of raw foil because it adds a subtle frame, but it’s totally optional.
Final inspection checklist
- Edges aligned and trimmed?
- No visible bubbles or dust?
- Seal fully dry and evenly coated?
- Protective film still on (if supplied) – peel only when you’re ready to stick.
Once you’ve ticked those boxes, you’re ready for the grand moment.
Stick it and step back
Peel off any backing film, align the magnet on your chosen fridge spot, and press firmly for a few seconds. The magnetic force will lock it in place, but give it a gentle wiggle to make sure it’s truly seated.
And there it is – a personalized photo collage magnet that not only looks great but can stand the test of everyday kitchen life.
Want to keep it looking fresh? Wipe it down with a damp cloth once a month; avoid abrasive cleaners that could dull the seal.
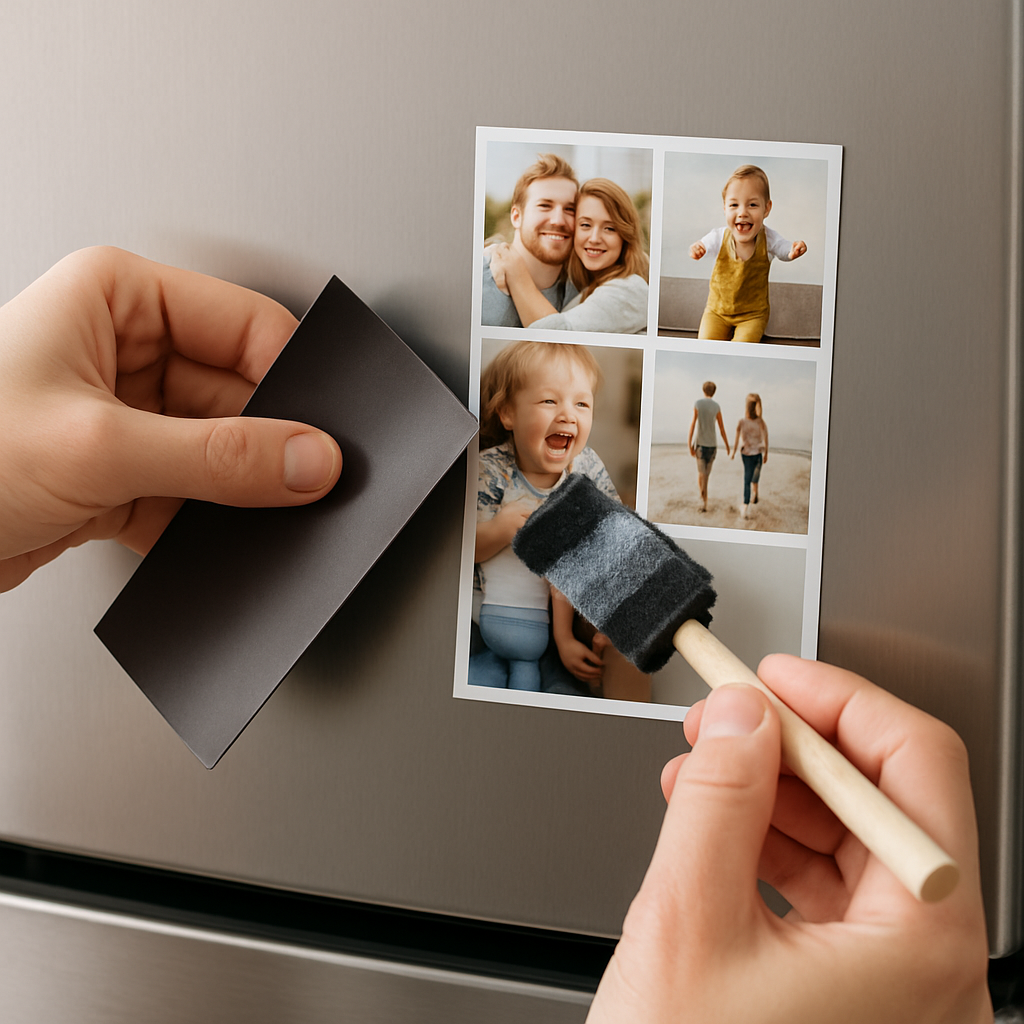
Step 5: Display Ideas and Care Tips
Now that your photo collage magnet is glued, sealed and ready to stick, the real fun begins – figuring out where it lives and how to keep it looking fresh.
Pick a spot that tells a story
Do you remember that moment when you opened the fridge and the first thing you saw was a goofy beach selfie? That instant smile is exactly why placement matters.
Try the high‑traffic zone near the milk shelf if you want the magnet to be a daily reminder. Or, if you’re more of a "quiet corner" person, the side panel next to the spice rack can become a mini‑gallery that only shows up when you’re reaching for a pinch of pepper.
And don’t forget the door’s metal frame – a thin strip of magnet can hug the edge, letting the collage peek out without covering the whole surface. It’s a subtle way to add personality without turning your fridge into a billboard.
Mix‑and‑match with other fridge décor
Ever notice how a handful of magnetic clips, a grocery list, and a kids’ drawing can coexist without looking chaotic? The trick is to give each piece a little breathing room.
Place your collage at the center of a “magnet cluster” and surround it with smaller, functional magnets. The eye naturally wanders from the big image to the notes, turning a practical surface into a curated display.
If you’re feeling adventurous, create a theme – maybe all magnets in pastel tones for a calm vibe, or bold primary colors for a kitchen that feels like a pop‑art gallery.
Lighting tricks that make colors pop
Kitchen lighting can be harsh. A glossy finish will reflect overhead bulbs and sometimes look washed out. If you’ve chosen glossy, consider a soft under‑cabinet LED strip; the gentle glow brings out the blues and greens in your collage without glare.
Matte finishes are more forgiving in bright rooms – they absorb light and keep details crisp. Either way, a quick test: hold the magnet up to your fridge light for a few seconds. If the image looks dull, a little repositioning of the light source can make a world of difference.
Everyday care routine (it’s easier than you think)
Here’s the low‑down: once a month, grab a soft, damp microfiber cloth and give the magnet a gentle wipe. Avoid paper towels; they can leave scratches.
Never spray harsh cleaners directly onto the surface. If you need to tackle a stubborn spot, spray the cloth first, then rub – that way the liquid never sits on the magnet.
And remember, the clear UV‑resistant seal you applied earlier is your best friend. It repels water, resists fading, and handles the occasional kitchen splatter. As long as you keep abrasive cleaners away, the magnet should stay vibrant for years.
Quick fix for accidental fingerprints
Got a fingerprint right in the middle of a smiling face? No panic needed. Dab a corner of the cloth with a tiny bit of isopropyl alcohol, then gently roll it over the mark. The seal protects the print, so the alcohol won’t seep through.
Just make sure the cloth isn’t saturated – a light touch does the trick.
When you need a fast replacement
Sometimes life happens – a magnet gets dropped, or you decide to switch up the collage for a new family vacation.
If you’re in a pinch, many pharmacies offer same‑day photo magnet services at CVS. They require glossy prints, but the turnaround is under an hour, perfect for last‑minute gifts or a quick fridge refresh.
Just upload your updated collage, pick the glossy option, and swing by the store with a coffee. Your new magnet will be ready to stick before dinner.
Checklist before you step back
- Location chosen – high‑traffic or quiet corner?
- Surrounding magnets arranged for balance?
- Lighting adjusted to avoid glare?
- Monthly wipe‑down routine set?
- Emergency replacement plan (e.g., CVS same‑day service) in place?
Take a step back, give your fridge a once‑over, and notice how the photo collage magnet instantly lifts the room’s mood. It’s not just a piece of art; it’s a daily reminder of the moments you love.
Conclusion
We've walked through every step, from picking the right snapshots to sealing the finished piece, so you now know exactly how a simple photo collage magnet can become the centerpiece of your kitchen.
Remember that moment when you opened the fridge and a burst of laughter hit you because of that goofy beach selfie? That's the power of a well‑crafted magnet – it turns everyday routine into a tiny celebration.
So, what’s next? Grab those 8‑12 photos that still make you smile, choose a shape that fits your fridge real‑estate, and send the file to Loveonmagnets. A quick paper test, a dash of sealant, and you’re set.
If you ever wonder whether the finish will hold up, think of the quick‑wipe tip we shared: a damp microfiber cloth once a month keeps colors vibrant without any fuss.
And should a magnet get knocked off, you’ve already got the same‑day replacement plan in your back pocket – no panic required.
Finally, let that collage do the talking. Every time you reach for a snack, you’ll be reminded of the moments you love. Ready to make your fridge a memory board? Order your custom photo collage magnet today and start the daily smile loop.
FAQ
How do I choose the right photos for a photo collage magnet?
Start by pulling the images that make you smile or sigh – the ones you’d show a friend over coffee. Aim for 8‑12 high‑resolution shots with good lighting; blurry or dark pictures won’t translate well onto the magnetic surface. Mix close‑ups with wider scenes to give the collage visual rhythm, and keep the colour palette fairly cohesive so the final magnet looks intentional, not chaotic.
What size and shape work best for a typical fridge?
Most kitchens have a sweet spot about 3‑4 in wide on the door, so a 4 × 4 in square or a 5 × 5 in rectangle feels balanced without overwhelming the space. If you love a playful look, round or heart‑shaped magnets add personality, but make sure the shape still fits the layout you’ve designed. Measure the area you want to cover first – a quick tape‑measure check prevents a magnet that’s too big or too tiny.
Will the colors fade over time on a photo collage magnet?
Loveonmagnets uses UV‑coated magnetic sheets, which protect the inks from kitchen light and occasional sun exposure. In practice, most users report vibrant colours lasting years, especially when you wipe the surface with a damp microfiber cloth once a month. Avoid harsh chemicals; they can wear down the coating. If your kitchen gets direct sunlight, a matte finish can further reduce glare and help the image stay crisp.
Can I reorder the same design if I lose or damage the magnet?
Absolutely. Keep the original high‑resolution file you uploaded – it’s the easiest way to place a repeat order. Loveonmagnets stores your design for a limited time, so you can request a replacement within a few months without starting from scratch. If you don’t have the file, you can pull the same photos from your device and recreate the layout in a few minutes, then reorder.
How do I clean and maintain my photo collage magnet?
Grab a soft, damp microfiber cloth and give the magnet a gentle wipe every few weeks. For fingerprints, a tiny dab of isopropyl alcohol on the cloth does the trick without harming the UV seal. Never spray cleaner directly onto the magnet; always apply to the cloth first. And skip abrasive pads – they’ll scratch the finish and dull the colours over time.
Is it safe to use photo collage magnets on stainless steel appliances?
Yes, the flexible magnetic foil adheres well to stainless steel, but the bond isn’t as strong as on a painted fridge. If the surface is very smooth, choose the thicker 0.3 mm magnetic layer for extra grip. Test with a regular fridge magnet first; if it slides, ask for the stronger option. The magnet won’t damage the appliance because the foil is non‑abrasive and leaves no residue.
How long does it take to receive a custom photo collage magnet from Loveonmagnets?
Standard production runs are typically 3‑5 business days after you upload a print‑ready file. Shipping adds another 2‑3 days for most U.S. addresses, so you can expect your magnet within a week. If you need it sooner, Loveonmagnets offers expedited printing and priority mail for an extra fee — a great choice for last‑minute gifts or a quick fridge refresh.


