

Ever stare at a blank fridge and wish you could splash a favorite memory right there?
We’ve all been there – the coffee mug clink, the kids’ art pinned, and that one photo of the beach that makes you smile every time you open the door.
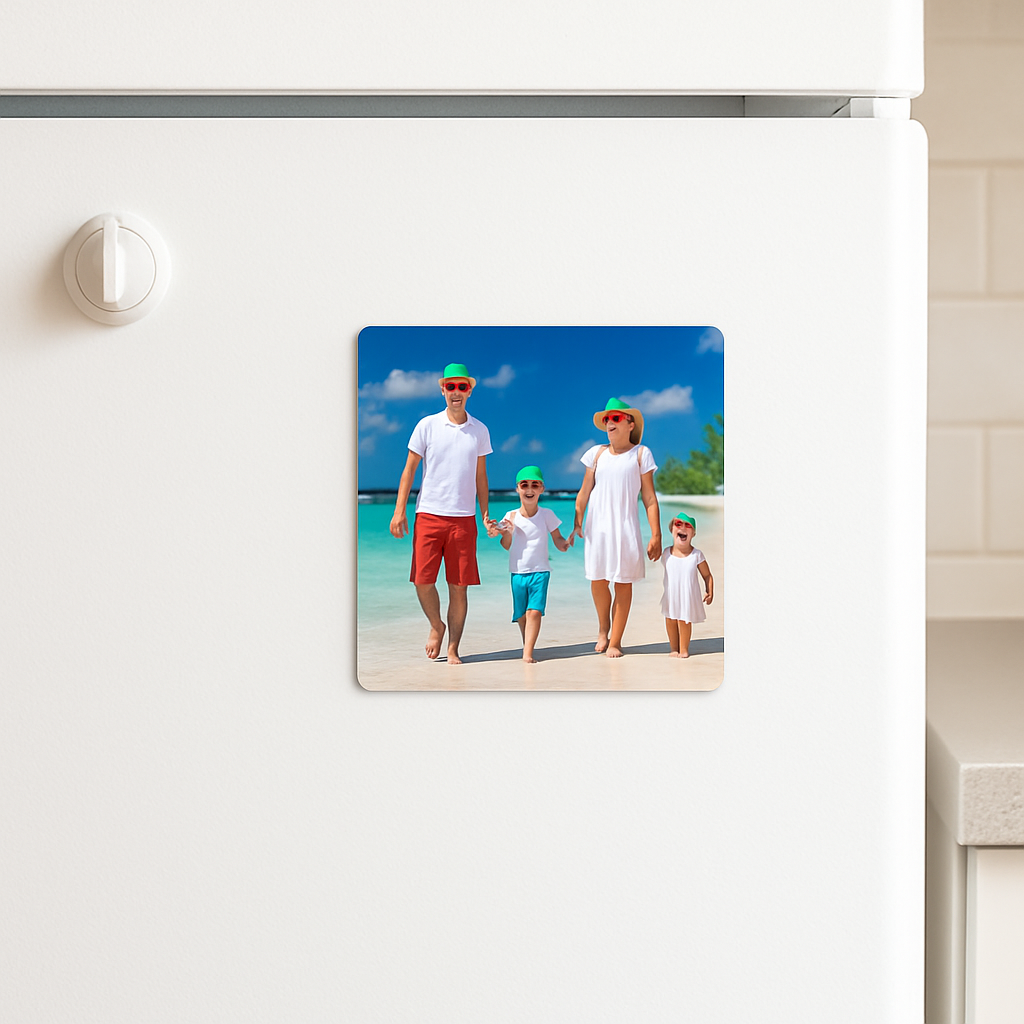
That tiny, square 3x3 photo magnet can turn that empty metal into a personal gallery without any nail or tape.
Imagine pulling a quick snapshot from your phone, uploading it, and in a few days having a sturdy, glossy 3x3 magnet stuck on your kitchen door, ready to catch eyes and start conversations.
Sounds simple, right? But there’s more to getting the perfect magnet than just picking a size.
First, the image needs enough detail – a 3x3 inch space holds roughly a 600 × 600 pixel crop before it starts looking blurry.
Second, you want a finish that resists kitchen spills and sunlight, so a UV‑protected coating is a game‑changer.
And finally, think about the vibe you’re after: a vibrant splash of color for a family vacation, or a muted pastel for a sleek office fridge.
When you choose a custom‑made 3x3 photo magnet from Loveonmagnets, you get that quality without the guesswork – they print on high‑resolution material and seal it with a durable magnet backing.
Plus, the ordering process feels like a quick coffee chat: you pick your photo, select the finish, and they handle the rest.
So, why settle for a generic souvenir when you can showcase a moment that actually matters to you?
Think about the last time you passed a fridge and a bright, familiar face made you pause – that’s the power of a well‑chosen 3x3 photo magnet.
Ready to turn those digital memories into magnetic conversation starters?
Let’s dive in and explore how you can pick the perfect picture, avoid common pitfalls, and make sure your magnets stay vivid for years.
TL;DR
If you want a quick, vibrant way to turn any favorite photo into a sturdy 3x3 photo magnet that brightens your fridge and sparks conversation, Loveonmagnets makes it effortless.
Just upload your image, pick a UV‑protected finish, and within days you’ll have a personalized magnet that stays vivid, resists spills, and reminds you of the moment every time you open the door.
Step 1: Selecting and Preparing Your Photo
Alright, before your 3x3 photo magnet even sticks to the fridge, you’ve got to pick the right picture – and that part feels a lot like choosing a favorite selfie for a profile pic.
First thing: think about the moment you want to relive every time you swing open the door. Is it a sunrise over the ocean, a goofy family pose, or maybe a close‑up of your pup’s tongue? The emotion behind the image will guide the rest of the choices.
But here’s a quick reality check – not every photo will look crisp when it’s shrunk to 3 inches square. A good rule of thumb is to start with a source file that’s at least 1200 × 1200 pixels. That gives the printer enough detail to avoid that fuzzy “pixelated” vibe.
So, what should you do if your favorite snap is only 800 × 800 pixels? Try pulling back a little – maybe crop a broader scene that still captures the feeling, or pick a different image that’s higher‑resolution. Upscaling can work, but it often introduces blur.
Check lighting and color balance
Natural light wins. Photos taken in harsh midday sun often have blown‑out highlights, while indoor shots with mixed bulbs can look muddy. If the picture looks washed out on your phone, it probably won’t pop on a magnet either.
Quick tip: open the photo on a computer and toggle the brightness/contrast sliders. If you can see detail in the shadows and highlights, you’re in good shape.
Mind the composition
Because the magnet is small, keep the main subject centered and avoid clutter around the edges. Think of it like a miniature poster – the eye should land on the focal point instantly.
And if you love a busy background, consider a subtle blur (a shallow depth‑of‑field effect). Most photo editors let you apply a “Gaussian blur” to the background while keeping the subject sharp.
Does this feel like a lot? Don’t worry, Loveonmagnets makes the upload painless. When you drag your image into the design tool, the platform will automatically flag low‑resolution files and suggest a better alternative.
Now, about the finish – you’ll want a UV‑protected coating to keep colors vivid despite kitchen sunlight and occasional spills. This little extra step is what separates a dull magnet from a lasting memory.
One more thing that trips people up: orientation. A portrait‑oriented photo will look tall on a square magnet, which can be striking, but make sure the key details aren’t cut off by the edges. Most tools let you preview a 3 × 3 inch crop before you confirm.
Here’s where you can dive deeper into the whole selection process: How to Choose and Create Personalized Photo Fridge Magnets That Stand Out offers a full rundown of lighting, resolution, and finish options.
Before you hit “order,” give the image one final glance on a screen that’s about the same size as the magnet – think of a phone’s gallery view. If it still looks sharp and the colors pop, you’re ready.
Finally, save a backup copy of the original file. If you ever want a second set or a different size, you won’t have to hunt down the high‑res version again.
Take a breath, pick that perfect shot, and you’ll be one step closer to turning a fleeting memory into a daily smile.
Materials & Printing Options for 3x3 Photo Magnets
When you move from a digital file to a tangible 3x3 photo magnet, the material you pick is the invisible hero behind that crisp, splash‑proof finish.
Substrate: what your image actually sits on
Most custom shops use a thin PVC or polyester sheet because it’s lightweight, flat, and takes ink like a sponge. PVC gives you a glossy surface that makes colors pop, while polyester tends to be a bit more matte and resistant to bending.
Do you ever wonder why some magnets look like a glossy postcard and others feel more like a soft sticker? It’s the substrate. If you love that “wow” factor in bright kitchens, go glossy; if you prefer a low‑glare look that hides fingerprints, polyester is your friend.
Finish options: UV‑protected vs matte low‑glare
A UV‑protected coating is basically sunscreen for your magnet. It shields the ink from kitchen sunlight and the occasional splash of orange juice. The result? Your beach sunset stays vibrant for years.
Matte low‑glare finishes, on the other hand, sacrifice a touch of shine to keep fingerprints at bay. They’re perfect for high‑traffic fridges where kids are constantly grabbing magnets.
Need a deeper dive into which finish wins for your space? Check out our Best Photo Magnets 2025 guide for side‑by‑side comparisons.
Magnet backing: flexible rubber vs hard ferrous
The backing determines how well the magnet clings and how easy it is to reposition. Flexible rubber magnets bend around the fridge’s curves and are less likely to chip the paint. Hard ferrous sheets provide a stronger pull but can be a bit stubborn when you try to move them.
My go‑to for kitchen doors is the rubber‑backed option because you can slide the magnet to a new spot without leaving a mark. If you’re decorating a metal locker that doesn’t see daily handling, the hard backing gives that extra grip you might want.
| Option | Pros | Cons / Notes |
|---|---|---|
| Glossy PVC substrate | Vivid colors, high shine, good ink absorption | Shows fingerprints, can be slippery |
| Matte polyester substrate | Low glare, fingerprint‑resistant, durable | Colors slightly muted compared to glossy |
| UV‑protected coating | Protects against fading, spill‑resistant | Usually adds a slight gloss |
| Matte low‑glare finish | Hides fingerprints, subtle look | Less vibrant on very bright images |
| Rubber magnet backing | Flexible, easy to reposition, gentle on paint | Pull strength slightly lower |
| Hard ferrous backing | Strongest hold, ideal for smooth metal | Harder to move, may leave faint marks |
So, how do you decide? Start by asking yourself where the magnet will live. If it’s a busy family fridge, matte polyester with a rubber backing and a low‑glare finish will stay looking fresh. If you’re showcasing a vacation photo on a sleek office fridge, glossy PVC paired with a UV coating and hard backing gives that gallery‑ready shine.
One last tip: order a single sample of each combination before committing to a full batch. Seeing the texture in your own kitchen lights tells you instantly which combo feels right.
With the right material, finish, and backing, your 3x3 photo magnets become more than a memory—they become a lasting piece of kitchen art that endures spills, sunlight, and the occasional curious toddler.
Step-by-Step: Creating Your 3x3 Photo Magnet at Home
So you’ve decided you want a 3x3 photo magnet that feels like it was handcrafted in your own kitchen. The good news? You don’t need a professional printer – just a few everyday supplies and a little patience.
What you’ll need
- High‑resolution image (at least 600 × 600 px)
- Printable substrate – glossy PVC or matte polyester sheet
- UV‑protected coating spray (optional but worth it)
- Rubber magnet backing sheet (flexible) or thin ferrous sheet
- Sharp craft knife or scissors
- Cutting mat, ruler, and a clean cloth
Got all that? Great. Let’s walk through each step as if we’re chatting over coffee.
Step 1: Prepare your image
Open your photo in a simple editor. Crop it to a perfect square and zoom to 100 % – you’ll instantly see if it looks pixelated. Boost the contrast just enough so whites stay bright under kitchen lighting, and add a touch of saturation if the colors feel muted. Save the file as a high‑quality JPG or PNG.
Does it still look good on a small screen? If you can see the details on your phone, you’ll be fine on a 3x3 magnet.
Step 2: Print on the right substrate
If you have an inkjet printer that handles heavyweight paper, feed it the glossy PVC for that pop‑color look or the matte polyester for a low‑glare finish. Many home printers can handle 200‑gsm sheets without jamming.
Tip: For extra durability, spray a light coat of UV‑protected coating while the ink is still wet. It acts like sunscreen for your magnet, keeping the sunset vivid for years.
Step 3: Cut to size
Place the printed sheet on a cutting mat, align a ruler at the 3‑inch mark, and score with a craft knife. Press firmly, then snap the piece off. Do the same on the opposite side to get a clean 3 × 3 inch square.
Don’t rush – a tidy cut prevents jagged edges that can catch on the fridge paint.
Step 4: Add the magnet backing
Cut a matching 3 × 3 piece from your rubber magnet sheet. Peel off the protective film and press it onto the back of the printed square. The rubber gives a gentle pull that’s easy to reposition, perfect for a busy family fridge.
If you prefer a stronger hold, the thin ferrous sheet works too; just be aware it’s a bit harder to move.
Step 5: Seal and finish
Give the front another light spray of UV coating to lock in the colors. Let it dry completely – usually about 15 minutes – before you handle it again. This double‑coat trick is what the pros use to keep magnets looking fresh after spills.
Need inspiration on finishes? Check out the Best Photo Magnets 2025 guide for a quick side‑by‑side comparison.
Step 6: Stick and enjoy
Wipe the fridge surface with a damp cloth, dry it, then press your new magnet firmly into place. Walk away, then come back in a few minutes – if it still clings, you’ve nailed the right backing.
Finally, step back and admire the little memory you just turned into daily décor. Every time you reach for the milk, you’ll get a quick smile from that beach sunset or puppy grin.
And there you have it – a DIY 3x3 photo magnet that looks as polished as a store‑bought one, but with a personal touch you can’t buy.
Design Ideas: Personalizing Your 3x3 Photo Magnets
Ever stare at a plain fridge and think, “What if this spot could tell a story?” That tiny 3x3 space is a canvas you can dress up in a thousand ways – and you don’t need a designer’s degree to make it look intentional.
Play with color palettes
If your photo already bursts with color, let it shine. But if you’re working with a black‑and‑white portrait, try a colored border or a subtle wash‑out background on the magnet itself. A soft pastel frame can make a vintage family pic feel fresh, while a bold teal border adds a pop‑culture vibe to a travel snap.
And here’s a trick: pick a hue from the photo’s dominant color and echo it in the kitchen décor – maybe the same teal on a dish towel or a matching coaster. Suddenly the magnet feels like part of the room, not an afterthought.
Mix textures for tactile interest
Glossy PVC gives that postcard shine, but a matte polyester surface feels more like a soft‑touch sticker. You can even combine both – print the main image on glossy PVC, then add a thin matte overlay with a pattern (think tiny stars or a faint marble). The contrast is subtle enough to stay elegant, yet you’ll notice the difference every time you run a finger across it.
Think about the kitchen hustle: fingerprints are inevitable. A low‑glare finish hides those smudges, so you get a cleaner look without constant wiping.
Add a personal stamp or quote
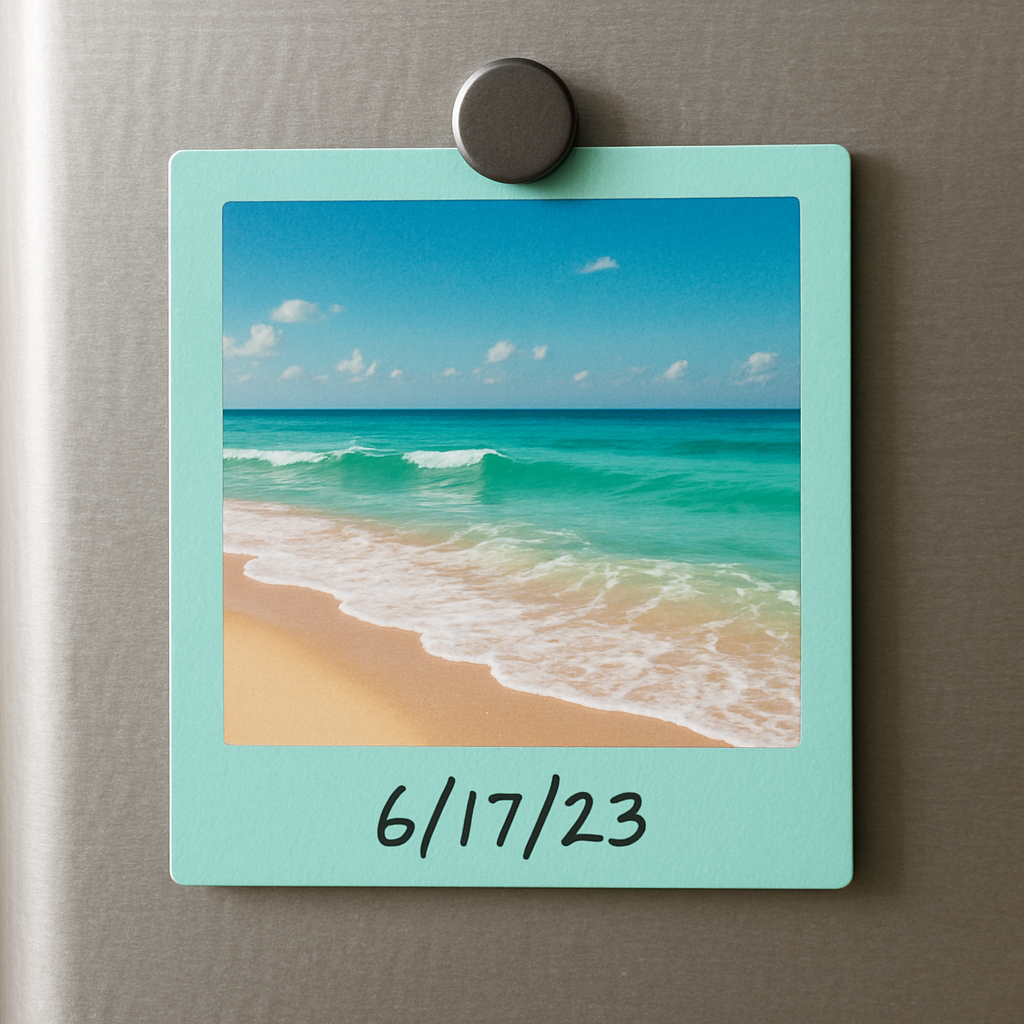
Most people love a photo, but a few words can turn a memory into a mantra. A short phrase like “Sunday mornings” or a handwritten date stitched onto the bottom edge adds context without stealing the visual focus. Use a font that mimics your own handwriting for that genuine touch.
We’ve seen families place a tiny recipe line – “Grandma’s lemon bars” – right under a photo of the dessert. It becomes a conversation starter and a quick reference when cravings hit.
Layer with themed stickers or cut‑outs
Because the magnet is essentially a tiny canvas, you can treat it like a scrapbook page. Tiny stickers – a sun, a paw print, a music note – can be printed directly onto the magnet or applied as separate adhesive pieces that sit on top of the image. This works especially well for kids’ art: a doodle magnet with a sparkle sticker feels like a mini‑gallery.
Just remember to keep the extras proportionate; a 3x3 inch square can get crowded fast. One or two small elements are enough to add personality.
Choose a backing that matches your lifestyle
Rubber magnet backing is forgiving – you can slide it around the fridge without scratching paint. If you love swapping photos weekly, that flexibility is golden. For a more permanent display, a hard ferrous sheet holds tighter, making the magnet feel like a small piece of art glued to metal.
And if you want a little extra flair, consider a backing that’s tinted – a soft gray or pastel that peeks out around the edges, giving the magnet a framed look without an actual frame.
Showcase seasonal themes
Think about rotating your magnets with the seasons. A summer beach shot paired with a turquoise border now, then swapping to a cozy fireplace image with a warm amber edge in winter. The same 3x3 size works year‑round, but the design language shifts with the calendar, keeping your fridge feeling fresh.
Pro tip: order a small batch of the same photo in two different finishes – one glossy, one matte – and see which vibe your kitchen naturally leans toward.
Ready for inspiration? Check out the best photo magnet finishes for 2025 to compare UV‑protected coatings and matte options side by side.
All these ideas boil down to one simple principle: treat your 3x3 photo magnet like a tiny piece of home décor you’d curate on a coffee table. Pick a color, add a texture, maybe a word, and let the magnet do the storytelling every time you reach for the milk.
Care, Maintenance, and Display Tips for 3x3 Photo Magnets
Alright, you’ve just stuck a fresh 3x3 photo magnet on the fridge and you’re already smiling. But what happens when the coffee splashes, fingerprints appear, and the kitchen hustle kicks in?
Protect the colors
The UV‑protected coating you chose is basically sunscreen for your magnet. It slows fading from the sunlight that sneaks in through the window. If the edge looks a shade dull after a month, just wipe it with a soft, damp cloth – no harsh chemicals needed.
Pro tip: a quick dab of a 50/50 water‑and‑isopropyl mix lifts greasy smudges without scratching the finish.
Deal with fingerprints
Rubber‑backed magnets are forgiving; the matte surface hides smudges. Glossy PVC magnets love a microfiber towel. Lightly dust the front before you reach for a snack and you’ll avoid the “why does my beach sunset look cloudy?” moment.
Mind the paint
Metal doors adore magnets, but sliding them around can irritate paint. Give the fridge a quick dry‑cloth wipe before you reposition – it removes dust that acts like sandpaper. For weekly swaps, slip a thin silicone pad between the magnet and the door; it’s invisible but protects the paint.
Simple cleaning routine
- Weekly: wipe the front with a damp microfiber cloth.
- Monthly: spray a light UV coating (if you applied one at home) and let it dry.
- Every 3‑6 months: rotate the magnet to a new spot for a fresh look.
Sounds like a lot? It’s basically the same routine you use for any kitchen surface.
Display ideas that stay fresh
Instead of a static row, try a “magnet gallery wall.” Group 3x3 pieces by theme – travel, family, pets – and leave a tiny gap between each. The gaps act like visual breathing room and make every photo pop.
Seasonal vibes are easy: swap the border color each quarter. Teal for summer, amber for fall – the magnet stays the same, the frame does the talking.
Another trick: attach a thin magnetic strip (available at most craft stores) around a cluster to create a temporary “frame.” It adds a subtle shadow that makes the pictures look deeper.
When things go sideways
If the magnet starts losing its bite, the backing is likely the culprit. Rubber can lose elasticity after years of heat. Peel it off carefully and stick a fresh rubber sheet – it’s as easy as re‑applying a sticker.
Stubborn edge lifting? Run a hairdryer on low heat for ten seconds; the gentle warmth expands the backing just enough to flatten it back onto the fridge.
Quick checklist before you walk away
- Wipe the front with a damp cloth.
- Check the backing for flex; replace if needed.
- Make sure the fridge surface is clean and dry.
- Consider a seasonal border or a magnetic‑strip “frame.”
If you’re curious about leveling up the look of your magnets with different finishes, check out create stunning print photo magnets for a deeper dive.
Bottom line: a little care now keeps your 3x3 photo magnets looking fresh for years, and a few playful display tricks turn a simple fridge into a rotating memory board you’ll actually enjoy checking every day.
Enjoy the process and watch your kitchen come alive.
Conclusion
We've walked through picking the perfect snap, choosing a finish, printing, and even swapping magnets with the seasons. By now you probably feel a bit like a fridge‑decorating pro.
So, what's the biggest win? It’s the tiny reminder you get every time you swing the door – a smile, a memory, a tiny piece of home that doesn’t cost a fortune.
Remember the quick checklist: 600 × 600 px resolution, UV‑protected coating, clean edge seal, and a magnet thickness of at least 0.5 mm. If any of those boxes are unchecked, just pause, tweak, and print again. The extra effort pays off in years of vibrant color.
Got a seasonal shift coming up? Grab a few extra 3x3 photo magnets, stash them in a zip‑lock bag, and swap them when the holidays roll around. It’s a low‑effort way to keep your kitchen feeling fresh.
And if a magnet ever loses its stick, a tiny strip of double‑sided tape does the trick until you replace the backing. Simple, right?
Ready to turn more of your favorite moments into conversation starters? Grab your next photo, follow the steps we’ve covered, and let your fridge become the gallery you’ve always wanted.
And don’t forget to enjoy the process – the joy of seeing a memory pop up while you make a sandwich is priceless.
FAQ
What size should my image be for a 3x3 photo magnets?
To keep your magnet crisp, aim for at least 600 × 600 pixels – that’s the sweet spot for a 3‑inch square. If you can upload a bigger file (say 1200 × 1200 px), the printer will downsize it, preserving detail. Stick to JPEG or PNG, and make sure the image is in sRGB so colors look the same on your fridge as they do on your phone. A quick zoom‑in at 100 % on your computer will tell you if any fuzz shows up.
How long do 3x3 photo magnets stay vibrant on the fridge?
When you choose a UV‑protected coating, most 3x3 photo magnets keep their color for three to five years under normal kitchen lighting. Direct sunlight can speed up fading, so positioning them a few inches away from a sunny window helps. The magnetic backing itself doesn’t degrade, but if you notice the grip weakening, a thin extra sheet of magnet or a dab of double‑sided tape will revive the hold without re‑printing.
Can I use any type of photo for my 3x3 photo magnets?
Absolutely – anything that meets the resolution rule works, whether it’s a goofy family selfie, a pet portrait, or a scanned piece of kids’ artwork. Just remember that very busy backgrounds can get lost when the image shrinks, so try to keep the main subject centered with a little breathing room. If you’re using a scanned drawing, boost the contrast a notch so the lines stay sharp after printing.
What should I do if a 3x3 photo magnet stops sticking?
If the magnet’s grip fades, start by cleaning the fridge surface with a damp cloth – dust or oil can sabotage the pull. Next, apply a thin strip of double‑sided tape to the back; it gives an instant boost without altering the look. For a longer fix, you can stick a second sheet of magnetic material (0.5 mm thick) on top of the existing backing, then press firmly.
How many 3x3 photo magnets can I safely display on one fridge?
You can line up a whole gallery – the fridge door is typically 30‑32 inches wide, so you could fit eight or nine 3‑inch squares side by side with a tiny gap. Just keep an eye on weight: each magnet is lightweight, but stacking too many in one spot can thin the magnetic field. A good rule of thumb is to spread them out across the door and maybe one on the side panel.
Are 3x3 photo magnets safe for stainless‑steel refrigerator doors?
Yes – the magnet adheres to the metal underneath the stainless‑steel coating, so there’s no risk of scratching the finish. Just avoid using abrasive cleaners on the magnet itself; a soft microfiber wipe is enough. If your fridge has a magnetic “shield” panel (some models do), the magnet will still cling, but you might need a slightly stronger backing, like a 0.6 mm sheet, for a firm grip.
Can I get custom shapes for my 3x3 photo magnets or are they only square?
Most vendors, including Loveonmagnets, print the image on a square sheet and then cut it to 3 × 3 inches, so the final shape stays square. Some services do offer rounded corners or a subtle die‑cut that follows the subject, but the overall footprint remains the same. If you want a truly non‑square silhouette, you’d need to order a different size or a specialty shape, which usually starts at 2 × 2 inches.


