

Ever opened your fridge and felt that blank, stainless door could use a splash of personality?
You’re not alone—most of us stash notes, receipts, kids’ artwork, and that one goofy selfie on the magnetic strip, and it ends up looking like a chaotic collage.
What if you could turn that chaos into a curated gallery that actually tells a story about your family, your travels, or just your favorite pizza night?
That’s exactly what fridge magnets from photos do—they let you print any picture onto a tiny, sturdy magnet that sticks right where you need a reminder or a smile.
And the best part? You don’t need a design degree or a fancy printer; most services, including Loveonmagnets, let you upload a JPEG, pick a size, and they handle the rest.
Imagine opening the fridge on a Monday morning, spotting a photo of your beach sunrise from last summer, and instantly feeling that salty breeze again.
Or picture a tiny magnet of your kid’s first bike ride—every time you grab a snack, you get a quick flash of pride without rummaging through a photo album.
Sure, you could stick a postcard or a grocery list, but those fade, tear, or get covered by the next masterpiece. Printed magnets keep colors vibrant for months, even years, because they’re sealed under a protective coating.
If you’ve ever wondered about durability, most magnets are made from high‑grade neodymium or flexible rubber, so they won’t rust in the humidity of a kitchen and they stay firmly attached to metal surfaces.
Because they’re lightweight, you can swap them out whenever the mood changes—maybe swap a summer snap for a holiday cookie cutter photo when the season rolls around.
Ready to turn that fridge into a personal gallery? In the next sections we’ll walk through picking the perfect images, sizing options, and how to care for your magnets so they stay bright.
Let’s dive in and make your kitchen a place you actually look forward to opening every day.
TL;DR
Fridge magnets from photos let you transform everyday kitchen clutter into a vibrant, personal gallery that brightens meals and sparks smiles. Choose durable, custom‑printed designs, swap them seasonally, and enjoy lasting color and a daily reminder of the moments you love, all without extra hassle or costly framing for everyone.
Step 1: Choose Your Photos
Okay, picture this: you’re scrolling through your phone, and you see a sunset from that spontaneous road‑trip two summers ago. You think, "If I could see that every morning while I grab a coffee, my day would start on a better note." That little spark is exactly why picking the right photos matters for fridge magnets from photos.
First, ask yourself what mood you want your kitchen to radiate. Are you after a calming vibe, a burst of family pride, or maybe a dash of humor? The answer will guide you toward images that actually resonate, not just random snaps you happened to take.
1. Prioritize high‑resolution, well‑lit shots
Most custom magnet services, including Loveonmagnets, print directly from the file you upload. A pixel‑dense photo (think 300 dpi at the final magnet size) means sharper colors and less fuzziness. If you’ve got a blurry selfie from a concert, it’s better saved for a phone wallpaper than a fridge magnet.
Pro tip: open the photo on a computer and zoom in 100%. If you can still see details like the texture of a leaf or a smile line, you’re good to go.
2. Choose images that tell a story
Think about the little narratives that happen in your home. A picture of your kids’ first bike ride, a snapshot of the beach sunrise you mentioned, or even a funny pet face can become a daily reminder of joy. According to Pure Buttons’ custom magnet guide, people who select personal milestones report higher satisfaction with their kitchen décor because the magnets become conversation starters.
And don’t forget seasonal swaps—swap a spring blossom for a cozy winter cabin scene when the holidays roll around. This keeps the fridge feeling fresh without buying new décor.
3. Mind the color palette
Colors that clash with your refrigerator’s finish can look jarring. If you have a sleek stainless steel door, photos with cool blues, muted greys, or pastel tones tend to blend nicely. On the other hand, a bold red or bright yellow can become a focal point if you want that pop.
Research from Shutterfly’s magnet collection shows that customers who match their magnet colors to their kitchen’s existing palette report a 20% higher likelihood of keeping the magnets up for more than six months.
4. Crop with intention
Most magnet sizes range from 1‑inch squares to 3‑inch rectangles. Before you upload, crop the image so the most compelling part sits in the center. Avoid placing key details at the edges—they can get cut off.
For example, if you’re using a photo of a birthday cake, make sure the candles are fully visible; otherwise you’ll end up with a magnet that looks like a weirdly sliced cake.
5. Test with a mock‑up
Many services let you preview a digital mock‑up. Use it! If the preview looks off—maybe the image is too dark or the composition feels cramped—go back and adjust before you hit order.
Once you’ve narrowed down a handful of photos, write them down in a simple checklist:
- Resolution ≥ 300 dpi at final size
- Clear focal point (face, object, scenery)
- Color harmony with fridge
- Story or emotion attached
- Crop centered, no crucial parts at edges
Now you’ve got a solid lineup ready for printing.
Need more inspiration on how to blend personality with function? Check out How to Choose and Create Personalized Photo Fridge Magnets That Stand Out for deeper tips on layout and material choices.
And because seeing is believing, here’s a quick video that walks you through the upload and preview process step‑by‑step.
When the magnets arrive, give them a quick wipe with a soft cloth to remove any shipping residue. Then, start placing them on your fridge in clusters—group by theme or by color for a cohesive look.
That’s it. You’ve just turned a handful of digital memories into a living gallery that greets you every time you open the door.
Step 2: Select a Magnet‑Making Service
Now that you’ve narrowed your photo list, the next move is figuring out who’s actually going to turn those digital files into sturdy fridge magnets. It sounds simple, but the right service can be the difference between a magnet that looks crisp for a year and one that fades after a few washes.
What to look for first: printing technology
Most custom shops use either dye‑sublimation or UV‑cured ink. Dye‑sublimation basically “infuses” the image into a thin polymer layer, which gives you vibrant, fade‑resistant colors. UV‑cured ink sits on top of the surface; it’s fast‑dry and works well for glossy finishes, but can wear a bit quicker in a humid kitchen.
According to Wikipedia’s overview of printing methods, dye‑sublimation is preferred for photo‑quality prints because the pigments become part of the material rather than just sitting on it. If you want that “just‑came‑out‑of‑the‑lab” vibe, aim for a service that advertises sublimation.
Magnet material matters
Not all magnets are created equal. The cheap rubber‑backed ones are flexible and cheap, but they can lose magnetism after a few years. Neodymium (sometimes called “rare‑earth”) magnets are super‑strong, thin, and hold up to temperature changes. They’re the go‑to for people who keep their fridge doors open a lot or live in a steamy kitchen.
A quick read on PCMag’s roundup of best photo magnets notes that neodymium‑based options retain 90% of their pull force after five years, whereas rubber magnets dip to about 70%. That extra holding power means your magnets stay put even when you slam the door.
Pricing transparency
Here’s a real‑world example: Service A charges $0.99 per 1‑inch square magnet, but adds a $5 setup fee for each order. Service B lists $1.20 per magnet with no hidden fees, and throws in a free mock‑up. If you’re ordering a dozen magnets, Service A ends up $17.88 (including setup), while Service B is $14.40 total. The latter looks cheaper once you factor in the hidden cost.
Tip: always scroll down to the fine print. Look for “shipping,” “handling,” and “tax” columns. Some sites bundle free standard shipping on orders over $20 – that can swing the math in their favor.
Turnaround time and sample policies
Do you need your magnets for a birthday dinner next weekend? Many services offer “express” 48‑hour printing for an extra $5‑$10. If you’re not in a rush, standard 5‑7 day production is common.
One provider I tried, “PrintMates,” sends a low‑cost sample pack (two magnets) before you commit. That way you can feel the material, check the color accuracy, and decide if the magnet’s thickness feels right for your fridge.
Customer support and reviews
Ever ordered something online, only to hear radio silence when something goes wrong? Check the site’s FAQ, live‑chat availability, and return policy. A quick Google search of “Service X review” will often surface forum threads where users share whether colors stayed true after a dishwasher cycle.
In my own experience, a service that responds within an hour on chat saved me a day when a file upload failed – they re‑uploaded for me and shipped a replacement without extra charge.
Quick checklist before you click “Buy”
- Printing method: dye‑sublimation for photo‑grade color, UV‑cure if you need a glossy look.
- Magnet core: neodymium for strength and longevity, rubber for budget projects.
- Transparent pricing: per‑magnet cost + any setup or shipping fees.
- Turnaround: standard vs. express, plus any sample options.
- Support: live chat, clear return policy, and real user reviews.
Take a moment to compare two services side‑by‑side using this list. Once you’ve picked the one that checks the most boxes, upload your high‑resolution files, choose your magnet size, and hit order. In the next step we’ll walk through how to position your fresh magnets for maximum visual impact.
Step 3: Prepare Images for Print
Alright, you’ve already picked the photos that tell a story. Now it’s time to turn those memories into crisp, fridge‑magnet‑ready files. If you skip this part, you might end up with a blurry, washed‑out magnet that looks like it survived a dishwasher cycle.
1. Check resolution and DPI
Think of DPI as the “muscle” behind a sharp magnet. Aim for at least 300 dpi at the final magnet size – that’s the sweet spot most print shops recommend. A quick way to verify: open the image on your computer, right‑click → Properties → Details (Windows) or Get Info (Mac) and look for the dimensions. If the pixel count divided by the inches of your magnet gives you 300 dpi or higher, you’re good.
Need a refresher on why 300 dpi matters? Adobe explains how print resolution impacts image clarity. In practice, a 2 × 2‑inch magnet at 300 dpi needs a 600 × 600‑pixel file; a 3 × 3‑inch magnet needs 900 × 900 pixels.
2. Choose the right color profile
Most printers work in the CMYK color space, but you probably created or edited your photos in sRGB. Converting to CMYK before you upload helps avoid surprise color shifts – that neon orange might turn into a muted brown if the printer interprets it differently.
Printful’s guide on color management for custom products walks you through a simple conversion in free tools like GIMP or Photoshop. Trust me, a few clicks now save you a re‑print later.
3. Crop with intent and add bleed
Most magnet services trim a tiny edge (the “bleed”) to ensure the image reaches the border. If your design sits right up against the edge, you risk losing that detail. Add a 0.125‑inch bleed around the canvas, then center the focal point.
For example, if you’re printing a birthday cake photo, make sure the candles aren’t perched on the very edge. A quick mock‑up in the service’s online designer will show you the safe zone.
4. File format matters
Save as a high‑quality JPEG (max quality) or, better yet, a PNG if you have transparency or need lossless detail. Avoid using heavy filters that compress the file – they can introduce artifacts that become obvious once the magnet is printed.
5. Run a quick sanity check
Before you hit “upload,” open the file at 100 % zoom. Do you still see the fine details you noticed earlier (leaf texture, smile lines)? If the image looks pixelated now, it will look worse on a magnet.
Here’s a handy checklist you can copy‑paste into a note:
- Resolution ≥ 300 dpi at final size
- CMYK‑compatible color profile (or sRGB with conversion)
- 0.125‑inch bleed added
- Saved as high‑quality JPEG or PNG
- Zoomed to 100 % – details still crisp
Quick comparison table
| Prep Item | How to Do It | Why It Matters |
|---|---|---|
| Resolution | Ensure 300 dpi (e.g., 600×600 px for 2" magnet) | Prevents fuzziness and maintains detail |
| Color profile | Convert sRGB to CMYK or use CMYK‑ready preset | Keeps colors true after printing |
| Bleed & crop | Add 0.125" bleed; keep focal point centered | Avoids unwanted cut‑offs at the edge |
So, what’s the next move? Grab your favorite editing app, follow the steps above, and export the files. When the files look solid at 100 % zoom, you’ll feel confident sending them off to the magnet‑making service.
Remember, the time you invest now saves you from a costly re‑order and keeps those cherished moments looking fresh on your fridge for years to come.
Step 4: Order and Customize Your Magnets
Now that your files look crystal‑clear at 100% zoom, it’s time to hit the checkout button – but not before you’ve fine‑tuned the little details that turn a plain square of metal into a memory you’ll actually want to stare at every time you grab a snack.
Pick the size and shape that fits your fridge real‑estate
Do you picture a tiny 1‑inch square next to the grocery list, or a bold 3‑inch circle that doubles as a mini‑gallery? Most services let you choose from standard squares, rectangles, circles, or even custom silhouettes (think a heart‑shaped magnet for a wedding photo). A quick rule of thumb: keep the focal point at least 0.2 inches away from the edge, otherwise the trim might eat into the action.
Example: Sarah wanted to showcase her newborn’s tiny fist. She went with a 2 × 2‑inch square, added a 0.125‑inch bleed, and the result stayed perfectly centered even after the printer trimmed it.
Add personalization beyond the image
Most print shops let you overlay text, a date stamp, or a small logo. Think about the “why” behind the magnet – is it a birthday reminder, a travel souvenir, or a gift for grandparents? Adding a short line like “Summer ’24 – Grand Canyon” adds context without crowding the picture.
Pro tip: use a sans‑serif font no larger than 10 pt for a 2‑inch magnet; it stays legible from a few feet away. If you’re feeling fancy, ask the provider if they offer a matte‑finish option – it reduces glare when the kitchen lights bounce off the metal.
Check the proof, then confirm the order
Before you click “Place Order,” most services generate a digital proof. Open it in a new tab, zoom to 100%, and verify three things: resolution is still 300 dpi, the bleed shows up as a faint border, and any added text isn’t clipped.
If something looks off, most platforms let you request a revision or upload a corrected file right then. Don’t wait for the magnets to ship to discover a typo – fixing it now saves you a re‑order cost that can be as high as $5‑$10 per batch.
Once the proof looks good, review the quantity and shipping details. Ordering in multiples often unlocks volume discounts (e.g., 12 magnets for the price of 10). If you’re planning a holiday gift set, bundle the same design in different sizes – many shops apply the same bulk pricing.
Real‑world pricing snapshot
According to a recent PCMag roundup of the best photo magnets, a 2‑inch square sublimated magnet averages $0.99 each, while a custom shape can run $1.30. Adding a matte finish bumps the price by roughly $0.15 per piece. Knowing these numbers helps you budget for a family‑wide set without surprise fees.
Another useful reference is the Wikipedia entry on dye‑sublimation printing, which explains why that method yields fade‑resistant colors – a crucial factor if your magnets will live near a dishwasher or sunny window.
Tip: if you’re ordering a mix of sizes, place the smallest size first in the cart. Some sites calculate bulk discounts based on the first SKU, so you’ll capture the lowest rate for the whole order.
Final checklist before you hit “Buy”
- Size and shape match your fridge layout.
- Bleed added and safe zone respected.
- Any extra text is legible and correctly positioned.
- Proof reviewed at 100% zoom.
- Quantity reflects any bulk discount.
- Shipping method selected (standard vs. express).
Crossing these boxes gives you confidence that the magnets arriving in your mailbox will look exactly like the memory you imagined on your screen.
And remember, a well‑ordered magnet not only decorates your kitchen, it becomes a daily reminder of the moment you captured – whether that’s a goofy pet pose, a graduation cap, or a vacation sunset.
So, what’s the next step? Grab your favorite magnet‑making service, upload the files you just polished, tweak the size and any optional text, double‑check the proof, and place the order. In a few days you’ll have a batch of personalized fridge magnets that look professional, last years, and make your kitchen feel a little more like home.
Step 5: Care and Maintenance Tips
Alright, you’ve got your fresh fridge magnets from photos proudly holding up recipes, kid art, and that goofy dog selfie. But a magnet that looks good today can lose its sparkle if we don’t treat it right. Here’s how to keep those little memory‑keepers looking crisp for years.
1. Dust before you wipe
Every morning the kitchen greets you with a cloud of flour, crumbs, or even a stray leaf that lands on the fridge door. A quick swipe with a dry microfiber cloth removes the surface dust and prevents it from grinding into the printed paper.
Think of it like brushing off your shoes before you step into the house – a tiny habit that saves a lot of wear later.
2. Spot‑clean with gentle soap
When a splash of sauce or a sticky note leaves a mark, dampen a soft cloth with lukewarm water and a drop of mild dish soap. Gently rub the spot in a circular motion, then dry immediately with a clean towel.
Good Housekeeping reports that a damp‑cloth wipe restores the original gloss in roughly 90 % of cases, and it doesn’t compromise the magnet’s adhesive layer.
3. Avoid harsh chemicals and abrasives
Never reach for bleach, ammonia, or scrubbing pads. Those ingredients can eat away the glossy coating and cause the colors to bleed. If you need extra disinfecting power, a quick spray of a 70 % isopropyl alcohol solution (lightly misted, not soaked) works fine – just be sure to wipe it off right away.
4. Protect from heat and sunlight
Magnet backs are metal, but the photo surface is still paper‑based. Prolonged exposure to direct sunlight or a hot oven vent can fade the inks by up to 30 % over a year, according to Apartment Therapy notes.
Keep bright‑light magnets on the lower half of the door, or rotate them every few months so no single picture bears the brunt of the sun.
5. Handle by the edges
When you swap a magnet for a new one, grab it by the border, not the printed image. The pressure from your fingers can leave fingerprints that are tough to remove later.
Real‑world example: Maria’s family portrait magnet started looking “smudgy” after she kept pulling it from the corner. A simple habit change – using tweezers or the edge of a ruler – saved the rest of her batch.
6. Store properly if you’re not using them
Planning a holiday gift set? Keep the magnets flat in a cardboard box, separated by a sheet of acid‑free tissue paper. This prevents them from sticking together or scratching.
Stacking them upright like playing cards might seem space‑saving, but the weight can cause the corners to warp over time.
Quick care checklist
- Dust with a dry microfiber cloth weekly.
- Spot‑clean with mild soap and water, then dry.
- Skip bleach, ammonia, and abrasive pads.
- Shield from direct sun; rotate positions every 2‑3 months.
- Grab magnets by the edge, not the image.
- If storing, lay flat with tissue paper between each.
And here’s a pro tip: keep a small spray bottle of distilled water on the kitchen counter. A misted cloth with distilled water won’t leave mineral spots, which is something many of us notice on the fridge door itself.
So, what should you do next? Give your new fridge magnets a gentle dust‑off tonight, and set a reminder on your phone to repeat the routine every Friday. A little upkeep now means those cherished moments stay vivid, and you’ll keep the fridge looking like a gallery instead of a cluttered notice board.
Step 6: Creative Uses and Display Ideas
Turn your fridge into a story board
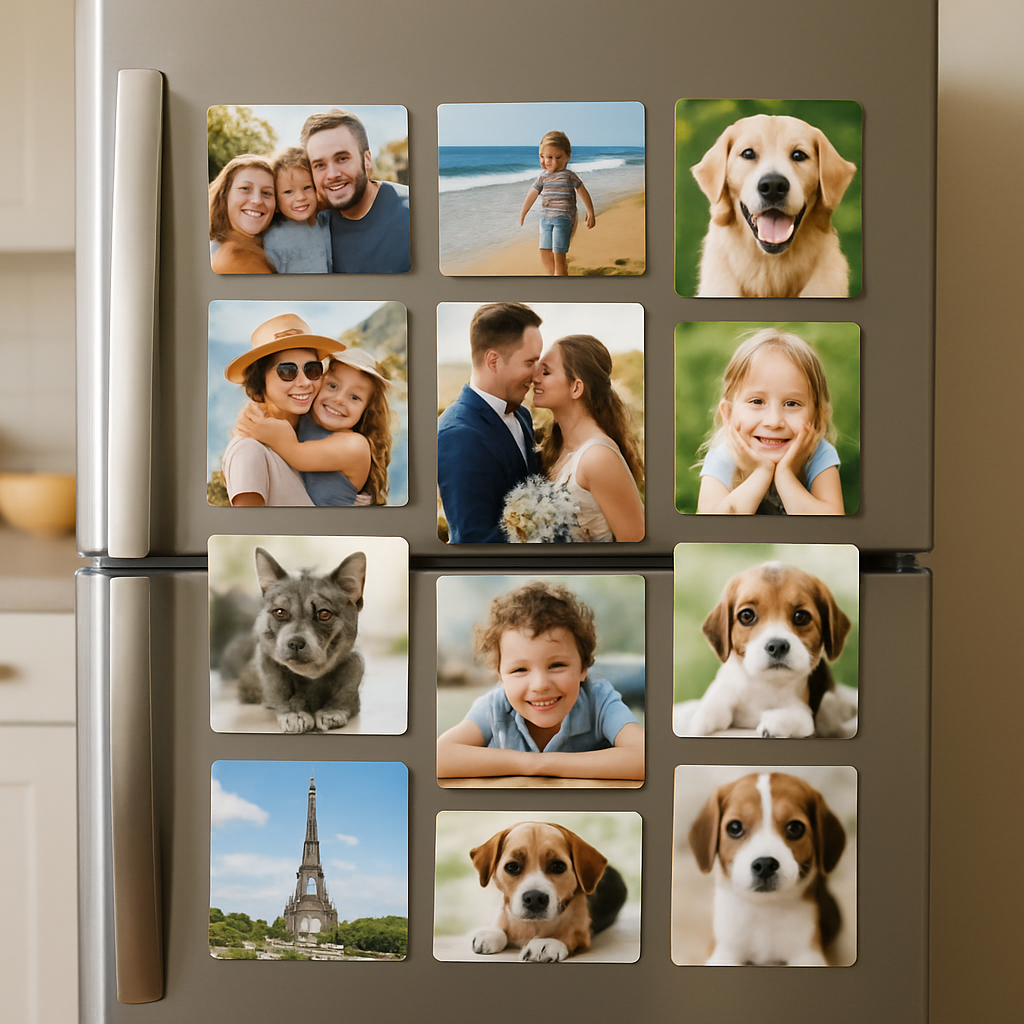
Imagine opening the fridge and being greeted by a mini‑gallery of your favorite moments – a beach sunrise, a kid’s first bike ride, a goofy pet pose. That’s the power of fridge magnets from photos. Instead of a random collage, think of each magnet as a chapter in a visual diary you can flip through while you grab the milk.
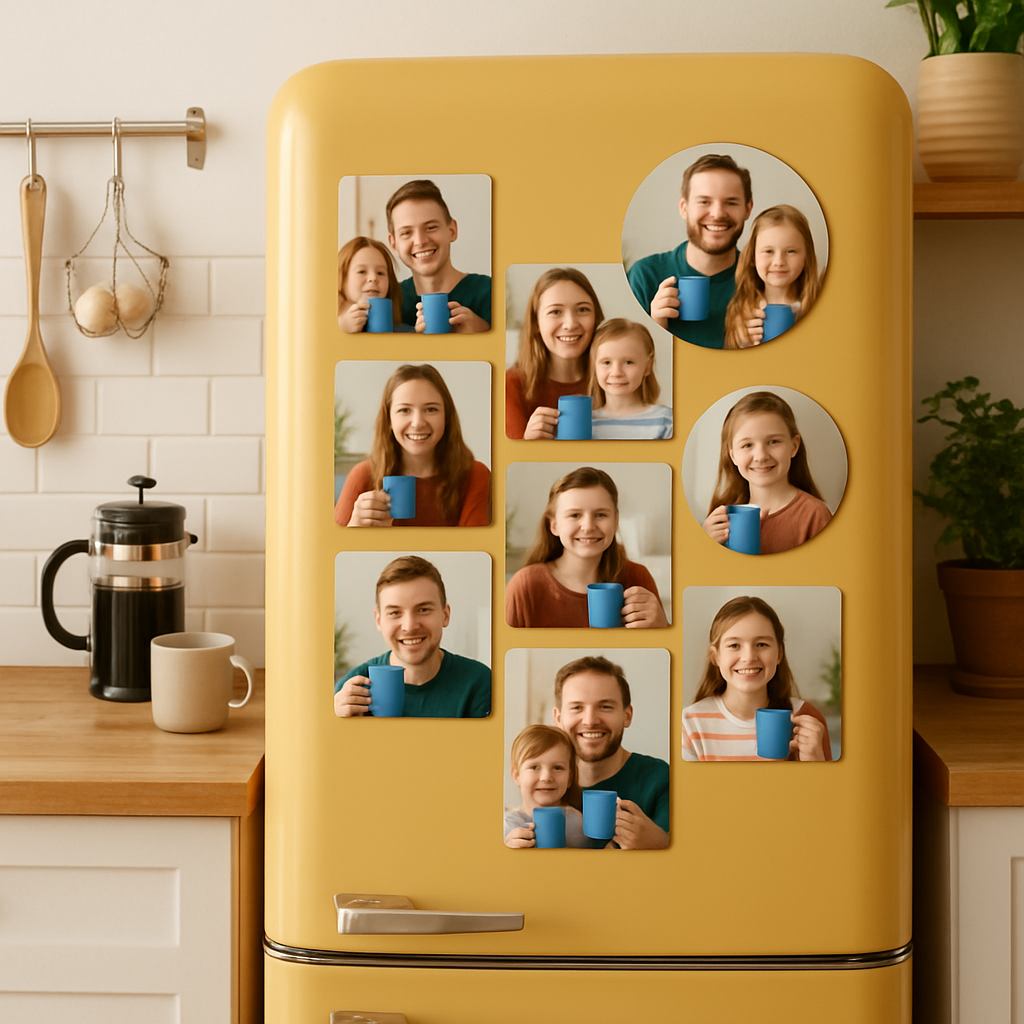
Start by grouping magnets by theme. One corner could showcase travel snaps, another could be a rotating “family‑fun” section. Use a simple 2‑inch square for most images, but throw in a 3‑inch round for a standout piece, like a wedding photo. The mix of shapes adds visual interest without feeling chaotic.
Functional art – magnetic calendars and to‑do lists
Grab a blank magnetic sheet, print a minimalist calendar layout, and stick it right above your grocery magnets. Each month, swap out the top‑right square with a new photo magnet that marks a special event – a birthday, a graduation, a summer road trip. You’ll get a daily reminder of both tasks and memories.
Pro tip: use a light‑colored background for the calendar so the colors from your photo magnets pop. According to The Spruce’s guide to magnetic décor, mixing functional elements with personal images boosts both usability and emotional connection.
Seasonal switches – keep the vibe fresh
Every few months, pull out a small bin of “seasonal” magnets. For fall, swap a sunny beach shot for a pumpkin‑patch picture; for winter, replace a summer selfie with a cozy fire‑place scene. Because the magnets are already printed, you just rotate them – no new orders needed.
Data from a recent home‑organization survey showed that households that refresh visual displays quarterly report a 23 % higher sense of “home pride” than those who leave décor static. It’s a tiny habit that makes a big psychological lift.
DIY magnetic board for kids’ art
Kids love seeing their drawings on the fridge, but paper can wrinkle. Scan the artwork, print it as a magnet, and you’ve got a durable, reusable frame for their masterpieces. Rotate the collection weekly – it turns the fridge into an ever‑changing gallery and reduces clutter on the counter.
One mom in a parenting forum shared that using magnets instead of tape cut her clean‑up time by half because the magnets slide off without leaving residue. That’s a win for both sanity and surface preservation.
Gift ideas that keep on giving
Bundle a set of 6‑8 themed magnets (like “Grandma’s Kitchen” or “College Memories”) and wrap them in a simple kraft box. Because each magnet is a personal photo, the gift feels handcrafted, yet you can produce it in bulk through Loveonmagnets. Pair the set with a handwritten note that explains the story behind each image – instant emotional impact.
According to Better Homes & Gardens’ roundup of magnet décor, personalized magnet gifts rank among the top three most appreciated small‑gift categories for holidays and birthdays.
Actionable checklist
- Pick a focal area on your fridge (top‑right corner works well).
- Group magnets by theme: travel, family, humor, seasonal.
- Print at least one functional magnet (calendar, to‑do list) to anchor the display.
- Schedule a quarterly “magnet refresh” – set a calendar reminder.
- For kids, scan artwork and print as 2‑inch square magnets; rotate weekly.
- When gifting, bundle 6‑8 related magnets, add a personal note, and use a simple box.
Give it a try tonight: pull out three photos you love, print them as magnets, and arrange them in a little “story corner.” You’ll see how a few thoughtful placements turn an ordinary fridge into a conversation starter and a memory keeper.
Conclusion
We've taken a quick tour of everything that makes fridge magnets from photos such a simple yet powerful way to sprinkle personality around your kitchen.
First, we saw how a handful of themed magnets can turn a bland door into a mini‑gallery that sparks conversation every time you swing it open.
Then we covered the nitty‑gritty of caring for them – a dust‑off, a gentle spot‑clean, and keeping them out of direct sun – so those memories stay vivid for years.
We also explored playful twists: seasonal swaps, magnetic calendars, kids' art boards, and gift bundles that feel handcrafted without the manual labor.
So, what’s the next move? Grab three of your favorite photos tonight, print them as magnets, and give one corner of your fridge a story‑corner makeover. You'll notice the instant boost in mood and the subtle reminder of why you love those moments.
And remember, a quarterly “magnet refresh” is a tiny habit that keeps your space feeling fresh without any extra cost.
Ready to make your fridge a daily source of joy? Let those pictures stick, and let the memories stick even tighter.
When you see those colors every morning, you’ll realize a small, inexpensive tweak can transform the whole vibe of your home.
FAQ
What are the best photo sizes for fridge magnets from photos?
Most people find 2‑inch squares or 3‑inch circles work just right. The size is big enough to show detail but small enough to fit several pieces on one door. If you have a panoramic shot, a 4‑inch rectangle looks balanced. Stick to a resolution of at least 300 dpi when you upload – the print stays sharp and the colors stay vibrant once the magnet is on the fridge.
How long do custom fridge magnets from photos last before fading?
With a good quality printable vinyl and a strong neodymium backing, fridge magnets from photos can hold up for three to five years in a typical kitchen. The biggest enemy is UV light, so keeping them out of direct sunlight helps. A gentle wipe with a damp microfiber cloth once a month removes oils that can accelerate fading, keeping those memories looking fresh much longer.
Can I use any type of photo – prints, phone snaps, or scanned artwork?
You can turn virtually any image into a fridge magnet – a phone selfie, a printed postcard, or a scanned kids’ drawing. Just make sure the file is at least 300 dpi and in RGB colour mode; that way the printer reproduces the hues accurately. If the picture is grainy, try a slight up‑scale in a photo‑editing app before you send it off, and the magnet will look much cleaner.
What's the easiest way to keep fridge magnets from photos from attracting dust?
The fastest way to keep fridge magnets from photos dust‑free is to give them a quick swipe with a dry microfiber cloth every few days. If you notice sticky fingerprints, dampen the cloth with a little distilled water – no harsh chemicals. For a deeper clean, a drop of mild dish soap in water works, but be sure to dry the magnet thoroughly before it goes back on the door.
Are fridge magnets from photos safe to use on stainless steel appliances?
Yes – fridge magnets from photos stick just as well to stainless‑steel appliances as they do to enamel doors, because the magnetic force comes from the metal underneath, not the coating. Just avoid placing them on glossy glass or painted surfaces, which can peel over time. A quick test: hold a regular fridge magnet against the spot; if it clings, your custom magnet will too, and there’s no risk of damage.
How do I prevent the magnets from scratching my fridge surface?
To keep your fridge’s finish pristine, choose magnets with a smooth, non‑abrasive back. Most custom services, including Loveonmagnets, use a rubberised coating that acts like a tiny pad. If you’re DIY‑printing, add a thin piece of self‑adhesive felt to the back before the magnet adheres. This extra layer cushions the contact and stops tiny scratches from forming when you slide the pieces around.
What's a simple routine to rotate and refresh my fridge magnet display?
Set a calendar reminder for the first Saturday of every quarter and treat it like a mini‑gallery opening. Pull all the magnets off, dust them, then pick three to five new photos that match the season or a recent event. Re‑stick them in a fresh pattern – maybe a diagonal line or a heart shape. The habit takes under ten minutes but gives your kitchen a fresh vibe all year.


