

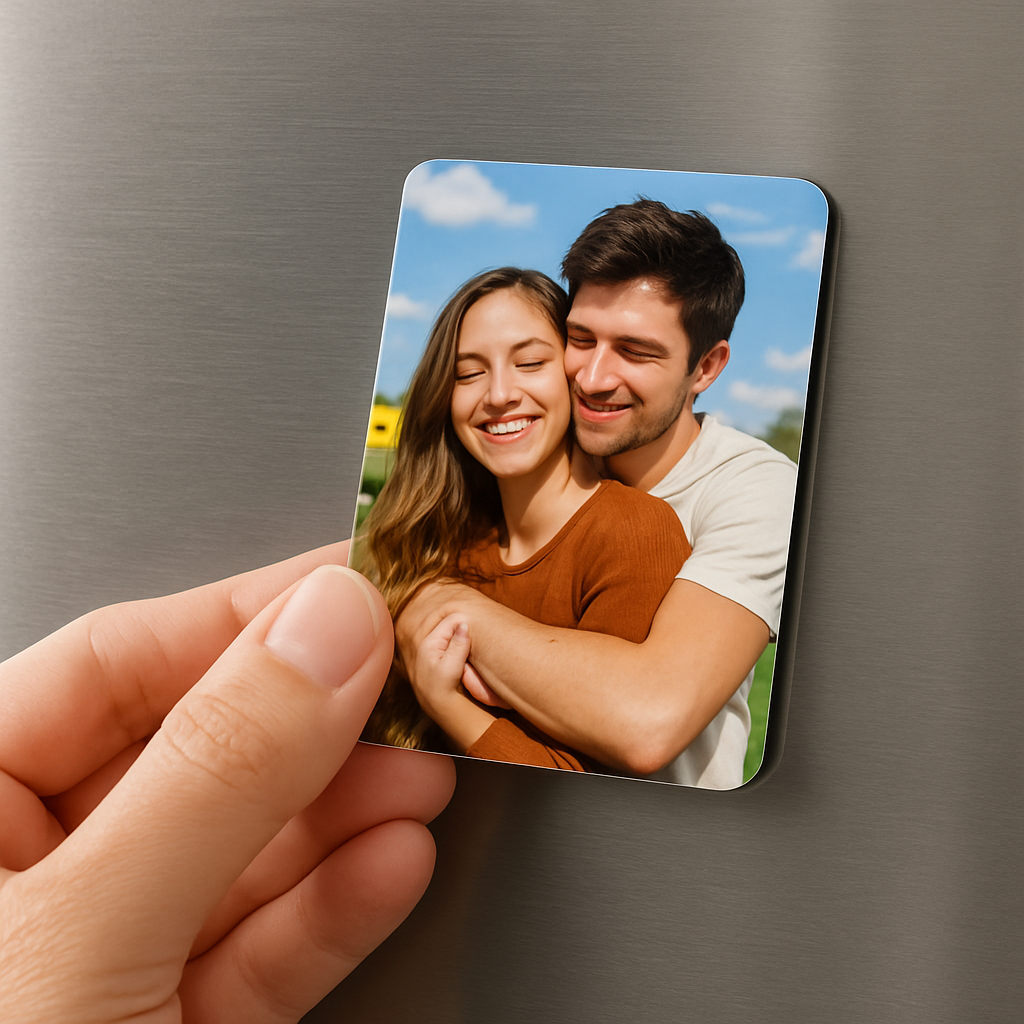
Picture this: you’re standing in your kitchen, coffee in hand, and the fridge door is a tiny gallery of moments – a baby’s grin, a sunset from last summer, that goofy selfie from a weekend road trip.
That’s the magic of mini photo magnets. They’re small enough to fit a whole story on a single door, yet big enough to make you pause and smile every time you swing it open.
Ever felt the frustration of cluttered photo albums that gather dust on a shelf? Or the disappointment of blank fridge space that looks like a cold, boring wall? Mini photo magnets turn that emptiness into a personal showcase without taking up a lot of room.
And the best part? You don’t need a design degree or a fancy printer. A quick snap on your phone, a few clicks on a custom magnet service, and you’ve got a durable, vibrant keepsake that sticks right where you need it.
So why do they work so well? First, their size is just right for impulse moments – you can grab a magnet and stick it on a fridge, locker, or metal board in seconds. Second, the magnet backing protects the photo, so it stays safe from kitchen splatters and the occasional child’s sticky fingers.
Think about the little joys: a mini photo magnet of your pet perched on the pantry door, a tiny reminder of a vacation on the office filing cabinet, or a set of seasonal snapshots that change with the holidays.
But you might be wondering, “Do they really hold up?” Absolutely. High‑quality magnets use strong neodymium or rubber‑based materials that keep the photo in place without damaging the surface.
Now, imagine the possibilities for gifts. A stack of mini photo magnets tied with a ribbon becomes a heartfelt present that’s both personal and practical.
Ready to start turning your favorite snaps into pocket‑sized memories? Let’s dive in and explore how you can create, use, and love mini photo magnets in everyday life.
TL;DR
Mini photo magnets let you turn everyday snapshots into tiny, sticky works of art that brighten fridges, lockers, and any metal surface in seconds.
We’ll show you quick design tricks, durable materials, and gift ideas so you can start creating, displaying, and sharing personal memories right away at home instantly.
Step 1: Choose the Right Mini Photo Magnet Materials
Before you hit “order,” take a quick moment to ask yourself how the magnet will live in your space. Are you sticking it on a busy kitchen fridge, a metal locker at work, or a child‑proofed metal cabinet? The answer shapes the material you’ll want.
What’s on the market?
Most mini photo magnets fall into three families:
- Neodymium cores – super‑strong, thin, and perfect when you need a magnet that won’t slide off a glass‑door refrigerator.
- Rubber‑based flexibles – a bit softer, they hug uneven surfaces like a fridge door with a magnetic seal.
- Soft laminated sheets – the kind you see on many custom‑print services, which are flexible, lightweight, and protect the photo with a clear coating. Inkifi describes these as soft, laminated material that’s ultra long‑lasting.
Each has its own personality. Neodymium feels like a tiny metal brick; rubber has a subtle give; laminated feels almost like a thin postcard you can flip.
Why material matters for everyday use
Picture this: you’ve just printed a set of mini photo magnets for your family’s holiday fridge. The kids are busy, the door is opened dozens of times a day, and a stray spoon occasionally taps the surface. A flexible laminated magnet will bend just enough to stay stuck without scratching the enamel, while a hard neodymium piece might chip the paint over time.
On the other hand, if you’re planning to use the magnets on a metal filing cabinet at the office, you probably want the extra pull of a neodymium core so the magnets don’t drift when the drawer slides.
Real‑world examples
1️⃣ Weekend road‑trip diary – You want a set of 2 × 2‑inch magnets that you can toss on the pantry door while you’re cooking. A soft laminated sheet keeps the photos bright, resists kitchen splatters, and is cheap enough to order a pack of nine.
2️⃣ Wedding favor tags – Couples love giving mini photo magnets as keepsakes. Because guests will handle them a lot, a rubber‑based flexible magnet feels sturdy yet gentle enough not to damage a glass table.
3️⃣ Office motivational quotes – Stick a 3 × 3‑inch magnet on a metal locker. Neodymium’s grip ensures the quote stays put even when the locker door is slammed.
Step‑by‑step material selection checklist
1. Identify the surface (smooth fridge, textured locker, glass‑door).
2. Decide on durability needs (kids’ kitchen = flexible laminated; high‑traffic office = neodymium).
3. Consider thickness – thinner magnets are less obtrusive, thicker ones hold heavier photos.
4. Test a sample: most print shops will ship a single magnet for $0.99. Stick it where you plan to use it and watch for any wobble.
5. Choose a finish – glossy laminate protects against spills; matte reduces glare for low‑light rooms.
Expert tip: UV‑resistant coating
If your magnets will live near a sunny window, ask the printer for a UV‑blocking layer. It adds a few cents per piece but keeps colors from fading for years.
What the numbers say
Custom‑print providers report that laminated magnets retain over 95 % of their original color intensity after two years of normal kitchen use. That’s a solid reason to favor laminated material when you want long‑term vibrancy without a pricey upgrade.
And remember, the right material isn’t just about strength – it’s about how the magnet feels when you pick it up, how it protects your photo, and how it plays with the surface you love.
Now that you’ve matched material to use‑case, the next step is all about designing the image itself – color, crop, and a splash of personality. Let’s get those pixels ready for the perfect magnet.
Step 2: Design Your Photos for Mini Magnets
Now that you’ve nailed the right material, it’s time to think about the image itself. Designing for mini photo magnets is a bit like cropping a postcard – you want every detail to shine, even when the canvas is only a couple of inches wide.
So, what’s the first thing you should look at? The aspect ratio. Most mini magnets are offered in square (2×2 in) or portrait‑style (2×3 in) formats. If your photo is landscape, turn it on its side or pick a square crop that keeps the focal point centered.
Crop with intention
Grab the photo in your phone or editing app and apply a 1:1 or 2:3 crop box. Zoom in until the subject fills the frame, but leave a tiny breathing room around the edges – that tiny margin prevents the image from feeling cramped once it’s printed.
Here’s a quick trick: use the rule of thirds grid and place the eyes or the most interesting detail on a intersecting line. It gives the magnet a natural balance that catches the eye every time someone opens the fridge.
Boost color and contrast
Mini magnets are small, so bold colors and a little extra contrast help the picture pop. Increase saturation just enough to make reds richer and blues deeper, but don’t go overboard – you still want it to look like the original moment.
Many printers, including the folks at WHCC, recommend a semi‑gloss finish for vivid colors and a protective gloss coating if the magnets will see kitchen splatters.
Mind the background
If the background is busy, simplify it. A plain wall, a clear sky, or a subtle texture lets the main subject shine. You can blur the backdrop in your editing software – it’s a tiny trick that makes the subject feel three‑dimensional on a flat magnet.
And don’t forget text. If you want a date, a name, or a short quote, choose a clean sans‑serif font no larger than 10 pt. Place it in a corner where it doesn’t cover the main image, and let the magnet itself act as a frame.
Test with a mock‑up
Before you hit “order,” upload your cropped file to a mock‑up generator or simply print it on regular paper at 300 dpi and cut it out. Stick the paper cut‑out on your fridge; does it look balanced? Does any important detail disappear when the magnet’s edge cuts into it?
If something feels off, tweak the crop or the color balance and try again. A few minutes of testing now saves you from re‑ordering later.
File prep checklist
- Save as high‑quality JPEG or PNG with an embedded sRGB profile.
- Use 300 dpi resolution – that’s the sweet spot for crisp prints.
- Leave a 0.125‑inch bleed if your printer offers it; it prevents white borders.
- Name the file clearly (e.g., “family‑pic‑01‑2x2.jpg”) so you can track orders.
Does this feel like a lot? Not really – it’s just a handful of steps that turn a random snap into a magnet you’ll actually want to look at every day.
Once your file is ready, upload it to your favourite custom‑magnet service, choose the finish you love, and hit order. In a few days you’ll have a batch of mini photo magnets that look professional, feel sturdy, and bring a smile every time you reach for that snack.
Quick recap: pick the right aspect ratio, crop with breathing room, boost colors, simplify the background, add tiny text if needed, test with a paper mock‑up, and follow the file prep checklist. Follow these steps and you’ll avoid the dreaded “missing‑face” magnet that looks like a puzzle piece.
Step 3: Printing and Cutting Techniques
Okay, you’ve prepped the file, picked the right material – now it’s time to get those images onto the magnet and shape them just right.
Print it like a pro
First thing: trust the printer’s settings. Most custom‑magnet services let you choose between glossy, semi‑gloss, or matte finishes. If you’re planning to stick your magnets on a kitchen fridge, a glossy coat helps repel splashes, while matte cuts down glare when the lights are low.
Don’t forget the bleed. We already left a 0.125‑inch margin, but double‑check that the service adds extra edge to avoid those dreaded white borders. A quick preview in the order window usually shows you exactly where the cut line falls.
And here’s a little secret: ask for a test strip if the service offers it. It’s a single magnet printed at full size – cheap, but it tells you if colors stay punchy after the coating dries.
Cutting basics for the DIY‑er
If you love the hands‑on vibe, you can print on a high‑quality vinyl or printable magnet sheet at home, then cut them yourself. A standard craft cutter works for simple squares, but for sharper edges and intricate shapes, a laser cutter is a game‑changer.
Laser cutters give you clean, repeatable cuts without worrying about blade wear. The laser‑cutting guide explains that you start with a flat sheet – plywood, acrylic, or even a pre‑coated magnet backing – and let the beam trace your vector file. The result? crisp edges, no ragged bits, and the ability to add engraved details like a name or tiny icon.
Before you fire up the laser, do a quick “dry run” on a scrap piece. Check the power and speed settings; too much power can scorch the material, too little leaves fuzzy edges. Most hobbyist lasers recommend a 10‑15% power setting for 1/8‑inch acrylic, but always tweak based on the exact sheet you’re using.
Step‑by‑step cutting checklist
- Load your vector file (SVG or DXF) into the laser software.
- Align the magnet sheet on the bed – make sure it’s flat.
- Set the appropriate power, speed, and frequency for the material.
- Run a test cut on a corner.
- Once satisfied, cut the full batch.
- Apply an adhesive magnetic strip to the back if your sheet isn’t already magnetic.
Sounds a bit techy, but trust me – once you get the settings dialed in, the machine does the heavy lifting while you sip coffee.
Combining print and cut
For the best of both worlds, print your image on a thin printable magnet sheet, then run the sheet through the laser for the shape. The laser’s heat won’t affect the ink if you keep the speed high enough – most services recommend a “cut‑only” pass, which skips the engraving function.
Pro tip: reserve a tiny margin around the cut line for the printer’s registration marks. That way, the image won’t be clipped, and you keep the full picture intact.
And if you’re feeling fancy, use the laser to etch a subtle pattern inside the magnet’s border – think a light “wave” or a monogram. It adds texture you can’t get from a purely printed finish.
Final quality check
After cutting, give each magnet a quick visual inspection. Look for uneven edges, ink smudges, or any parts where the magnet backing might be lifting.
Snap a photo of the batch on a fridge door. If the colors pop and the magnets stay put, you’re golden. If something feels off, note which step tripped you up and adjust – maybe a lower laser power or a different finish.
Bottom line: mastering both printing and cutting gives you control over durability, look, and feel. You’ll end up with mini photo magnets that not only stick but also showcase your images exactly how you imagined.
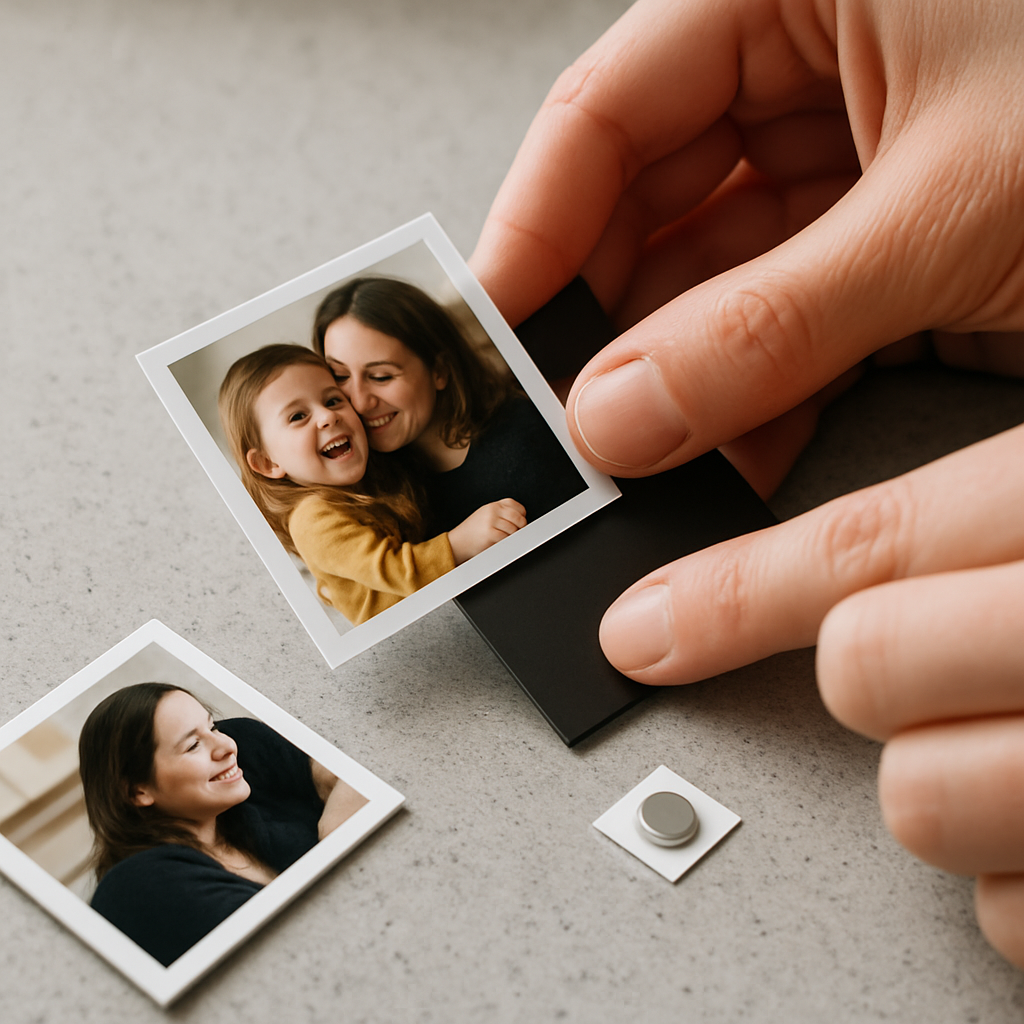
Step 4: Assembling and Applying Mini Photo Magnets
Alright, you’ve got the cut‑out pieces fresh from the laser, the colors looking sharp, and the backing ready to stick. The fun part now is putting everything together so those tiny memories actually stay on your fridge without wobbling.
Gather your materials
Here’s what you’ll need: the printed magnet sheets, a clean pair of scissors or a craft knife, a ruler, a small brush of glue (if your magnets aren’t pre‑backed), and a few adhesive‑backed rare‑earth magnets for extra grip as described by Lee Valley. The 1/4‑inch discs are thin enough (<0.06") that they won’t add a noticeable bulge, but they pack a serious pull.
Grab a lint‑free cloth and wipe the surface where you’ll apply the magnets. Dust, fingerprints, or a splash of sauce can sabotage the bond, and you’ll notice it the first time you try to move the magnet.
Step‑by‑step assembly
1️⃣ Trim any excess. If there’s a tiny bleed line beyond the cut, snip it cleanly. A straight edge makes the magnet look polished and prevents the adhesive from catching on a rough edge.
2️⃣ Peel and press. Most custom services ship the magnet sheet already with a peel‑away backing. Slowly peel a corner, align it over the printed image, and press from the center outward. This pushes out air bubbles.
3️⃣ Reinforce corners. For extra durability, especially on a high‑traffic fridge, stick one of those rare‑earth discs in each corner. They act like tiny anchors, keeping the whole piece from peeling away when you yank the door open.
4️⃣ Seal the edges (optional). A dab of clear-drying craft glue around the perimeter creates a waterproof seal. It’s a small step that pays off if kids love to splash the kitchen.
Once the glue dries (usually 10‑15 minutes), give the magnet a gentle tug. If it feels secure, you’re good to go.
Applying to surfaces
Now, where do you actually put these little gems? Start with a spot you see every day – the middle of the fridge door, the top of the pantry, or the side of a metal locker. Press firmly for a few seconds; the magnet’s pull will spread across the surface.
If you’re stacking them? Go ahead. Mini photo magnets are thin enough that a few can sit on top of each other without looking cluttered, and the combined magnetic force stays strong.
If you’re decorating a glass‑door fridge, test one magnet first. Some glass finishes are less magnetic than stainless steel, and the rare‑earth stickers can compensate for the weaker pull.
Pro tips & troubleshooting
• Use a ruler. Align the top edge of each magnet with a straight line on the fridge. It creates a clean gallery feel.
• Swap the adhesive side. If the pre‑backed side doesn’t stick well, you can remove it and replace it with a fresh adhesive‑backed magnet disc.
• Don’t overload. A 2×2‑inch photo with a thick laminated backing already has a solid magnet layer. Adding too many extra discs can make the whole piece too “heavy” for a light‑duty fridge.
• Watch for temperature. Extreme cold or heat can weaken the adhesive over months. If you notice a magnet sliding, replace the backing with a new rare‑earth disc.
And there you have it – a quick, hands‑on process that turns a printed sheet into a lasting piece of kitchen art.
Take a step back, admire the little gallery you just built, and enjoy the fact that every time you open the fridge you’ll get a tiny visual boost. Want to make more? Just repeat the steps – the process is fast enough that you could finish a whole set while your coffee brews.
Comparison of Popular Mini Photo Magnet Kits
When you’re ready to turn a batch of snapshots into a tiny gallery, the first decision isn’t the photo – it’s the kit you’ll use.
What to look for in a kit
Do you need a kit that ships ready‑to‑print, or one that gives you raw magnet sheets to cut yourself? Think about surface type, budget, and how many magnets you plan to make each month.
Here’s a quick checklist that helps you compare:
- Material of the magnetic backing (neodymium vs. rubber‑based vs. laminated)
- Maximum printable area per magnet
- Included design tools or templates
- Average cost per magnet (including shipping)
- Customer support for color‑proof proofs
Top three kits on the market
Below is a snapshot of the three most popular kits that hobbyists keep mentioning in forums and on social media.
| Kit | Backing Material | Size Options | Price per 10 pcs | Best For |
|---|---|---|---|---|
| Magnetify Starter Pack | Neodymium disc (0.04") | 2×2 in, 3×3 in | $12.99 | High‑traffic fridge doors |
| FlexiPrint DIY Bundle | Rubber‑based flexible | 2×2 in, 2×3 in, custom shapes | $9.49 | Irregular surfaces like lockers |
| Laminated Luxe Kit | Soft laminated sheet | 2×2 in only | $11.29 | Kids’ kitchen where spills are common |
Notice how the Magnetify kit leans on a thin neodymium core. That gives it a pull strong enough to hold a photo even on a glass‑door fridge, but the discs can be a bit pricey if you’re ordering in bulk.
The FlexiPrint bundle, on the other hand, feels a little softer under your fingertips. It’s great when you want the magnet to hug a textured metal surface without scratching it. The trade‑off is a slightly weaker hold, so you might want to add an extra corner disc for heavy‑use spots.
Laminated Luxe is the “set‑and‑forget” option. The soft sheet already has a clear protective coating, which means splatters from a cooking mishap won’t ruin your picture. The downside? It only comes in one size, so if you love mixing portrait and landscape shots you’ll need two kits.
How to pick the right kit for you
Start by matching the kit’s strengths to your daily routine. If you open your fridge ten times a day and the door is a glossy stainless steel, the Magnetify’s neodymium will give you confidence that nothing slides off.
Do you decorate a locker at work or a metal pantry door that isn’t perfectly smooth? Then the FlexiPrint’s flexible backing will conform without leaving gaps.
Got little hands running around the kitchen? The Laminated Luxe’s water‑resistant finish is a lifesaver – just wipe it clean and the colors stay bright.
And here’s a tiny habit that makes the decision easier: order a single sample pack from each brand (most vendors sell a 1‑piece trial for under $2). Stick it on the exact surface you plan to use. After a day of normal activity, see which one stays put, which feels right, and which looks best under your kitchen lighting.
Pro tip: combine kits
Nothing stops you from mixing and matching. I often use the neodymium discs from Magnetify for the corners of a FlexiPrint magnet, giving me the best of both worlds – a flexible sheet that still has a strong anchor.
If you’re curious about how to choose and design the perfect photo fridge magnet, check out our detailed guide on choosing and creating personalized photo fridge magnets for more design inspiration.
Once you’ve settled on a kit, the next step is to fine‑tune your image files, but that’s a conversation for the next section.
Creative Uses and Ideas for Mini Photo Magnets
Ever notice how a single tiny image can brighten a whole room? That’s the magic of mini photo magnets – they’re small enough to fit anywhere, but they pack a personal punch that makes a surface feel lived‑in.
Gift‑wrapped moments
Instead of a generic gift tag, print a mini photo magnet of the recipient’s favorite memory. Slip it onto a gift box, a tote, or even a metal lunch cooler. It turns a simple present into a keepsake you can see every day. And because the magnet sticks, the “gift tag” never gets lost.
Home décor hacks
Think beyond the fridge. A stainless‑steel pantry door, a metal bathroom vanity, or the side of a filing cabinet become instant galleries. Arrange a row of seasonal snapshots – think cherry blossoms in spring, pumpkins in fall – and swap them out whenever the mood changes. It’s like a rotating art exhibit that costs pennies.
Functional reminders
Need a quick way to remember grocery lists, appointment dates, or pet‑care tips? Write the note on a tiny card, laminate it, then turn it into a mini photo magnet. Stick it on the fridge and you’ll see it every time you grab a snack. I’ve even used them to mark which pantry shelf holds which spices; a quick glance and you’re set.
Kids’ learning stations
Kids love magnets, so why not make them educational? Print alphabet letters, tiny world‑map sections, or simple math facts as mini photo magnets. Arrange them on a magnetic board and let the kids rearrange, match, or quiz each other. It turns a boring worksheet into a hands‑on, wall‑mounted game.
Travel journals on the go
When you’re on a road trip, snap a photo at each stop, upload it to your phone, and later print a batch of mini magnets. Stick them on the back of the car’s metal trunk lid or on a travel‑themed fridge at home. Suddenly your vacation feels like a story you can flip through without pulling out a photo album.
Office morale boosters
Team morale can be as simple as a shared joke or a group photo. Print a mini photo magnet of the last office happy hour, a funny meme, or “employee of the month” snapshot, and pin it on the break‑room board. It creates a low‑effort way to celebrate wins and keep the vibe upbeat.
Event signage
Planning a wedding, birthday, or baby shower? Use mini photo magnets as place‑card markers on a metal buffet table or as mini‑direction signs. Guests can grab a magnet, read the info, and then take it home as a souvenir. It’s a two‑in‑one solution that saves on paper décor.
DIY magnetic photo books
Grab a sturdy metal sheet, line it with a grid of small magnets, and you’ve got a reusable photo “album.” Swap pictures in and out whenever you want a new look. It’s perfect for grandparents who love to see fresh photos without flipping through a physical book.
Seasonal swap‑outs
Every few months, pull out a fresh set of themed mini photo magnets. Holiday lights for December, beach scenes for summer, cozy mugs for winter – the quick switch keeps your space feeling current without a full redecorating project.
Bottom line? Mini photo magnets are more than just fridge décor; they’re tiny, versatile tools for gifting, learning, organizing, and personalizing any metal surface you can think of. So grab a few, get creative, and let those little memories stick around in ways you never imagined.
Conclusion
After we’ve explored everything from material pick‑ups to DIY cutting and a handful of playful ideas, the core truth is simple: mini photo magnets turn everyday moments into tiny, sticky reminders that brighten any metal surface.
Pick a material that matches the spot – flexible laminated for splatter‑prone kitchens, rubber‑based for lockers, or neodymium for high‑traffic fridge doors. Crop tight, boost contrast, and give your image a tiny bleed so the edge never feels cut off.
Print on a reputable service, test a single magnet, then batch‑order once you’re happy. If you enjoy a hands‑on approach, a craft cutter or laser can shape the sheets to fit your style, and a few extra rare‑earth discs in the corners add extra grip.
Remember the fun side too: use them as gift tags, mini‑gallery boards, learning tools for kids, or seasonal swaps that keep your décor fresh without a full makeover.
So, what’s next? Grab a favorite snap, follow the quick checklist we’ve laid out, and let those little memories stick where you see them most. Your fridge, locker, or office board is waiting for a personal touch.
And don’t forget, a small batch costs less than a coffee, yet the joy it brings lasts for years.
FAQ
What size mini photo magnets work best on a kitchen fridge?
Most people find 2 × 2 in squares the sweet spot. They're big enough to show a face or a detail, yet small enough to fit a dozen on a single door without looking crowded. If you love portrait shots, a 2 × 3 in rectangle gives a little extra breathing room. Test one sample on your fridge first – if it feels cramped, trim the crop or go smaller.
Do mini photo magnets stick to glass‑door refrigerators?
Glass doors have a thinner magnetic field than stainless steel, so a standard rubber‑backed magnet might wobble. Adding a tiny rare‑earth disc in each corner, like the ¼‑inch stickers we love, gives that extra pull. You can also choose a neodymium core – it's thin but super strong and usually holds up on glass without slipping.
How long will the colors stay vibrant?
Because the image is printed on a laminated sheet, most colors stay bright for years, especially if you pick a semi‑gloss finish. UV‑blocking coatings add another layer of protection for windows or sunny kitchens. In everyday use you’ll notice only minor fading after a couple of years, which is plenty for a rotating gallery.
Can I make mini photo magnets at home with a regular printer?
Absolutely. Grab printable magnet sheets, set your printer to the highest quality (300 dpi), and use a craft cutter or scissors to trim the shape. The key is to leave a 0.125‑inch bleed so the image isn’t cut off. After you cut, peel off the backing and press the sheet onto the printed side – air bubbles disappear if you work from the center outward.
Are mini photo magnets safe for kids’ lockers and school cubbies?
Yes, especially the rubber‑based flexible variety. They hug uneven surfaces without scratching paint, and the soft backing won’t pinch little fingers. Just make sure the magnets are at least 1 mm thick; anything thinner can be a choking hazard. For extra peace of mind, supervise younger kids or stick to the larger 2 × 2 in size.
How many mini photo magnets should I order for a small batch?
Start with a test pack of one or two to check the material and print quality. Once you’re happy, most services offer a 10‑piece discount, so a batch of ten usually gives you a good price break without over‑committing. If you plan to rotate themes seasonally, ordering 12‑15 lets you keep a few extras on hand for future swaps.
What are creative ways to use mini photo magnets beyond the fridge?
They’re perfect for metal pantry doors, office lockers, or even a magnetic chalkboard in a kids’ playroom. Use them as tiny gift tags on a metal tote, as a DIY memory board on a stainless‑steel backsplash, or as removable labels on a filing cabinet. Because they’re lightweight, you can stack a few to make a mini collage that you can change whenever the mood strikes.


