

Ever opened your fridge and felt a tiny pang of nostalgia because a favorite photo is just sitting there, flat and forgotten? That's the exact moment we all know too well – the memory is there, but the display is bland.
What if you could turn that same snapshot into a little piece of art that clings to metal, pops with color, and makes you smile every time you grab a snack? That's where square photo magnets come in, and trust me, they're more than just a decorative gimmick.
Imagine a 2x2" square, hand‑cut, printed on glossy photo paper, and magnetized on the back. You slip it onto your fridge, and instantly your kitchen feels a bit more like home. It's the kind of small upgrade that whispers, 'I care about the moments that matter.'
Most of us collect digital photos faster than we display them. Those images sit in cloud folders, waiting for a chance to be seen. Square photo magnets give those pictures a physical voice without taking up shelf space or demanding a whole wall.
You're probably wondering how easy it is to create one. The process is surprisingly simple: choose a photo, decide if you want a matte or glossy finish, and let a service cut and magnetize it for you. In a few days you get a set of sturdy, vibrant magnets that survive kitchen humidity and the occasional stray spoon.
So, why choose the square shape? The crisp, equal sides create a balanced look that fits neatly among other kitchen staples – pens, grocery lists, kids' artwork. It also mirrors the classic photo print format, making the image feel familiar yet fresh.
Now picture this: you pull out a family portrait of a beach vacation, stick it on the fridge, and your kids rush over to point at the waves. Suddenly the kitchen becomes a storytelling hub, and the magnet is the cue for a shared laugh.
Ready to give your memories a magnetized home? In the next sections we'll walk through design tips, placement ideas, and how to keep your squares looking bright for years.
TL;DR
If you’re craving a quick way to turn forgotten digital snapshots into lively kitchen décor, square photo magnets let you slap a vibrant memory onto any metal surface in minutes.
We’ll show you how to pick the perfect finish, place them for maximum impact, and keep colors bright for years, so every snack break feels like a mini‑reunion with loved ones.
Step 1: Choosing the Right Square Photo Magnet Size
Ever stare at a blank fridge and think, “I wish I could see that beach photo every time I grab a snack?” That moment of missed connection is why we start with size. The dimensions of your square photo magnet dictate how it reads from a distance, how it fits with other magnets, and even how long it lasts on a humid kitchen door.
Understanding the common square formats
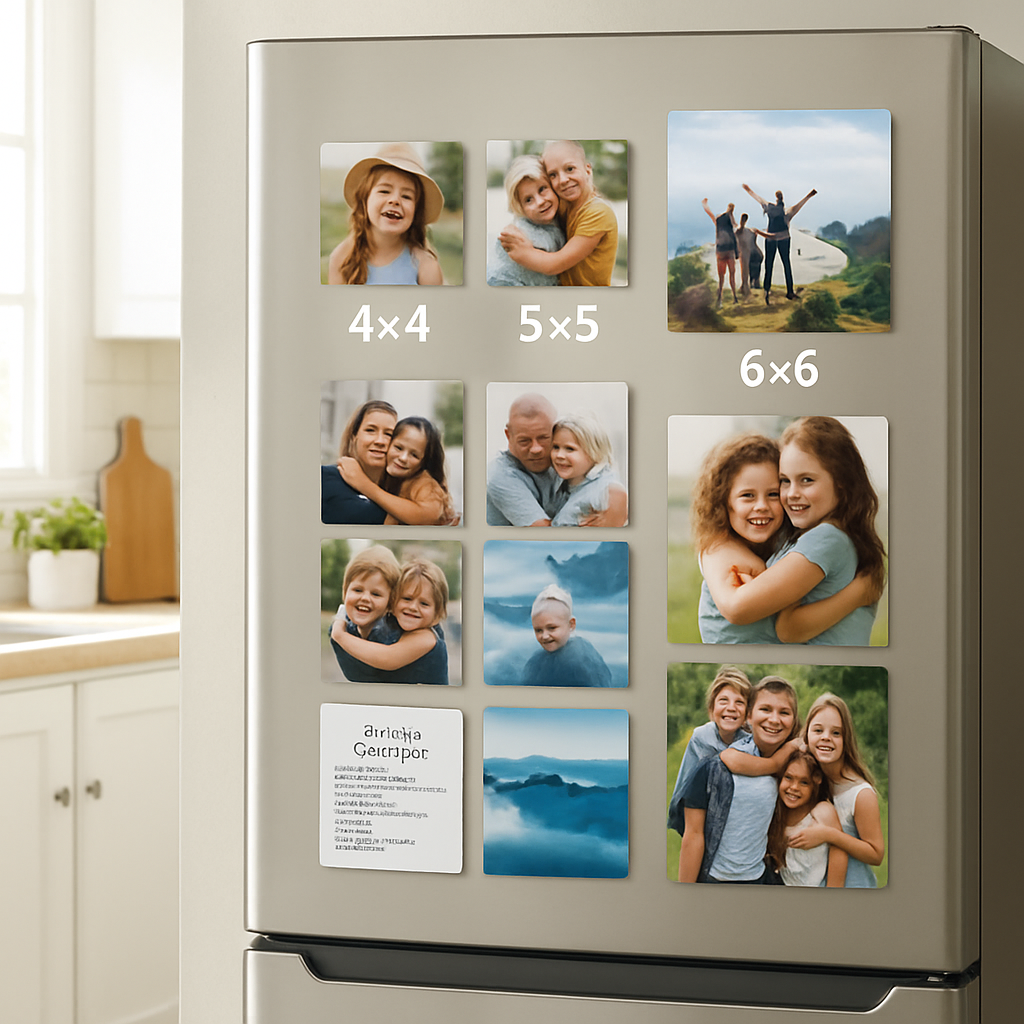
Most photo labs, including the guide on standard square photo print sizes, list three go‑to options: 4×4 in (10×10 cm), 5×5 in (13×13 cm), and 6×6 in (15×15 cm). The 4×4 is perfect for a quick visual cue—think a tiny family portrait next to the butter dish. The 5×5 gives you a bit more breathing room for detail, ideal for a sunset or a pet’s goofy grin. The 6×6 steps into “mini‑art” territory; you’ll see enough pixels to appreciate textures without needing a full‑frame picture.
Match the magnet size to the space
Here’s a quick checklist you can run while you sip coffee:
- Is the magnet going on a crowded fridge door? Lean toward 4×4 so you can stack a story‑line of images without crowding the magnets you already have.
- Do you want the magnet to double as a focal point on a pantry door or locker? Go up to 5×5 or 6×6; the larger canvas draws the eye and can stand alone.
- Are you planning a themed gallery (travel, recipes, kids’ art) where each piece tells a chapter? Keep a uniform size—mixing 4×4 and 6×6 can feel chaotic unless you deliberately use the size difference as a visual hierarchy.
Resolution matters—don’t let pixel‑poverty ruin your vibe
Square magnets need a square image file. For crisp results aim for at least 1200 × 1200 pixels for a 4×4, 1500 × 1500 pixels for a 5×5, and 1800 × 1800 pixels for a 6×6. If your phone shot is portrait, crop it in a photo editor so the main subject stays centered. Most online magnet services let you preview the crop before you hit “order.”
Real‑world examples
Imagine you just got back from a weekend road trip to the mountains. You have three standout shots: a wide vista, a close‑up of a wildflower, and a goofy selfie with your sibling. A 6×6 works wonders for the vista—its larger surface captures the depth of the peaks. The wildflower, with its delicate detail, looks sharp on a 5×5, while the selfie fits nicely on a 4×4 next to the milk carton. Together they form a mini‑storyboard that anyone walking by can read in seconds.
Another scenario: a new parent wants to keep baby’s first smile visible during late‑night feedings. A 4×4 magnet on the fridge door is subtle enough not to clash with medication labels, yet bright enough to lift spirits. Pair it with a 5×5 milestone chart magnet for a functional‑decor combo.
Actionable steps to pick the perfect size
- Measure the flat surface where you’ll place the magnet. Leave at least 1 inch of breathing room on each side.
- Choose a photo that works at the intended size—more detail for larger magnets, bold shapes for smaller ones.
- Check pixel dimensions. If you’re below the recommended count, either select a different photo or upscale using a reputable editor.
- Order a sample set of all three sizes from custom square photo magnets to see which feels right in your kitchen.
- Place the magnets on the fridge before committing—use a piece of masking tape to “try on” the size without adhesive.
Pro tip from the pros
According to the fridge‑decorating guide, mixing square magnets with a few rectangular or round ones creates visual rhythm. If you stick to only squares, vary the size to keep the layout from feeling too uniform.
Bottom line: the right size turns a simple magnet into a purposeful piece of kitchen storytelling. Start small, test, and scale up as your confidence grows.
Step 2: Selecting Materials and Finishes
Now that you know which size fits your fridge, the next decision feels a bit like picking the right fabric for a favorite shirt—if the material doesn’t match the room, the whole look falls flat.
Square photo magnets come in a handful of core materials and surface finishes. The choices affect everything from how bright the colors stay in a steamy kitchen, to how easily the magnet sticks to metal, to the tactile vibe you get when you run your finger over it.
1️⃣ Core magnet material matters
Most vendors offer two base types: flexible rubber‑based magnets and rigid ferrous‑backed plates. Rubber magnets are lightweight, bend slightly when you press them, and tend to leave a softer imprint on the fridge surface. Rigid plates give a firmer “click” and are less likely to curl over time, which is handy if you plan to stack several magnets on a single spot.
Think about where you’ll hang yours. If you love swapping pictures daily – maybe a rotating travel collage – the flexible option saves you a little elbow‑room. If you want a permanent anchor for a recipe card that you’ll reference every night, the hard‑backed version feels more secure.
2️⃣ Finish options and what they mean for your kitchen
Once the material is settled, the finish determines visual mood and durability. Here are the most common finishes you’ll encounter:
- Glossy: Pops color, looks like a mini‑photo print, but fingerprints show up quickly. Best for low‑traffic spots like the side of a pantry door.
- Matte: Reduces glare, hides smudges, and gives a modern, understated look. Perfect for bright kitchens where sunlight bounces off the fridge.
- Soft‑touch matte: Adds a velvety feel and extra protection against minor scratches. Great for households with kids who love to tug at magnets.
- Metallic acetate (a subtle shimmer): Adds a hint of sparkle without being flashy. Works well for holiday‑themed magnets or a chic, adult‑only gallery.
Real‑world example: Emma, a busy mom of three, swapped her glossy beach‑vacation magnet for a matte finish after noticing a fingerprint trail every morning. The matte version kept the blues vibrant while staying clean, even after a week of kitchen chaos.
3️⃣ How to match finish to lighting and décor
Ask yourself these quick questions:
- Is the fridge door often in direct sunlight? If yes, matte or soft‑touch matte will prevent glare.
- Do you love a glossy “photo‑print” vibe? Then choose glossy, but keep a cleaning cloth handy.
- Is your kitchen style minimalist or industrial? Metallic acetate can echo steel appliances without looking tacky.
When you’ve answered the list, you’ll have a clear finish direction.
4️⃣ Actionable steps to lock in the perfect combo
- Identify the magnet’s location (door, pantry, locker) and note the typical temperature and humidity.
- Choose core material based on how often you’ll move the magnet: flexible for frequent swaps, rigid for permanent placement.
- Pick a finish that complements your kitchen lighting and cleaning habits.
- Order a single‑piece sample of each finish you’re considering. Most labs let you order a “proof” magnet for a few dollars.
- Hang the sample for 48 hours. Check for color fading, magnet strength, and any edge warping.
- Once you’ve found the winner, place the full set and arrange them in a story‑telling layout.
Pro tip: If you’re mixing finishes (say, a glossy family portrait with a matte recipe card), keep the layout balanced by alternating them every other magnet. The rhythm prevents one finish from dominating the visual field.
Quick comparison table
| Material | Finish Options | Best Use Cases |
|---|---|---|
| Flexible rubber | Glossy, Matte, Soft‑touch matte | Rotating galleries, kids' art, low‑strength areas |
| Rigid ferrous plate | Glossy, Matte, Metallic acetate | Permanent recipe cards, holiday décor, high‑traffic zones |
| Hybrid (rubber core with thin metal backing) | Matte, Soft‑touch matte | Mixed‑style rooms where you want strength but a soft feel |
Bottom line: the right material‑and‑finish combo turns a simple square photo magnet into a durable piece of kitchen personality that survives spills, finger smudges, and the occasional accidental bump.
Take a minute now, pick one finish you’ve never tried, order a sample, and watch your fridge transform from bland to conversation‑starter.
Step 3: Designing Your Photo Layout
Okay, you’ve already picked the size and the finish, so now it’s time to ask yourself: how do I turn a handful of square photo magnets into a mini‑gallery that feels intentional, not accidental? The answer lives in the layout – the invisible skeleton that guides the eye and gives each memory its own spotlight.
Start with a visual story arc
Think of your fridge as a short comic strip. The first magnet is the opening panel – something that catches attention right away, like a bright beach sunrise or a laughing toddler. The middle pieces build context – maybe a collage of road‑trip snapshots or a series of recipe cards. The last magnet should feel like a satisfying “full stop,” perhaps a family portrait that ties the whole theme together.
Grab three to five photos that share a color or subject thread. Lay them on a table, face‑up, and shuffle until the sequence feels natural. You’ll notice a rhythm emerging – light, dark, light – or a progression from “where we were” to “where we are now.”
Grid vs. staggered – which layout works for you?
Square magnets love a clean grid. If you’re aiming for a sleek, minimalist look, imagine an invisible 2‑by‑2 or 3‑by‑3 matrix. Keep equal spacing (about a half‑inch) between each piece; the uniform gaps create a sense of order that works especially well in modern kitchens with stainless‑steel appliances.
But grids can feel a bit stiff. For a more relaxed vibe, try a staggered or “brick‑wall” arrangement. Start with a larger magnet at the top left, then place a slightly smaller one just below and to the right, like the way bricks are laid. This offset adds visual movement and lets you fit odd‑shaped magnets (like a rectangular recipe card) without breaking the flow.
Use color temperature as a guide
Warm tones (reds, oranges, yellows) naturally pull the eye, while cool tones (blues, greens) recede. Position a warm magnet near the center of the fridge to make it a focal point, and let cooler images flank it. If you have a glossy finish that reflects kitchen light, place it where the light hits directly – that way the shine enhances the colors instead of creating glare.
Real‑world example: Sara, a freelance designer, arranged her fridge magnets by season. She started with a sunny summer beach shot (warm, glossy) at the top‑center, followed by a muted autumn forest (cool, matte) on the left, and capped the row with a winter holiday card (metallic acetate) on the right. The result was a balanced color wave that made each season feel distinct yet part of a whole.
Practical step‑by‑step layout checklist
- Clear the fridge door of existing magnets and wipe it down.
- Lay your chosen photos on a flat surface, face‑up.
- Decide on a layout style – grid, staggered, or a hybrid.
- Mark invisible guide lines with a light pencil on the fridge (or use a piece of masking tape) to keep spacing consistent.
- Start with the “anchor” magnet – the one you want people to notice first.
- Place the remaining magnets one at a time, stepping back after each addition to see how the composition feels.
- Adjust spacing or swap pieces until the visual flow feels right.
- Press each magnet firmly to ensure a strong hold, especially if you live in a humid climate.
Mixing finishes without chaos
If you’ve already experimented with different finishes (glossy, matte, soft‑touch), don’t let them clash. Alternate finishes every other magnet – glossy, matte, glossy, matte – to create a subtle rhythm. The eye will naturally glide from one texture to the next, and no single finish will dominate the scene.
Pro tip: When you have a standout magnet (say, a glossy family portrait), give it a little breathing room – an extra half‑inch gap on each side – so it can “breathe” and truly pop.
Testing durability
After you’ve settled on a layout, give it a 24‑hour test. Open and close the fridge a few times, wipe a light spot of condensation on the door, and see if any magnet shifts. If a piece slides, either replace it with a stronger core (rigid ferrous plate) or move it to a lower‑traffic area.
Once the layout passes the durability test, you’ve got a personalized gallery that not only looks great but stays put for months, even with the occasional kitchen spill.
Wrap‑up
Designing your photo layout is less about strict rules and more about storytelling, color balance, and a touch of personal flair. Start with a clear narrative, choose a grid or staggered pattern that matches your kitchen vibe, alternate finishes for texture, and double‑check magnet strength. In a few simple steps, you’ll turn a random collection of square photo magnets into a curated memory wall that greets you every time you reach for the milk.
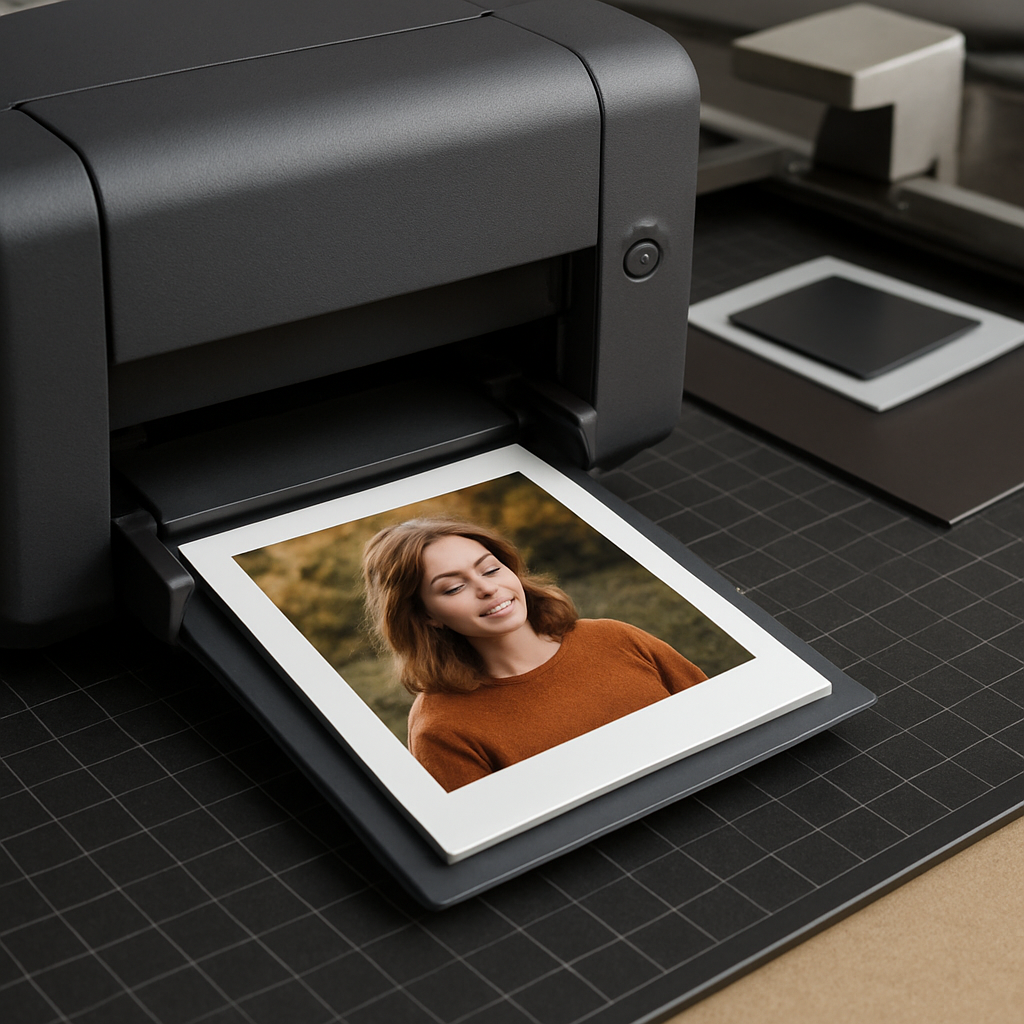
Step 4: Printing and Production Process
Alright, you’ve chosen size, material, and finish. The next magic happens in the printer’s kitchen, where your digital memory becomes a solid square photo magnet you can actually touch.
1️⃣ Prepare a print‑ready file
Start with a high‑resolution JPEG or PNG. Aim for at least 300 dpi at the final size – that means a 2×2 in magnet needs a 1800 × 1800 pixel canvas. If you’re working in Photoshop, set the colour mode to RGB and embed an sRGB colour profile; most magnet labs use that as their baseline.
Crop the image square first, then centre the subject. A quick trick: add a 0.125‑inch bleed around the edge so the cutter doesn’t accidentally trim off a crucial detail.
2️⃣ Choose the right printing method
Most custom shops use either dye‑sublimation or UV‑curing inkjet. Dye‑sublimation pushes pigment into the photo paper fibres, giving you vibrant colours that won’t peel when you wipe the fridge. UV‑curing inks sit on the surface but cure instantly under UV light, which is great for glossy finishes that need extra shine.
If you love a matte look, ask for a matte‑coated paper; it reduces glare and hides fingerprints, a win for busy kitchens.
3️⃣ Proof it before it ships
Ask the lab for a digital proof (a PDF with colour swatches) or, better yet, a single‑piece sample. This lets you catch any weird colour shifts – like a sunset turning too orange after printing.
When the sample arrives, hang it on your fridge for a day. Does it stay bright under the kitchen light? Does the magnet hold firm? If anything feels off, request a quick re‑print before you place a larger order.
4️⃣ Cutting and magnetising
After the image is printed, a precision die‑cut machine slices the square out. The cut tolerance is usually ±0.02 in, so you get clean edges every time.
Next, the magnet backing is applied. Two common approaches:
- Rubber‑based sheet: a flexible magnet that bends slightly, perfect for rotating displays.
- Rigid ferrous plate: a solid metal core that clicks into place and stays put.
Both are adhered with a heat‑activated adhesive, ensuring the photo face and magnet back act as one piece.
5️⃣ Quality control checklist
Before the batch leaves the shop, run through this quick list:
- Check colour fidelity against the proof.
- Confirm each magnet measures the exact dimensions you ordered.
- Test magnetic strength – a quick pull test with a paper clip should hold firm.
- Inspect edges for burrs; a smooth edge means less chance of chips.
If any magnet fails, a reputable lab will replace it at no extra cost.
6️⃣ Packaging and shipping
Most services bundle magnets in a protective sleeve or a small cardboard box. Ask for a “no‑fold” packaging option if you’re ordering many pieces; it reduces the chance of scratches during transit.
Shipping usually takes 3–5 business days for domestic orders, but you can often upgrade to express if you need the magnets for a quick gift.
7️⃣ Your turn – action steps
Grab your favourite photo, open your favourite editing app, and set the canvas to 1800 × 1800 px. Add a 0.125‑inch bleed, export as a high‑quality JPEG, and upload it to the printer’s portal. Choose dye‑sublimation for lasting vibrancy, request a matte finish if you hate fingerprints, and order a single‑piece proof.
When the proof arrives, stick it on the fridge, live with it for a day, and note any colour or hold issues. Once you’re happy, place the full order and watch your kitchen transform.
Step 5: Applying and Maintaining Square Photo Magnets
Getting the magnet on the fridge without a hiccup
First thing’s first – clean the spot. A quick swipe with a damp cloth (or a little vinegar‑water mix if you’re dealing with sticky residue) removes crumbs, fingerprints, and the occasional splatter of tomato sauce. Let it dry for a minute; you don’t want a damp surface stealing the magnet’s grip.
Now, hold the square photo magnet up to the spot and press gently. You’ll feel a satisfying ‘click’ if you’ve got a rigid ferrous‑backed magnet, or a soft ‘thud’ with a flexible rubber core. That little sound tells you the magnet is actually bonding, not just leaning.
Does it feel loose? Try the “paper test”: place a sheet of printer paper between the magnet and the fridge. If you can slide the paper out easily, the magnet isn’t strong enough for that spot – move it to a higher‑iron area (most fridge doors have a metal rib near the top) or swap for a sturdier core.
Strategic placement for everyday use
Think about the traffic flow. The middle of the door is prime real estate for family photos, but it’s also where the door seals the most. If you notice the magnet wobbling every time the door closes, shift it a few centimeters toward the edge. That tiny move can prevent the magnet from being pulled off by the seal’s pressure.
Here’s a real‑world example: Maya, a college student, stuck her favorite campus photo right at the fridge’s center. After a week of the magnet slipping whenever she opened the door, she moved it down toward the bottom rail. The magnet stayed put, and she still gets a smile every time she grabs a snack.
Keeping colors bright and edges sharp
Square photo magnets love a little TLC. A soft‑touch matte finish will hide fingerprints, but glossy surfaces can still look dazzling if you wipe them gently with a microfiber cloth every few days. Avoid harsh chemicals – a dab of mild dish soap diluted in water is enough.
What about humidity? Kitchens can get steamy, especially after cooking. If you notice any swelling or the edges starting to lift, give the magnet a quick dry‑off with a towel and let it air for an hour. Most high‑quality prints are dye‑sublimated, meaning the ink is locked into the paper fibers, so a little moisture won’t bleed the colors.
Rotating your gallery without losing grip
One of the joys of square photo magnets is the ability to swap them out whenever inspiration strikes. To make rotation painless, keep a tiny piece of painter’s tape on the back of each magnet. The tape acts like a “handle” – you can peel it off, slide the magnet to a new spot, and press it back down without touching the printed side.
If you love a rotating travel collage, set a weekly reminder on your phone: “Switch one magnet, check the hold.” That tiny habit keeps your fridge fresh and ensures no magnet gets left behind in a corner where it might lose its magnetic pull.
Quick maintenance checklist
- Wipe the fridge surface and magnet face weekly with a microfiber cloth.
- Test magnetic strength after any major temperature change (e.g., after a holiday feast).
- Replace any magnet that shows edge warping or fading beyond the normal wear of a few months.
- Store spare magnets in a dry envelope to protect them from dust and moisture.
- When moving homes, pack magnets flat between two sheets of cardstock to avoid scratches.
When to call in the pros
Sometimes a magnet just won’t cooperate – maybe the fridge’s metal is unusually thin or a piece has a weak magnet core. Most reputable labs, like the ones you’d use for ordering, will replace a faulty magnet at no extra charge. Keep your order receipt handy, take a quick photo of the problematic magnet, and reach out to customer support. A simple exchange can save you a whole weekend of DIY frustration.
So, what should you do next? Grab your favorite square photo magnet, clean a spot on the fridge, press it on, and give it a little test push. If it stays, you’ve nailed the first step. Then set a reminder to wipe it clean every few days, and you’ll enjoy vivid, sturdy memories for months to come.
FAQ
What size square photo magnets should I choose for a small fridge door?
For a tight‑fit fridge you’ll usually want the 4×4 in (10×10 cm) option. It’s big enough to show a clear image but small enough to slip between grocery lists, pens, and other magnets without crowding the space. Measure the area you have, leave about an inch of breathing room on each side, and pick a photo with bold shapes so it reads well at that size.
Do glossy and matte finishes affect how long the colors stay vibrant?
Yes, the finish plays a role in both look and durability. Glossy surfaces give colors a pop‑in‑your‑eye effect, but they also attract fingerprints, which can dull the image if you’re wiping the fridge often. Matte or soft‑touch matte finishes hide smudges and reduce glare, making the colors stay “fresh” longer in a busy kitchen. If you’re prone to spills, matte is the safer bet.
Can I use square photo magnets on metal surfaces other than my fridge?
Absolutely. Most square photo magnets stick to any ferrous metal – pantry doors, locker fronts, metal cabinets, or even a stainless‑steel backsplash. Just make sure the surface is clean and dry before you press the magnet on. If the metal is thin or painted, you might notice a weaker pull, so give it a quick “paper test” – slide a sheet of paper under the magnet; if it slides too easily, move it to a sturdier spot.
How do I keep my square photo magnets from fading over time?
The key is proper cleaning and protecting the image. Wipe the magnet and the fridge with a soft microfiber cloth every few days; avoid abrasive sponges or harsh chemicals. If you have a glossy finish, a dab of diluted dish soap works fine. Also, try to keep the magnet away from direct steam for prolonged periods – a quick dry‑off after cooking helps prevent moisture from lifting the edges.
What’s the best way to swap out magnets without losing the grip?
Stick a tiny piece of painter’s tape to the back of each magnet before you hang it. The tape acts like a “handle” so you can peel the magnet off without touching the printed side. When you’re ready to move it, lift using the tape, place it on the new spot, and press firmly. This method keeps the image clean and preserves the magnetic strength.
When should I consider replacing a square photo magnet?
Replace a magnet if you see any of these signs: the edges start to warp or lift, the colors look dulled despite regular cleaning, or the magnet no longer holds when you give it a gentle tug. Most high‑quality magnets stay strong for months, but a sudden drop in magnetic pull – especially after a temperature swing like a holiday feast – is a good cue to swap it out.
Conclusion
We've taken you from picking the right size all the way to keeping your magnets looking fresh, so now you can treat your fridge like a personal gallery without the hassle.
Think about that moment when you grab a snack and the first thing you see is a sunny beach snap or a goofy family selfie – that instant boost of joy is exactly what square photo magnets are built for.
Key takeaways
Choose a size that fits the space, match the finish to your kitchen lighting, and use a simple layout trick – start with a focal magnet, then balance colors and textures.
Maintain the vibe by cleaning with a microfiber cloth, swapping pieces weekly with a piece of painter's tape, and swapping out any magnet that shows warping or faded colors.
Next step
Why not order a single sample of a finish you’ve never tried? Stick it on the fridge, live with it for a day, and see how it feels. If it clicks, fill the rest of the door with a story you love.
Remember, the magic isn’t just in the photo; it’s in the everyday reminder that a memory is right there, ready to make a routine moment a little brighter.


