

Ever walked into your kitchen, spotted a photo of a loved one, and wished there was a way to keep that feeling right on the fridge?
We’ve all been there – the little smile that pops up when you see a child’s grin or a sweet note from a partner, and suddenly the plain metal door feels a bit lonely.
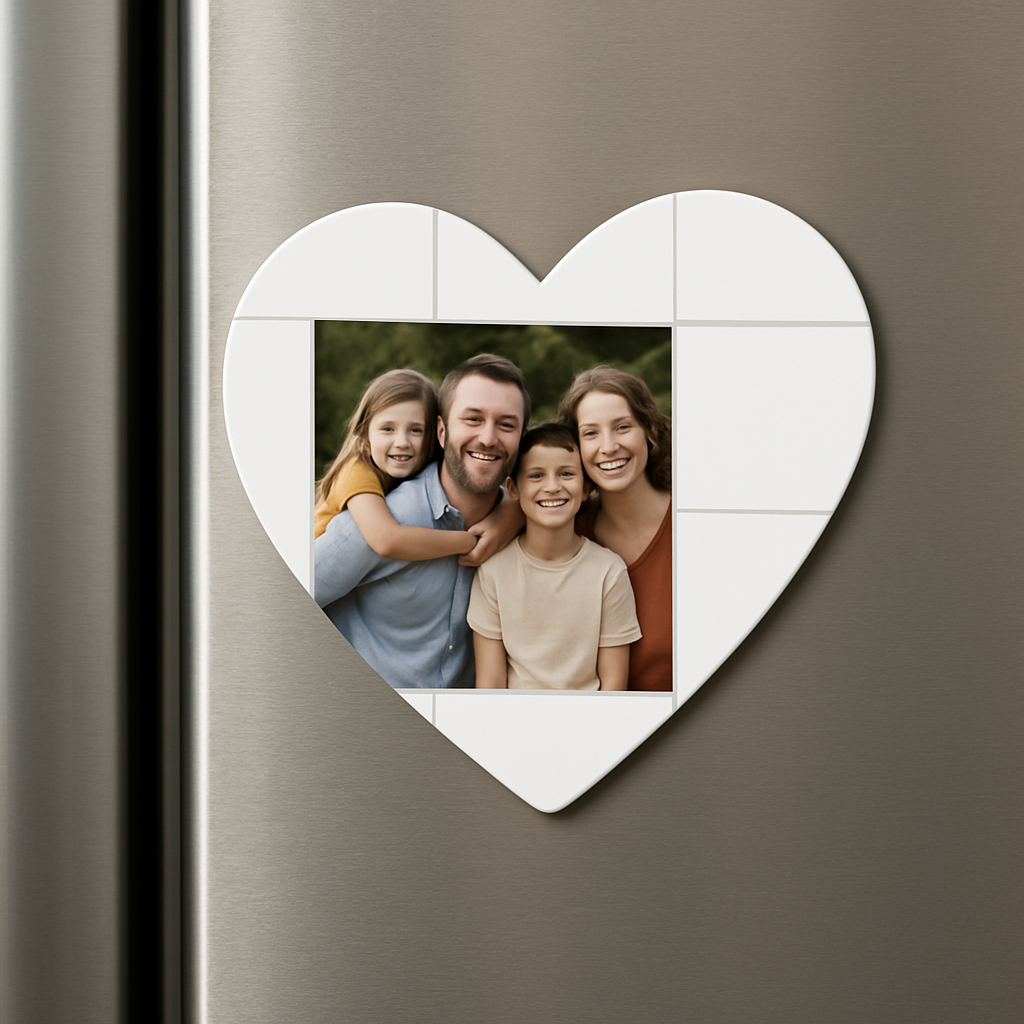
That’s exactly why heart shaped photo magnets have become my go‑to little love‑letters for the home.
But why a heart, and why a magnet? The shape instantly screams “love” without saying a word, and the magnet clings without any drilling or nails – perfect for renters, busy families, or anyone who likes to switch things up.
Imagine turning a candid snap from a weekend hike into a tiny crimson heart that sticks right next to your grocery list. Every time you grab milk, you get a tiny reminder of that sunrise view.
Or think about a newborn’s first grin printed on a soft, rounded magnet that you can move around to share with grandparents during video calls – it’s a simple way to spread joy without shipping a bulky frame.
And here’s a little secret: because the magnet is custom‑made, you can choose the exact photo, the finish, and even add a short caption on the back. No generic stock image, just your own moment, shaped like a heart.
So, what does this mean for you? It means you don’t have to settle for bland fridge décor or waste space on a crowded bulletin board. A heart shaped photo magnet gives you a personal, portable piece of art that lives where you see it most.
Feel like it’s a bit “cutesy”? I get that. The key is to pick a photo that genuinely makes you smile – maybe a candid laugh, a pet’s goofy face, or a sunset that took your breath away. The magnet then becomes a tiny, daily dose of happiness.
And because they’re lightweight, you can swap them out whenever the mood changes – summer beach vibes for July, cozy fireplace snaps for December. The flexibility keeps your kitchen feeling fresh without any permanent changes.
Ready to give your fridge a little love? Let’s dive in and explore how you can pick the perfect picture, choose the right size, and make a heart shaped photo magnet that feels as personal as a handwritten note.
TL;DR
Heart shaped photo magnets turn your favorite memories into cute, magnetic art that brightens any fridge without drilling or clutter. Pick a personal snap, customize the size and finish, and swap it whenever the mood changes for a daily dose of joy, and watch it spark smiles, brightening every breakfast.
Step 1: Choose Your Photo and Design Layout
Alright, let’s start with the part that feels the most personal – picking the picture that will become your heart shaped photo magnet.
Think about the moment that makes you smile every time you see it. Maybe it’s your kid’s first bike ride, the goofy face your dog makes when you’re trying to take a selfie, or a sunset that took your breath away on last summer’s beach trip. That tiny burst of joy is exactly what you want to trap in a magnet.
1. Scan your photo library for “wow” moments
Open your phone’s gallery or scroll through your social feeds. Look for images that are already high‑resolution (at least 1080 px on the longer side) – the sharper the file, the sharper the magnet will look.
Tip: If a photo is a little dark, give it a quick boost in your phone’s edit tools; you’ll see a noticeable difference once it’s printed on glossy or matte paper.
2. Choose the right orientation
Heart shapes work best with a portrait‑oriented picture because the top of the heart frames the head and the bottom gives room for the chin or shoulders. But don’t be afraid to flip a landscape shot if the subject fills the space nicely – think of a panoramic beach shot where the horizon becomes the “flat” bottom of the heart.
Here’s a real‑world example: I turned a sideways photo of my partner laughing on a hike into a heart magnet by cropping just the head and shoulders; the result still feels intimate, and the heart’s curve accentuates the smile.
3. Decide on a layout style
Most services, including our own, let you choose between a plain border, a colored frame, or a “no‑border” look that lets the photo bleed right to the edge. If you love a pop of color that matches your kitchen décor, pick a border that echoes your backsplash tiles.
Another tip: use a thin white border for photos with busy backgrounds – it gives the image a clean “gallery” feel on the fridge.
4. Test the visual weight
Before you hit “order,” preview the magnet in the design tool. Does the subject sit nicely in the center of the heart, or does it drift toward the notch? If it looks off‑center, crop a bit more on the side that’s too heavy.
Pro tip from a design pro: leave a little breathing room around the eyes; the magnet’s curve will naturally push the focus toward the center, making the eyes the star of the show.
5. Choose finish – glossy vs. matte
Glossy finishes make colors pop and work great for vibrant travel shots. Matte finishes soften glare, ideal for photos with strong sunlight or for a more subtle, sophisticated look. Both options are printed on premium photo paper that sticks to a flexible magnetic foil, so the magnet will last years on your fridge.
In practice, I used matte for a black‑and‑white portrait of my grandma; the lack of shine kept the image from looking like a mini billboard and gave it a timeless vibe.
Once you’ve settled on the picture, orientation, border, and finish, you’re ready to add it to the cart and let the printer do its magic.
Step 2: Select Materials and Supplies
Now that you’ve nailed the photo, it’s time to think about what actually holds that little slice of memory to your fridge. The magic behind a heart shaped photo magnet isn’t just the image – it’s the combination of paper, magnetic backing, and a few tiny details that keep the colors vivid and the magnet stuck for years.
Choose the right photo paper
Most custom shops, including Loveonmagnets, print on premium photo paper that’s coated to bring out sharpness and color depth. If you’re ordering a glossy finish, go for a high‑gloss paper – it makes bright reds and blues pop like they’re fresh off the camera screen. Matte paper is the better friend for black‑and‑white portraits or sun‑lit outdoor shots because it mutes glare.
Pro tip: ask for a sample sheet before you place a bulk order. A quick swipe with your finger will tell you if the paper feels too slick (gloss) or just right (matte).
Magnetic backing matters
Behind the paper sits a flexible magnetic foil. Look for a foil that’s at least 0.5 mm thick; anything thinner will lose its bite after a few weeks of fridge traffic. If you love the idea of a magnet that can be moved around without scratching the surface, choose a foil with a smooth polymer coating.
When you’re shopping for DIY kits, the MPRO guide notes that a complete set includes 1,000 magnetic pieces, enough for a whole family album (MPRO’s magnet‑making kit overview).
Printing method: laser vs. inkjet
Most home printers can handle the paper, but the choice of printer can affect longevity. Laser printers lay down toner that’s heat‑fused, so the image resists fading under kitchen light. Inkjet printers give richer gradients, which is great for sunset shots, but they may need a UV‑protective spray if your kitchen gets a lot of sunlight.
Think about your budget and volume. If you’re making a handful of magnets for yourself, an inkjet is cheap and easy. If you’re planning a holiday giveaway of 50 magnets, a laser printer will save you time and keep colors consistent.
Essential supplies checklist
- High‑resolution photo file (minimum 1080 px on the longest side)
- Premium glossy or matte photo paper
- Flexible magnetic foil (0.5 mm or thicker)
- Laser or inkjet printer
- Trim cutter or sharp scissors for clean edges
- Protective spray (optional, for UV protection)
Having these items on hand means you won’t have to pause mid‑project to run to the store.
Real‑world example: a family reunion
Imagine you’ve just printed a group shot from a summer reunion. You choose matte paper because the background is a bright beach and you don’t want glare when the magnet sits near the stove. You cut the magnetic foil to match the heart shape, then sandwich the photo between paper and foil using a light press. The result? A sturdy, glare‑free magnet that survives the daily hustle of opening fridge doors.
Another scenario: you’re making a set of “date night” magnets for a wedding gift. A glossy finish makes the pastel wedding colors sing, and the extra shine adds a festive feel. Because you ordered a thicker foil, each magnet stays perfectly level even when kids tug on them.
Quick quality check before you hit “order”
1. Lay the printed photo on a flat surface and place the magnetic foil on top. Does the heart shape line up without any white gaps?
2. Rub a fingertip over the paper. Any streaks or smudges? If so, re‑print – a clean surface is key to a professional look.
3. Test adhesion: stick a test magnet on your fridge for a day. If it slides easily, you might need a thicker foil.
Once everything checks out, you’re ready to move on to the final step: adding any custom text or finishing touches before the magnet is shipped.
And if you’re the DIY‑type, here’s a short video that walks through the whole material setup – from paper to foil to final cut:
Take a moment now to gather your supplies. A well‑prepared toolkit saves you from last‑minute trips, and it turns what could feel like a chore into a satisfying little craft session. Ready to make those heart shaped photo magnets stick around for years?
Step 3: Print and Cut Your Images
Now that you’ve picked the perfect snap and gathered the magnetic foil, it’s time to bring that picture to life. Printing and cutting might sound technical, but think of it as a mini‑craft session where you get to watch your memory turn into a tiny, sticky work of art.
Prepare your print file
First, open your photo in an editing program and set the canvas to the exact heart dimensions your magnet kit uses – most kits are 2 inches wide at the widest point. Keep the resolution at 300 dpi; that’s the sweet spot where the image stays sharp even after you trim the edges.
Next, add a thin bleed line (about 1 mm) around the heart shape. The bleed ensures the photo doesn’t end up with a white rim once you cut it. If you’re not comfortable drawing the heart yourself, many free online templates let you drop your photo into a pre‑shaped mask – just drag, drop, and export as a high‑quality PDF.
Pro tip: save a copy with the bleed and another copy without it. The no‑bleed version is handy if you ever want to print a border‑less version for a different shape.
Choose the right paper & finish
Glossy paper makes bright colors pop – perfect for a beach sunset or a kid’s birthday cake photo. Matte paper, on the other hand, tones down glare, which is great for black‑and‑white portraits or photos that will sit near a sunny window.
For a real‑world example, I printed a matte‑finished picture of my grandma’s smile from a family reunion. The matte surface kept the light from the kitchen from turning the magnet into a tiny mirror, and the image stayed soft and timeless.
When you order from Loveonmagnets, the paper is already premium, but if you’re doing this at home, look for photo paper labeled “premium” or “photo quality.” A quick fingertip test – it should feel slightly textured, not slick – can help you choose.
Print settings for crisp images
Set your printer to “photo paper” mode. This tells the printer to lay down more ink (or toner) and to let it dry longer, which reduces banding. If you’re using an inkjet, select the highest quality “Best” setting; for a laser printer, choose “Heavyweight” if that option appears.
Before you hit “print,” do a test strip on plain paper. Look for any banding or color shifts. If the colors look off, adjust the brightness or contrast in your file and print again. Remember, a tiny adjustment now saves you from re‑printing dozens of magnets later.
Example: I once printed a set of travel magnets from a sunrise hike. The first print came out a shade too warm because my monitor was calibrated differently. A quick tweak of the temperature slider gave me the perfect golden hue without wasting any foil.
Cutting the heart shape cleanly
Here’s where the magic really happens. If you have a craft cutter (like a Cricut or Silhouette), upload the heart vector and let the machine do the work – it’s fast and ultra‑precise. No cutter? No problem. A sharp pair of scissors or a utility knife works fine; just take your time.
Step‑by‑step for manual cutting:
- Lay the printed photo face‑down on a cutting mat.
- Place the magnetic foil on top, aligning the heart outlines.
- Use a ruler and a fine‑point pen to trace the heart onto the foil.
- Cut slowly along the line, keeping the blade at a consistent angle.
- When you reach the notch, pivot gently to avoid tearing the paper.
Pro tip: a self‑healing cutting mat protects both your blade and the surface, and a fresh blade ensures a clean edge without ragged bits.
Quality check before moving on
Once you’ve cut both paper and foil, sandwich them together and press lightly with a roller or the flat side of a ruler. This helps the adhesive bond evenly.
Now do a quick “magnet test.” Stick the finished piece on your fridge for a minute. Does it sit flush without wobbling? If there’s any lift at the edges, re‑press with a bit more pressure or use a thin piece of double‑sided tape to secure the corners.
Finally, glance at the image. Are the eyes centered? Is there any white gap from the bleed? If everything looks good, you’ve completed Step 3 and are ready for the final personalization stage.
Take a breath, admire your handiwork, and get ready to add any custom text or decorative stickers before the magnets are shipped. Your heart shaped photo magnets are now one step closer to brightening that fridge.
Step 4: Assemble the Magnets
Now that the photo and foil are perfectly cut, it’s time to bring everything together. This is the part where your heart shaped photo magnets actually become…magnetic.
First, gather your tools. You’ll need a clean work surface, a roller or a ruler‑backed flat object, some double‑sided tape (optional), and—and if you like ultra‑precise edges—a mini‑heart handheld cutter. The cutter’s steel body and cushioned grips make it easy to press straight through 120‑180gsm paper without tearing.
Step 1: Align the photo and magnetic foil. Lay the printed photo face‑up. Flip the magnetic sheet over so the adhesive side faces down, then line up the heart outlines. If you notice even a millimetre of mis‑alignment, lift the foil and readjust. A quick tap with a fingertip helps it stick just enough to stay put without full pressure.
Step 2: Press the sandwich. Take a clean roller or the flat edge of a ruler and roll from the centre outwards. You’re essentially spreading the adhesive evenly, squeezing out any air bubbles. You’ll feel a slight resistance—don’t worry, that’s the bond forming. If you see a tiny bubble, pop it with the tip of a needle and roll over again.
Step 3: Trim any excess. Once the adhesive is set, use your cutter or a sharp pair of scissors to trim the outer edges of the foil so the magnet’s shape matches the heart perfectly. This is also a good moment to double‑check that the photo isn’t shifting. A little wiggle means you need a bit more pressure.
Step 4: Test the magnet strength. Stick the assembled piece onto a fridge door. Does it sit flush? If the corners lift, apply a thin strip of double‑sided tape behind the foil or give the whole piece another firm roll. You want a solid hold that won’t slide when you grab a bottle of milk.
Step 5: Add final touches. This is where personalization shines—sprinkle a tiny sticker, write a short note on the back, or seal the surface with a clear UV spray for extra durability. Many of our customers love adding a single word like “Home” or “Love” on the reverse side; it becomes a hidden surprise for anyone who pulls the magnet off.
For more ideas on how to make your photo magnets truly yours, check out our guide on How to Choose and Create Personalized Photo Fridge Magnets.
A quick checklist helps you stay on track:
| Task | Tool / Material | Tip |
|---|---|---|
| Align photo & foil | Printed photo, magnetic sheet | Use a light touch to avoid shifting |
| Press sandwich | Roller or ruler‑backed flat edge | Roll from centre outward to release bubbles |
| Trim excess | Mini‑heart cutter or sharp scissors | Check edges after each cut for clean line |
If you’re wondering whether you need a special cutter, the mini‑heart handheld cutter is a solid investment for anyone making dozens of magnets. Its 40 × 38 mm cut size matches the typical heart dimensions we use, and the steel construction means you won’t have to sharpen it after each session.
Finally, step back and admire your work. The magnet should feel sturdy, the image crisp, and the heart shape clean. You’ve just turned a digital memory into a tangible keepsake that will greet you every morning.

Step 5: Personalize and Finish
Now that your heart shaped photo magnet is glued together, it’s time to make it truly yours.
Do you remember that little note you once slipped into a lunchbox? That same intimate vibe works perfectly on the back of a magnet – a single word, a date, or a tiny doodle can turn a simple keepsake into a secret‑share.
Pick a personal touch
Grab a fine‑point permanent marker or a set of tiny alphabet stickers. Write a short caption like “First hike” or “Love you ❤️”. If you’re feeling crafty, add a tiny star or a coffee cup doodle that only you’ll recognize.
Why not use the reverse side for a QR code that links to a video of the moment? A quick scan on a phone brings the memory back to life, and the magnet stays a quiet reminder on the fridge.
Seal it for longevity
Once the ink is dry, give the magnet a protective spray. A clear UV‑resistant coating stops fading from kitchen sunlight and guards against spills.
Just a light mist from about a foot away does the trick – you’ll feel a faint tingle as the spray settles, and the finish stays smooth to the touch.
Does this extra step feel like overkill? Not really; it’s the same reason you laminate a family recipe card – you want it to survive years of handling.
Choose a finishing flourish
Some people love a glossy sheen; others prefer a matte, soft look. If you went matte on the photo, a matte seal keeps everything consistent. If you chose a glossy photo, a glossy seal adds a subtle sparkle that catches the fridge light.
And here’s a tiny secret: a dab of glitter glue on the edge of the heart can make the magnet look like it’s been kissed by stardust. Just a speck, not a mess.
Quality check checklist
- Is the caption legible? Hold the magnet up to light and read the text.
- Are there any air bubbles between the photo and foil? Press gently with a fingertip to smooth them out.
- Does the seal coat cover the entire surface? Look for glossy spots that might have been missed.
- Is the magnet firmly attached? Stick it to the fridge and give it a gentle tug – it should stay put.
If anything feels off, a quick roll with the ruler‑backed flat edge can re‑adhere loose spots.
Packaging for gifts or storage
Planning to give these as presents? Slip each magnet into a clear cellophane bag and tie it with a pastel ribbon. It adds a boutique feel without extra cost.
For your own stash, store magnets flat in a small drawer or an airtight tin. That way the adhesive doesn’t pick up dust and the colors stay vibrant.
Ever wondered how a simple magnet can become a conversation starter? Place one on a guest’s fridge when they’re staying over – they’ll notice the tiny handwritten note and ask about the story behind it.
Final flourish – the “wow” moment
Step back, take a breath, and look at the finished heart. You’ve turned a digital snapshot into a tactile memory that greets you every time you open the fridge.
Now you can swap it out whenever the season changes, add a new caption for a birthday, or keep it as a permanent love note. The beauty of heart shaped photo magnets is that they’re endlessly adaptable – just like the moments they capture.
Ready to spread the love? Grab your favorite photo, follow these finishing steps, and watch your kitchen transform into a gallery of personal joy.
Step 6: Care, Display, and Gift Ideas
Now that your heart shaped photo magnets are glued, trimmed, and maybe even sealed, the real fun begins – figuring out how to keep them looking fresh and how to turn them into gifts that feel personal.
Everyday care that takes seconds
First thing’s first: a quick wipe‑down. Grab a soft microfiber cloth, a dab of mild dish soap, and a splash of water. Gently rub the front surface; the cloth removes fingerprints without scratching the glossy or matte finish.
If you live in a sunny kitchen, give the magnets a quarterly UV‑spray mist. The spray creates a thin, invisible shield that slows fading – especially handy for bright summer photos.
Because the magnetic backing is 30 mil thick and UV‑laminated, you don’t have to worry about the magnet losing its bite after a few weeks. Just keep the back clean of dust, and the hold stays strong.
Display ideas that feel personal
Think of the fridge as a rotating gallery. You can group magnets by theme – a “travel” cluster by the kitchen window, a “family milestones” line next to the milk shelf, or a “daily affirmation” heart right at eye level.
One real‑world trick: tape a thin strip of painter’s tape to the top edge of the fridge, then arrange magnets along it. When a new photo arrives, you simply lift the tape, slide the old magnet off, and replace it. No sticky residue, and the tape can be swapped out when you want a fresh look.
Another low‑key idea is to use the magnet as a placeholder on a pantry door. Slip a grocery list underneath the heart, then when you’re done, the magnet doubles as a reminder of the memory behind it.
Gift‑ready packaging without extra cost
When you want to share the love, the easiest packaging is a clear cellophane bag tied with a pastel ribbon – exactly what we mentioned earlier, but let’s add a twist. Slip a tiny handwritten note inside the bag, maybe a one‑line memory that matches the photo. It feels like a mini‑time capsule.
If you’re sending magnets to a friend across the country, pop a few in a sturdy cardboard mailer with a layer of kraft paper. The paper cushions the magnets and adds a rustic vibe that matches the heart shape.
For a corporate twist, print a tiny logo on the back of the magnet and bundle three hearts in a single bag. It’s a subtle “thank you” that lands on a coworker’s fridge without looking like a hard‑sell.
Creative ways to use them beyond the fridge
Because the magnetic material works on any smooth metal, you can stick a heart on a dishwasher, a metal locker, or even a car door (just be sure to remove it before a car wash – the pressure can pry it off). That means a baby’s first smile can travel with you on road trips, turning the vehicle into a moving photo album.
Another fun idea: create a “memory trail” on a metal board in your hallway. Arrange a series of hearts in chronological order, each with a short caption on the back. Guests will walk by, spot the story, and maybe add their own magnet later.
Checklist before you call it done
- Wipe the front with a damp microfiber cloth.
- Apply UV‑protective spray if the magnets face direct sunlight.
- Store spare magnets flat in an airtight tin to avoid dust.
- Package gifts in clear bags with a handwritten note.
- Test adhesion on the intended surface – fridge, locker, or car door.
Following these steps means your heart shaped photo magnets stay vibrant, stick where you want them, and become thoughtful gifts that people actually use.
So go ahead, pick that favorite snapshot, give it a little TLC, and watch it turn everyday spaces into moments you’ll cherish – day after day.
FAQ
What size heart shaped photo magnets work best for a standard fridge?
Most families find a 2‑inch‑wide heart to be just right – big enough to show detail but small enough to fit between bottles and notes. If you have a lot of surface area, you can step up to a 3‑inch version for a bolder statement. The key is to match the heart’s width to the space you’ll use most often, so it feels natural rather than crowded.
Can I use a regular photo printer for my heart shaped magnets?
Absolutely. A decent inkjet or laser printer that handles glossy or matte photo paper will do the trick. Just set the print quality to “photo” and use a 300 dpi file to keep the image crisp after you cut it. If you notice banding, run a test strip first – a small tweak in brightness or contrast can save you a whole batch of re‑prints.
How do I make sure the magnet sticks to metal surfaces like a dishwasher or locker?
The secret is a thick magnetic foil – aim for at least 0.5 mm. Thicker foil gives the bite you need, especially on smooth appliances that can be a bit slick. Before you settle the magnet, wipe the surface with a damp cloth, dry it, and press firmly for a few seconds. A quick “test stick” on the edge of the surface will tell you if you need a stronger foil.
Is there a way to protect the photo from fading in a sunny kitchen?
Yes, a light mist of UV‑protective spray works wonders. Hold the can about a foot away, give the magnet an even coat, and let it dry for a couple of minutes. The spray forms an invisible shield that slows sun‑induced fading without changing the look of glossy or matte finishes. It’s the same trick pros use for museum‑grade prints, just a lot more affordable.
Can I add text or a QR code to the back of my heart shaped photo magnet?
Definitely. A fine‑point permanent marker or tiny alphabet stickers make it easy to write a short caption, date, or inside joke on the reverse side. If you want something high‑tech, print a tiny QR code on adhesive paper and stick it on the back – a quick scan can pull up a video or a longer story, turning a simple magnet into a memory portal.
What’s the best way to store extra magnets so they stay clean and sticky?
Flat is the way to go. Slip each magnet into a small zip‑lock bag or an airtight tin, then lay the bags in a drawer. This keeps dust off the front and prevents the magnetic backs from attracting metal shavings. If you’re stacking a lot, separate layers with a thin piece of parchment paper – it stops them from sticking together and makes them easy to pull out one by one.
How can I turn heart shaped photo magnets into a gift without spending a fortune?
Package is half the charm. Slip the magnet into a clear cellophane bag, tie a pastel ribbon, and tuck a handwritten note inside. The note could be a one‑line memory that matches the photo – it feels like a tiny time capsule. You don’t need fancy boxes; the simple, thoughtful presentation makes the gift feel premium without adding a big cost.
Conclusion
So, you've walked through every step—from picking the perfect snap to sealing the final sparkle.
At the end of the day, a heart shaped photo magnet is just a tiny piece of paper that sticks, but the memory it carries feels a lot bigger. You’ve seen how a matte finish keeps a sunrise soft, how a glossy shine makes a birthday cake pop, and how a handwritten note on the back turns a fridge into a personal gallery.
What’s the next move? Grab your favorite photo, toss it into the workflow we laid out, and let the magnet do the talking. You don’t need fancy equipment—just a bit of paper, foil, and the willingness to add a personal touch.
Remember the quick‑care tip: a microfiber wipe and a light mist of UV spray keep colors bright, and storing magnets flat in zip‑lock bags prevents dust from stealing the shine.
Ready to fill your kitchen with moments that greet you every time you open the door? Dive back into the steps, craft a few magnets, and watch ordinary walls become a story board of love, travel, and everyday wins.
And hey, once you’ve got a handful, share the joy—gift a heart magnet to a friend, or surprise a family member with a mini memory capsule. Your fridge will thank you, and so will the people who see it.


