

Ever walked into a party and seen those retro‑style photo strips stuck on the fridge, each little rectangle buzzing with a burst of laughter and a flash of confetti?
It’s weird how a simple magnet can turn a random selfie into a memory you actually want to display, right? That’s the magic behind photo booth magnet strips – they take the instant‑photo vibe and give it a magnetic hug, so your favorite moments stick around literally.
Think about the last time you printed a photo strip at a wedding. You probably slipped it onto a nearby refrigerator, and later, while making a sandwich, you caught yourself smiling at that goofy pose. That tiny strip becomes a conversation starter, a reminder of good times, and it’s all thanks to that magnetic backing.
So, why are these strips suddenly everywhere from backyard barbecues to corporate events? The answer is simple: they’re cheap, customizable, and they add a personal touch without the hassle of framing or hanging. Plus, you can order them with your own graphics, logos, or even a quirky quote that fits the vibe of your event.
But here’s the kicker – most people don’t realize they can use photo booth magnet strips as a low‑key marketing tool. Imagine handing out branded strips at a product launch; every fridge in the office becomes a mini billboard for your brand, and nobody even feels like they’re being sold to.
Now, you might be wondering how to get the perfect strip without breaking the bank or ending up with blurry images. The good news is the process is straightforward: choose a template, upload your high‑resolution photo, pick a magnetic material, and let a printer do the rest.
Does that sound like something you’d try for your next celebration or promotional giveaway? If you’re nodding, keep reading – we’ll walk through the best ways to design, order, and display photo booth magnet strips so they become the highlight of any gathering.
Let’s dive in and turn those fleeting snapshots into lasting magnetic moments.
TL;DR
Photo booth magnet strips turn fleeting snapshots into magnetic keepsakes you can stick on fridges, lockers, or office boards anywhere—perfect for parties, weddings, and low‑key brand promos. They're cheap, fully customizable, and a simple DIY step‑by‑step lets you design, order, and display them in minutes anywhere you need them today.
Step 1: Understanding Photo Booth Magnet Strip Types
Before you dive into colors, fonts, and where to stick them, it helps to know that not all photo booth magnet strips are created equal. The magnetic backing, strip dimensions, and finish all influence how the strip feels on a fridge door, a locker, or even a metal tabletop.
So, what actually varies? Think of it like choosing a coffee blend—you can pick a light roast for a quick pick‑me‑up or a dark, robust blend for a lingering experience. The same idea applies to magnet strips.
Magnetic Backing Materials
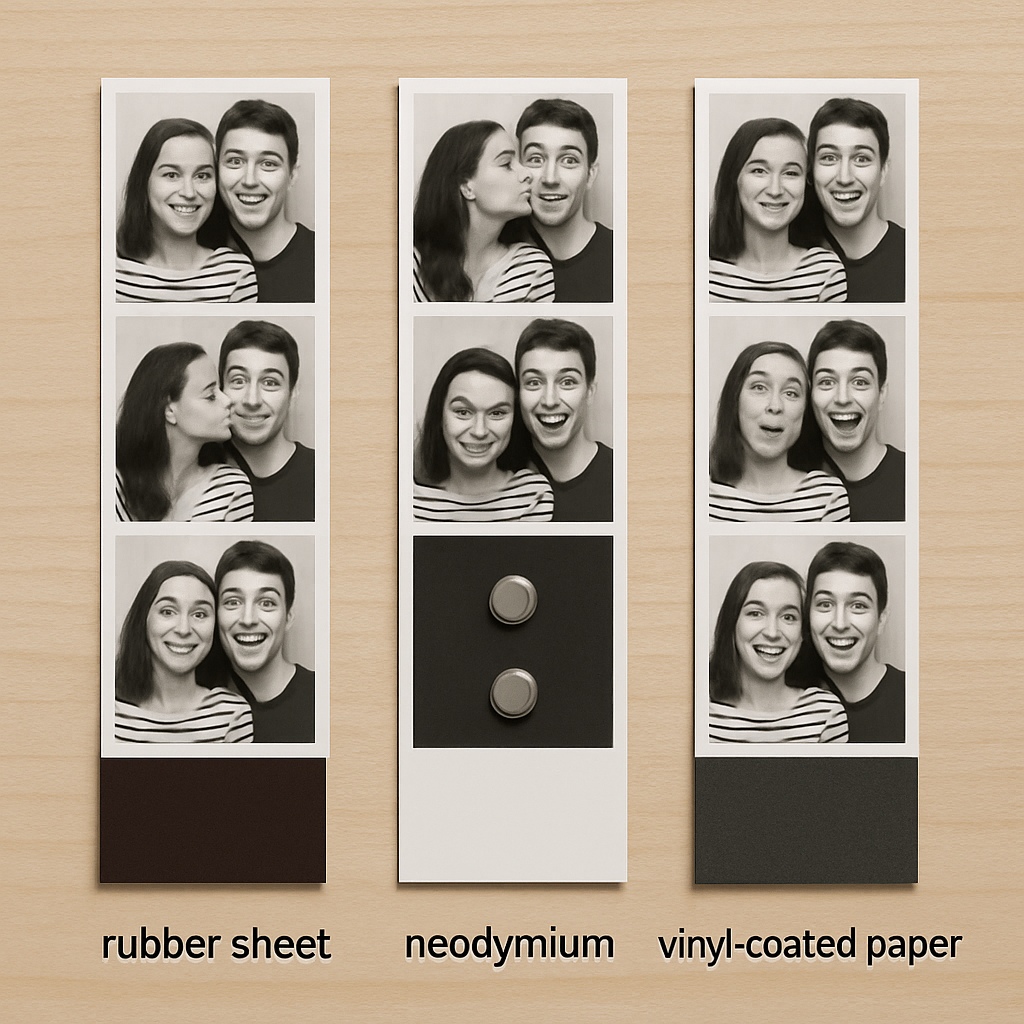
There are three common backing types you’ll encounter:
- Flexible rubber‑magnet sheets: Thin, bendable, and great for curved surfaces like a rounded locker door. They’re cheap and stick well, but can lose pull over time if exposed to moisture.
- Neodymium (rare‑earth) magnets: Super‑strong, thin, and perfect for heavy‑duty use—think office filing cabinets that get slammed shut daily. They’re pricier, but the hold lasts months.
- Vinyl‑coated magnetic paper: Offers a smooth surface that’s easy to write on, making it popular for events where guests add a quick doodle or message.
When you’re picking a backing, ask yourself: where will the strip live, and how long do you need it to stay put?
Strip Formats & Sizes
Traditional photo booth strips mimic the classic 2‑by‑5 inches layout—three 1.5‑inch squares stacked vertically. But today you’ll also see:
- Mini strips: 1 × 3 inches, ideal for business cards or swag bags.
- Wide panoramas: 4 × 6 inches, great for landscape shots from outdoor events.
- Custom shapes: hearts, stars, or even a silhouette of your logo—perfect for themed parties.
Choosing a size isn’t just about aesthetics; it affects the magnetic surface area. Larger strips need stronger magnets, otherwise they’ll slide off the fridge like a loose Post‑it.
Finish Options
Finishes can be glossy, matte, or even a soft‑touch coating. Glossy gives that vibrant, “wow” factor but can show fingerprints. Matte tones down glare, which is handy under bright kitchen lighting. Soft‑touch feels like a velcro‑like pad and can add a premium vibe without raising cost too much.
Here’s a quick tip: if you’re printing for a wedding, matte often works best because it won’t distract from the romantic color palette. For a tech conference, a glossy finish can highlight brand colors.
Choosing the Right Type for Your Event
Let’s walk through a practical checklist. Grab a pen, and tick off what matters most for your occasion:
- Location: fridge, locker, metal banner, or portable metal board?
- Duration: one‑night party or a month‑long trade show?
- Budget: flexible rubber‑magnet (budget‑friendly) vs. neodymium (premium).
- Design vibe: glossy for bold branding, matte for subtle elegance.
- Interactivity: do you want guests to write on the strip? Choose vinyl‑coated paper.
Once you answer those, you can match the backing, size, and finish. For example, a weekend wedding at a cabin might use flexible rubber‑magnet mini strips with a matte finish—easy on the wallet, easy to stick on the cabin’s tiny fridge, and won’t glare in the low light.
Does that make sense? If you’re still unsure, a reliable rule of thumb is to start with the strongest magnet you can afford, then scale down if the strip feels too heavy for the surface.
Need a concrete example? A recent corporate launch used 4 × 6 inch glossy strips with neodymium backing on a metal display board. The board stayed perfectly in place through a full‑day demo, and the glossy finish amplified the brand’s electric blue logo, turning the board into a miniature billboard that attendees kept on their desks.
And if you want to see these options in action, check out this quick walkthrough:
Notice how the video shows the magnetic strip being placed on different surfaces—notice the subtle flex of the rubber‑magnet on a curved locker door versus the firm snap of the neodymium on a metal panel.
Finally, a little insider insight: Snapfish explains the variety of magnetic photo booth strips and notes that many customers pair their strips with custom frames for an extra layer of durability. It’s a simple upgrade that can keep the strip looking fresh even after weeks of fridge traffic.
Now that you’ve got the lowdown on types, you’re ready to pick the perfect match for your next event. Grab your favorite design, choose the backing that fits the venue, and you’ll have magnetic memories that actually stick.
Step 2: Measuring and Cutting Magnet Strips for Your Photo Booth
Alright, you’ve chosen the perfect backing—now it’s time to size it so every selfie fits like a glove. Measuring might sound like a chore, but think of it as the quiet moment before the flash when you’re about to get everything just right.
Grab the right tools
All you really need is a sturdy ruler (or a metal tape measure if you’re feeling fancy), a sharp utility knife or scissors, and a clean cutting mat. If you’re printing on ultra‑thin paper, the magnetic strip insertion tool can save you from wrinkling the image while you slide it into the frame.
Measure like a pro
Start by laying your printed strip face‑up. Most standard strips are 2 × 5 inches, but you might be working with a mini 1 × 3 or a wide 4 × 6. Using the ruler, line up the zero mark with the left edge of the photo and note the full inches first. Then, count the smaller ticks—half‑inches, quarters, eighths, and finally sixteenths—exactly as the Lyt measuring guide explains. For example, if the photo ends a little past the 2‑inch mark and lands on the third quarter‑inch tick, you’ll record it as 2 ¾ inches.
Why bother with sixteenths? Because a slip of even a quarter‑inch can make the magnet either too loose (it slides off the fridge) or too tight (it bulges and looks cheap). The guide even reminds us that “rulers can not be used to measure anything more accurately than the 1/16 inches markings,” so that’s the smallest unit you’ll trust.
Mark your cut line
Once you have the exact length, grab a fine‑point permanent marker and make a tiny dot at the endpoint on the backing material. Some folks prefer a light pencil line—just make sure it’s visible but won’t smudge onto the photo when you press the magnet down.
Pro tip: measure twice, cut once. Double‑checking the measurement on the back side of the strip eliminates the dreaded “oops, it’s 1/8 inch short” moment.
Cutting with confidence
Place the strip on your cutting mat, align the blade with the marked dot, and give a smooth, steady slice. If you’re using scissors, hold the strip firmly with one hand and let the scissors do the work—no jagged edges if the blade is sharp.
For rubber‑magnet sheets that tend to flex, a utility knife works best because you can press down gently and guide the cut without bending the material. Neodymium sheets are thin but brittle; a clean, swift motion prevents chipping.
Test the fit
Before you move on to the next strip, slide your freshly cut magnet onto a test surface—your kitchen fridge works great. Does it sit flush? Does it hold firm without wobbling? If it feels loose, shave off a hairline with the knife; if it feels too tight, you may have cut a fraction too short, so consider trimming a tiny bit from the opposite side.
Real‑world example: at a recent corporate trade show, the organizer printed 4 × 6 inch glossy strips with neodymium backing. By measuring to the nearest 1/16 inch and cutting on a metal cutting board, each strip snapped onto the metal display panel without any sagging, even after a full day of attendees touching the board.
Batch‑size checklist
- Confirm strip dimensions (standard vs custom).
- Measure each strip individually or use a template for uniform cuts.
- Mark, cut, and immediately test on a fridge or metal surface.
- Store cut strips in a flat, dry drawer to keep the magnetic side from picking up stray metal shavings.
And there you have it—your magnet strips are now perfectly sized, ready to turn every photo booth moment into a fridge‑worthy keepsake. Next up, we’ll talk about attaching the strips to your printed photos without tearing them, so stay tuned!
Step 3: Installing Magnet Strips on Photo Booth Props
Now that your strips are cut to the right length, it’s time to actually stick them onto the props. This feels a little like putting the final piece of a puzzle in place – you’ve done the prep, and the magic happens in the next few minutes.
Gather the right tools (again)
Grab a clean, flat surface, a ruler, a thin pair of tweezers, and a piece of wax paper or parchment. The wax paper acts like a tiny barrier so the magnetic side doesn’t pick up stray metal shavings while you work.
Do you ever notice tiny specks of metal on the back of a magnet? That’s why the paper trick matters – it keeps the adhesive side pristine.
Position the prop for maximum grip
Most photo booth props are made of lightweight cardboard, foam board, or thin wood. Lay the prop face‑up and locate the exact spot where the strip will sit. If you’re working with a cardboard cut‑out of a mustache, the magnet should be near the edge so it can still cling to a fridge later.
Pro tip: use a small piece of masking tape to mark the spot. It’s easy to peel off later, and it gives you a visual cue.
Apply a thin layer of adhesive (optional but recommended)
If your magnet strip has a self‑adhesive backing, peel back a quarter of it, press it onto the prop, and then slowly roll the rest down. The adhesive gives extra security, especially on textured surfaces.
For non‑adhesive strips, a dab of spray‑adhesive or a few drops of clear-drying craft glue works wonders. Apply the glue sparingly – you don’t want it oozing out around the edges.
Lay the magnet, press, and test
Place the magnetic side down onto the marked spot. Use the tweezers to guide it into place without bending the strip. Once it’s aligned, press firmly for about five seconds. You should feel a subtle “snap” as the magnet engages with any metal in the prop (some props have metal reinforcement for durability).
Now, flip the prop over and give it a quick shake. If the strip shifts, lift it, adjust, and press again. A snug fit means the magnet will hold up when you later attach the finished photo strip.
Real‑world example: wedding photo booth
At a recent lakeside wedding, the photographer printed 2 × 5 inch strips on matte paper and used flexible rubber‑magnet sheets. The props were wooden cut‑outs of pine trees. By first sanding the wood lightly and then applying a thin line of spray‑adhesive, the magnets stayed put even when guests leaned on the backdrop for a selfie. The result? Over 200 happy couples left with a magnet that clung to their fridge for months.
Batch‑size checklist for installation
- Lay each prop on a clean surface; dust can weaken adhesion.
- Mark magnet locations with a tiny tape dot.
- If using glue, wait 30 seconds for tack before pressing.
- Press for 5–10 seconds; use a roller for larger surfaces.
- Test each prop on a metal surface before moving to the next.
Expert tip from a photo‑booth pro
“Always cut the magnet a hair longer than the prop edge,” says veteran booth operator Jenna Miles. “That extra millimeter gives you a little give‑room when you press, preventing the strip from curling.” She also recommends storing finished props in a zip‑lock bag with a small silica packet – it keeps humidity from weakening the adhesive.
If you need a deeper dive into the whole workflow – from design to print – check out this step‑by‑step guide to making photo magnets. It walks you through each phase with photos and printable templates.
And that’s it. A few minutes of careful placement, a little pressure, and your photo booth props are ready to become magnetic keepsakes. The next step will be attaching the printed photo strip to the magnet without tearing the paper, but for now you’ve nailed the foundation. Ready to stick those memories on a fridge and watch them spark conversation?
Step 4: Enhancing Photo Booth Experience with Custom Magnet Strip Designs
Now that your magnets are cut and glued, it’s time to make them look as good as they feel. A well‑designed strip can turn a simple fridge souvenir into a mini‑art piece that guests actually want to display.
Pick a design theme that matches the event vibe
Think about the mood of the party – is it a rustic wedding, a neon‑lit birthday, or a corporate launch? Grab a few color swatches or a mood board, then let that guide your strip layout. A pastel palette works wonders for a garden ceremony, while bold primary colors scream fun at a kid’s birthday.
Pro tip: keep the photo strip itself centered and let the surrounding graphics frame it. That way the picture stays the star, and the border adds personality without crowding the image.
Add interactive elements
One trick I love is slipping a tiny QR code into the bottom corner of the strip. Guests can scan it later to download a digital album or claim a discount code. It’s a subtle way to extend the experience beyond the fridge.
If QR codes feel too techy, try a simple “write your favorite memory” line. Provide a thin‑tip marker and watch people scribble inside the strip – it becomes a keepsake that’s truly theirs.
Use fonts and graphics that are readable at strip size
Remember, a photo booth strip is only a few inches tall. Choose a bold sans‑serif font for headings and keep body copy under 10 pt. Avoid intricate scripts that turn into a blur when printed.
Test your design by printing a plain sheet at home and holding it up to a fridge. If you can read the text from a couple of feet away, you’re good to go.
Step‑by‑step design checklist
- Set canvas size to match your strip dimensions (e.g., 2 × 5 inches).
- Place the photo in the middle third of the canvas.
- Add a thin border that matches the event colors.
- Include a short tagline or hashtag at the top.
- Insert a QR code or “write here” prompt at the bottom.
- Export as high‑resolution PNG or PDF.
Does this feel overwhelming? Take it one layer at a time – the photo, then the border, then the text. You’ll end up with a clean, cohesive strip.
Print with the right material for durability
When you send your design to a printer, specify a matte finish if the strip will be handled a lot. Matte reduces fingerprints and glare, which is especially helpful in bright kitchen lighting. If you want a pop‑of‑color look, a glossy finish can make the hues pop, but be ready for a few smudges.
Some services even let you add a thin protective laminate on top of the magnet. That extra layer can keep the design looking fresh through weeks of fridge traffic.
Quick quality test before the event
Print a single test strip and stick it on a metal surface. Check three things: does the image stay sharp, does the text stay legible, and does the magnet hold without wobbling? If any part feels off, adjust the file and re‑print. It’s a tiny step that saves a lot of embarrassment later.
Once you’re happy, place the full batch in a dry box or zip‑lock bag until the day of the event. Keep them flat so the graphics don’t warp.
Real‑world example
At a recent tech conference, the organizer used a sleek black border with neon green accents and a QR code that linked to the event’s photo gallery. Attendees loved scanning the code on the spot, and the strips ended up on office filing cabinets for weeks after the show.
Want to see a quick way to order custom strips without leaving your kitchen? Walgreens lets you upload your design and choose a matte or glossy finish, delivering the magnets in just a few days.
And that’s the final polish: a design that tells a story, a print that lasts, and a magnet that sticks. Your guests will walk away with a piece they actually want to display – and that’s the ultimate photo booth win.
Step 5: Maintaining and Troubleshooting Photo Booth Magnet Strips
Alright, you’ve got a stack of fresh‑lookin’ magnet strips ready to roll. But what if, a few days later, one of them starts to lose its snap or the colors look a bit dull? That’s where a quick maintenance routine saves the day.
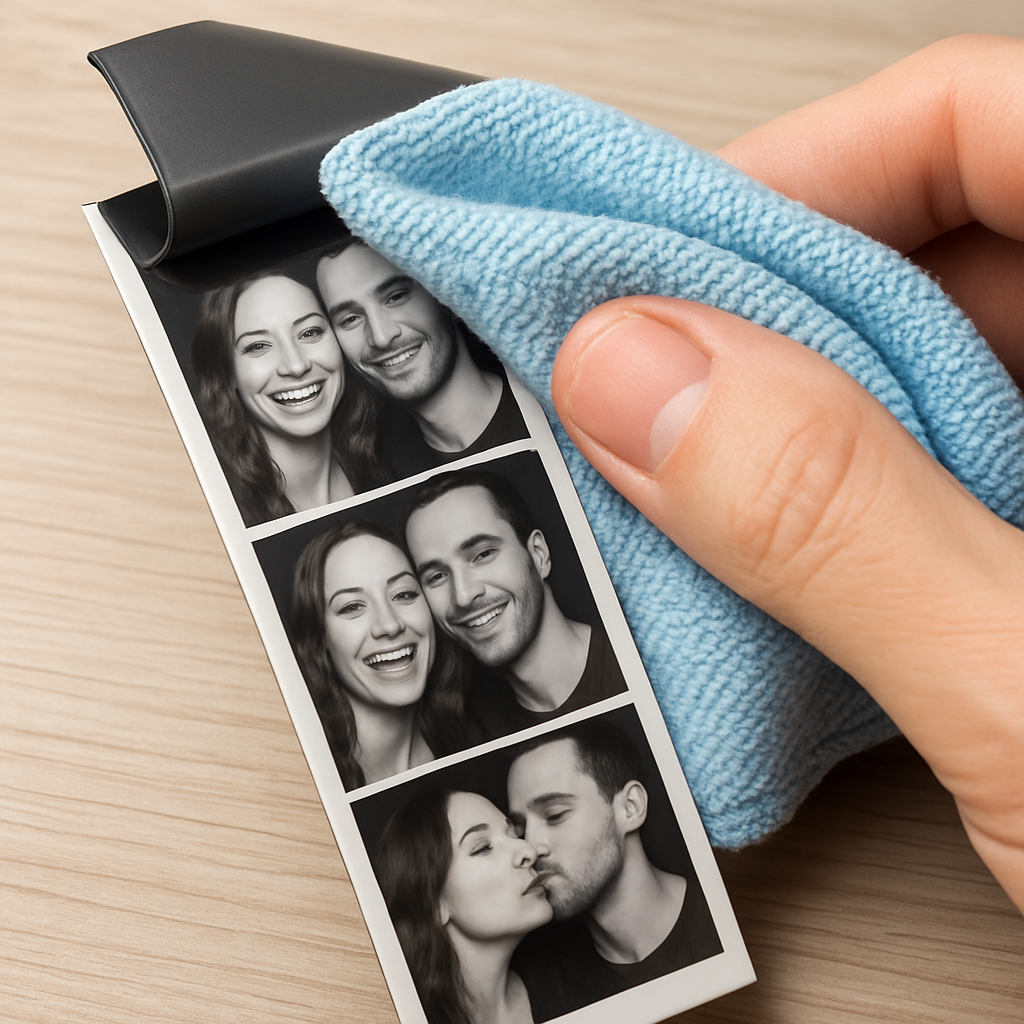
Keep ’em clean, keep ’em stuck
First thing’s first – dust is the silent killer. A speck of lint between the magnet and the fridge can make the strip wobble or even slide off. Grab a soft, lint‑free cloth and give the magnetic side a gentle wipe before you hand it to a guest.
Pro tip: a tiny dab of water on the cloth works wonders for glossy finishes, but avoid soaking the magnet. Too much moisture can weaken the adhesive on self‑stick backs.
Check the pull strength
Not all magnets are created equal. If you notice a strip sliding on a heavy‑duty metal board, it’s probably a flexible rubber‑magnet that’s losing its bite. Test the pull by sliding the strip halfway off a smooth fridge door – you should feel a firm resistance. If it feels loose, swap that batch for a neodymium‑backed version.
Does the magnet feel too strong? It can cause the strip to curl around the edge of a thin metal surface. In that case, trim a millimeter off the back edge to give it a little breathing room.
Print quality matters
Blurry images or faded colors often trace back to the source file. Make sure you upload a high‑resolution file (150 ppi or higher) so the print stays sharp after a week of fridge traffic. MyCanvas recommends 150+ ppi for the best results, and you’ll notice the difference the moment you compare a crisp strip to a pixelated one.
If the text looks fuzzy, double‑check that you used a bold, sans‑serif font and that the file wasn’t compressed too aggressively before uploading.
Troubleshooting checklist
When something feels off, run through this quick list before you panic:
- Is the surface clean and dry?
- Did the magnet bend during handling?
- Is the print resolution adequate?
- Did humidity get to the adhesive?
Fix one step at a time, and you’ll usually pinpoint the culprit.
Humidity and storage hacks
Moisture loves to sneak into zip‑lock bags, especially if you stash a whole batch in a pantry. Slip a small silica packet into the bag – it’s cheap and it keeps the backs from getting soggy.
Store strips flat, not stacked on top of each other, to avoid warping the graphics. A simple dry box does the trick for weekend weddings or month‑long trade shows.
When magnets won’t stick
Sometimes the issue isn’t the strip but the surface. Stainless steel appliances can be less magnetic than a classic fridge door. Test a spare strip on the intended surface before you hand out the batch. If it doesn’t hold, consider a thin metal plate you can attach to the surface first.
And if a guest complains that their strip fell off after a day, reassure them that a quick press‑and‑hold for five seconds restores the grip – the magnet still has plenty of pull.
Need a deeper dive into common printer hiccups? KRUU’s troubleshooting guide walks you through printer jams and ribbon errors that can affect strip quality.
Below is a handy reference table you can print and stick next to your photo booth for quick fixes.
| Issue | Likely Cause | Quick Fix |
|---|---|---|
| Strip slides off | Weak rubber magnet or dirty surface | Wipe surface, test with neodymium magnet |
| Blurry image | Low‑resolution file (under 150 ppi) | Re‑upload higher‑res file, re‑print |
| Magnet curls | Over‑strong magnet on thin metal | Trim 1 mm from back edge, or use softer magnet |
And remember, a little preventive care goes a long way. A quick wipe, a dry‑box storage, and a sanity‑check of your file resolution keep your photo booth magnet strips looking fresh and sticking strong all night long.
So, what’s the next step? Grab a cloth, give those magnets a once‑over, and you’ll be ready for the next wave of selfies without a hitch.
FAQ
Got questions about getting the most out of your photo booth magnet strips? Below are the most common queries we hear, with practical tips you can apply right away.
How do I make sure my photo booth magnet strips stick to any fridge?
First, give the surface a quick wipe with a dry microfiber cloth to remove dust or fingerprints. Then press the strip firmly for about five seconds, letting the magnet fully engage. Aim for a smooth, flat metal surface – textured paint or stainless‑steel can weaken the pull. If the fridge is oddly coated, a thin steel plate stuck with double‑sided tape gives the magnet a reliable backing.
What’s the best way to clean and maintain photo booth magnet strips so they stay strong?
Keep the magnetic side dry and free of grit. After each event, run a soft, lint‑free cloth over the back; a dab of water works for glossy finishes, but dry it immediately. Store strips flat in a zip‑lock bag with a small silica packet to fight humidity. Avoid stacking them on top of heavy objects – pressure can warp the graphic and reduce the magnet’s contact area.
Can I use photo booth magnet strips on surfaces other than refrigerators?
Absolutely – the magnets cling to any ferrous surface. Besides refrigerators, you can stick strips to metal lockers, filing cabinets, a steel‑framed whiteboard, or even a portable metal easel at a trade show. If you’re dealing with a non‑magnetic surface like wood or glass, attach a thin steel sheet or magnetic paint first, then your strip will hold just as securely.
How thick should the magnetic backing be for a 2×5 inch strip?
The magnetic backing should be thick enough to provide a strong pull but thin enough to stay flexible. For a standard 2 × 5 inch strip, a 0.5 mm to 1 mm rubber‑magnet works well for casual events, while a 0.8 mm neodymium sheet is ideal for high‑traffic venues where you need extra grip. Test the pull by sliding the strip halfway off a fridge; you should feel resistance before it falls.
What file resolution and format should I use to avoid blurry prints?
Upload a file that’s at least 150 ppi at the final size – anything lower will look pixelated once it’s printed on the magnet. Save the artwork as a high‑quality PDF or PNG to preserve colors, and avoid JPG compression artifacts. Double‑check that any text is at least 10 pt and uses a bold, sans‑serif font so it stays readable on the tiny strip.
How can I troubleshoot a strip that slides off after a day of use?
If a strip slides off after just a day, start by inspecting the fridge door – a greasy fingerprint or a thin film of moisture can sabotage the magnet’s grip. Wipe the area with a dry microfiber cloth, then press the strip again for five seconds. Should it still slip, swap the rubber‑magnet for a stronger neodymium backing or trim a millimeter from the back edge to reduce curl.
Conclusion
We've walked through everything from picking the right backing to keeping your strips looking fresh, and if you're still wondering whether photo booth magnet strips are worth the extra effort, the answer is a resounding yes.
They’re cheap enough to order in bulk, sturdy enough to survive a weekend wedding or a month‑long trade show, and simple enough that even a first‑timer can crank them out in under an hour.
So, what’s the next move? Grab your favorite design, choose a rubber‑magnet for casual parties or a neodymium sheet for high‑traffic venues, and cut those strips to the exact 1/16‑inch measurements we talked about.
Give each strip a quick test on the fridge – a firm press for five seconds, a gentle tug, and you’ll know it’s ready to travel home with guests.
A couple of maintenance habits go a long way: wipe the magnetic side with a lint‑free cloth before each handoff, store the batch flat with a silica packet, and you’ll avoid the dreaded slip‑off.
Remember, the magic isn’t just the magnet; it’s the memory you’ve captured and the little piece of paper that now lives on a kitchen door, a locker, or a filing cabinet.
Ready to turn your photo booth into a keepsake station? Order your custom strips today and let the smiles stick around long after the lights go out.


